


- Resource
- How To - Instructors
- Bongo – How To Use Virtual Classroom
Bongo – How To Use Virtual Classroom
Bongo Virtual Classroom and all of its services will be discontinued on May 26 , 2024. For details and instructions on how to save your files, please click on this article. .
The Virtual Classroom tool in the Learning Hub is a desktop conferencing tool that allows instructors to give a PowerPoint lecture online. The instructors schedule the meeting sessions that include time and date, and then students can log in on that day and time to hear and participate in that lecture. Instructors can present their PowerPoint and talk about each slide. Students can hear and ask questions.
Some refer to Virtual Classrooms as Bongo. They are the same product.
Step By Step Instructions
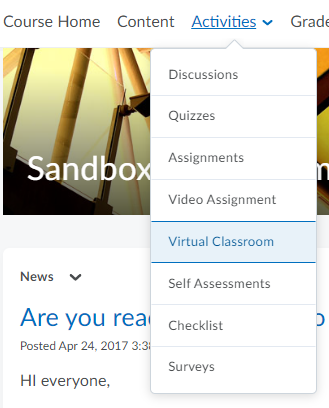
1. Where is the Virtual Classroom Tool Located?
You’ll find the Virtual Classroom in the Activities menu.
2. Creating a Brand New Room from the Meetings Page
When you first enter, you’ll probably see that you have no rooms. You will create a new meeting for each time you use this tool.

Click on the red circle with a white plus sign to create a new meeting room. Here are the settings to select (see sample below):
- Give it a title
- Date
- Start time
- Duration

The (four) check boxes are used,
- to record the session for students who miss the time.
- to create a link to the recording
- to allow external people to access this session (if you select this option, you can get a URL for your meeting and send it by email to the non-students)
- This one is MANDATORY so your entire class can get in
3. Launching your Virtual Classroom
On the main “Active Meetings” page you should now see the room you just created, along with the scheduled time and date.

Click on the three dots icon and select Launch to enter the meeting. You will only be able to get in during the time the meeting is scheduled.

You will need to allow Bongo to run and access your mic and camera so look for those messages and allow them.
In the Meeting Lobby you’ll see all sorts of help notices. At the bottom click on the Enter Meeting Room button.
4. Syncing your Microphone/Headphones
Once, you join the room the first thing you will see is a screen asking you what you like to set up. Are you just listning or do you plan to speak during the presentation? This will determine what selection you choose.

Select the Microphone option so you’ll be able to talk in the session. It will automatically do a test of your mic (you need to hear an echo, if you don’t click on the options button to make sure it has recognized your microphone). If the echo test goes well, then Click the green yes button to finally get in.
5. See What Participants are in Your Virtual Room
As an instructor, click the person icon up at the top left so that you see a list of people who have entered your room.

6. Adding a Presentation File to the Whiteboard Area
It is recommended to use .pdf files. However, it will allow you to upload .ppt (PowerPoint files) and .doc (Word files) and a variety of other file types.
Step One
Click on the blue circle with a plus sign, located at the bottom left hand corner and select “Upload a Presentation”:

Step Two
Drag and drop files or browse for your PowerPoint file and then click on “Start”:

Related Posts
