


- Resource
- Uncategorized
- How to Create and Use Checklists
How to Create and Use Checklists
Why Use the Checklist Tool?
The Checklist tool allows instructors to help students keep track and organize their course responsibilities.
- You can create a checklist that lists the activities users should complete throughout the course
- You can create a list of the reading required for each week
- You can create a list of required supplies for the course
- You can set release conditions based on students checking off items from their checklist (ex. you might want to release a news item once the student checks off that they read the first module of the course)
Step By Step Instructions
How to Create a Checklist
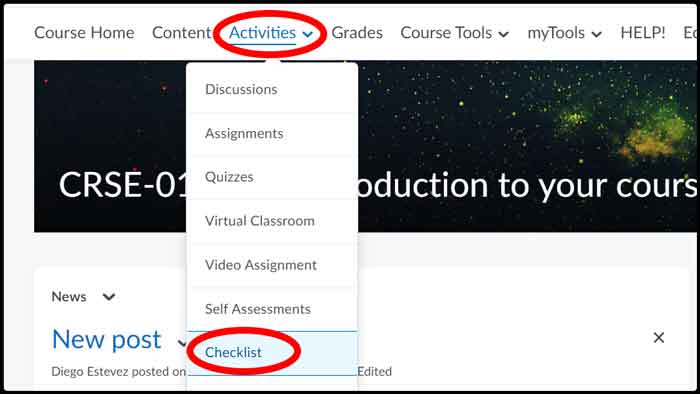
Click “Activities” then “Checklist”
Click “New Checklist”

Enter a name in the “Name” field
You can enter an optional description to identify what the checklist is about
By default checklists open in the current window of the user (so if they open the checklist they will loose the page they were on prior to clicking the checklist), but you can select “New Window” to override the default
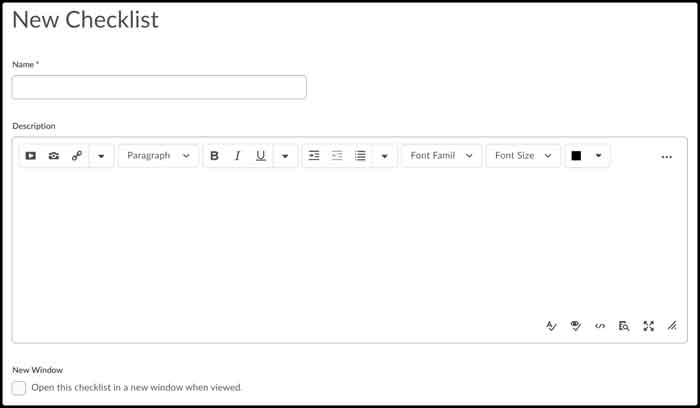
Click “Save” to save the new checklist
How to Create a Category
Click “Activities” then “Checklist”
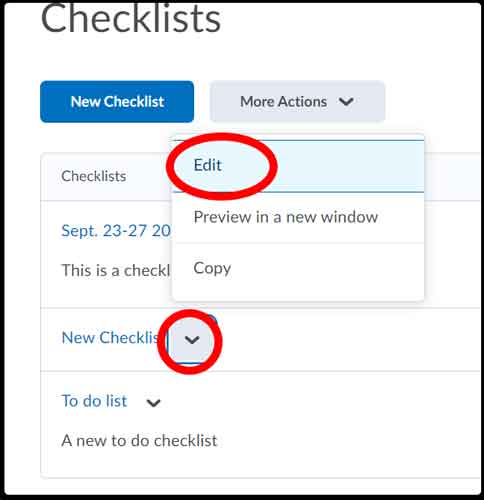
Locate the desired Checklist, click on the dropdown arrow and select “Edit”
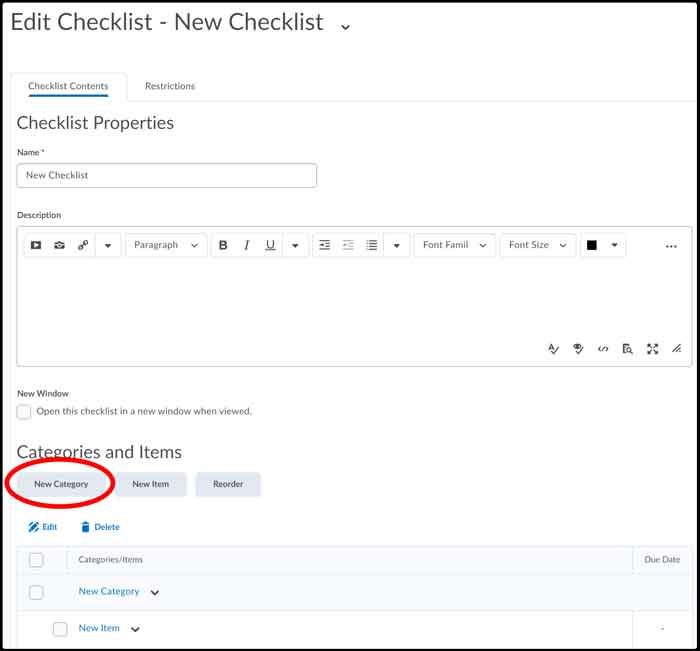
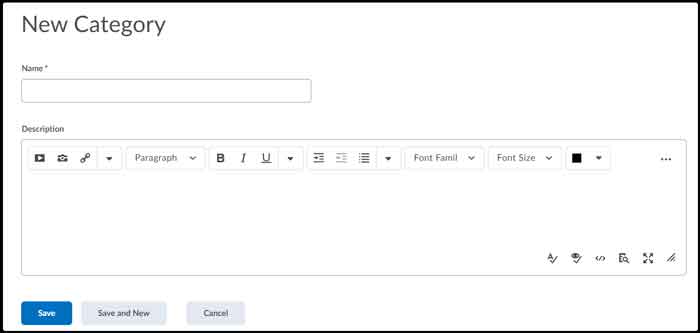
Scroll down and locate the heading ‘Categories and Items’ and then click on “New Category”
Give your Category a name and description then click “Save” (or Save and New if you would like to create another Category straight away)
Create an Item(s) in a Checklist
An item is the what the user will check off in the checklist. Each item that you create must belong to a category. You will need to select the checklist you would like to add the item too.
Click “Activities” then “Checklist”
Find the Checklist you would like to add then item too and then click the dropdown arrow (to the right of the checklist) and then click “Edit”
Underneath the heading “Categories and Items” click the “New Item” button

Select a category, a name and description for the new item
You can choose to add a “Due Date”
You can choose to “Display in Calendar”
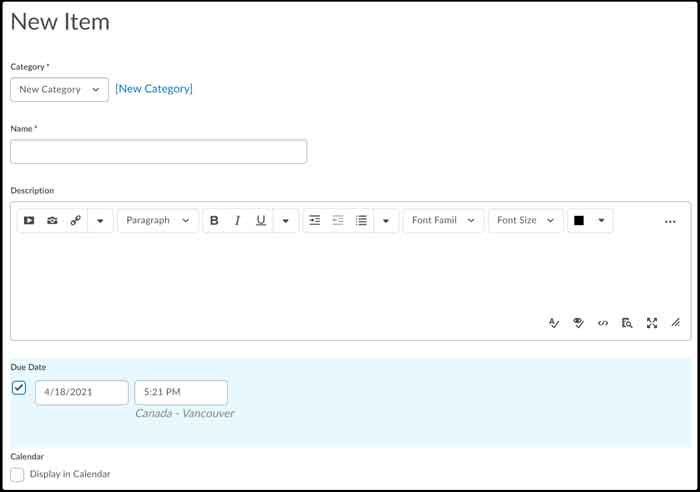
Click “Save” or “Save and New” if you plan to add more than one item to the checklist
How to Manage Your Checklist
Click “Activities” then “Checklist”
Find and click on the dropdown arrow beside the checklist, then click “Edit”
Make the changes you want to the “Checklist Properties” area or click on a category or item in the Categories and Items area to edit those.

Make your changes then click “Save“
How to Add Release Conditions to a Checklist
Click “Activities” then “Checklist”
Find and click on the dropdown arrow beside the checklist, then click “Edit”
Click on the “Restrictions” tab
Click “Attach Existing” if you already have a release condition that you want to attach or click “Create and Attach” to create a new condition

Click “Save” (now the checklist has conditions you set)
Related Posts
