


- Resource
- Assignment - Instructor
- How to use the Manage Dates Tool
How to use the Manage Dates Tool
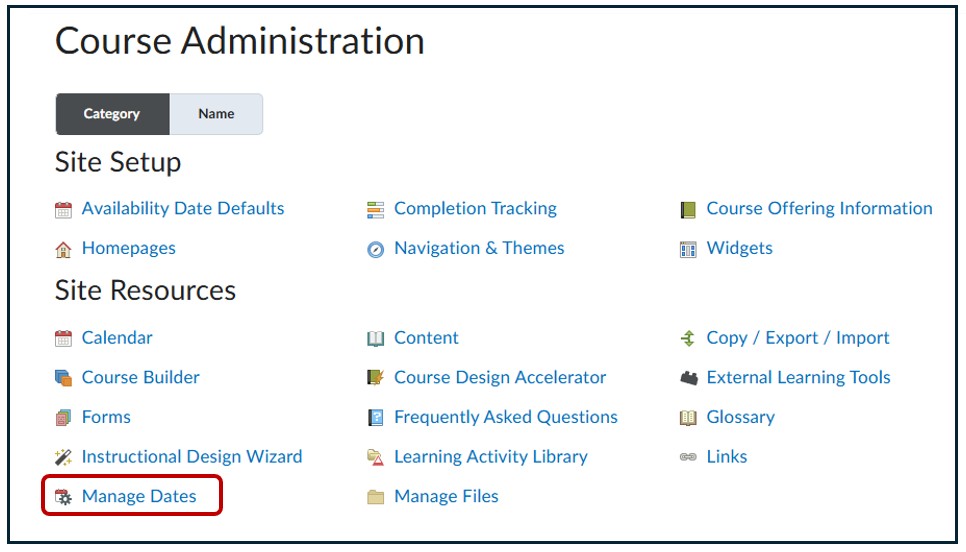
The Manage Dates tool can be used to control the due dates, start and end dates, and calendar visibility for the items in your course. You can access this tool by going to Course Administration, then selecting Manage Dates.
Add or change individual date for activities or content
- Go to Edit Course > Manage Dates
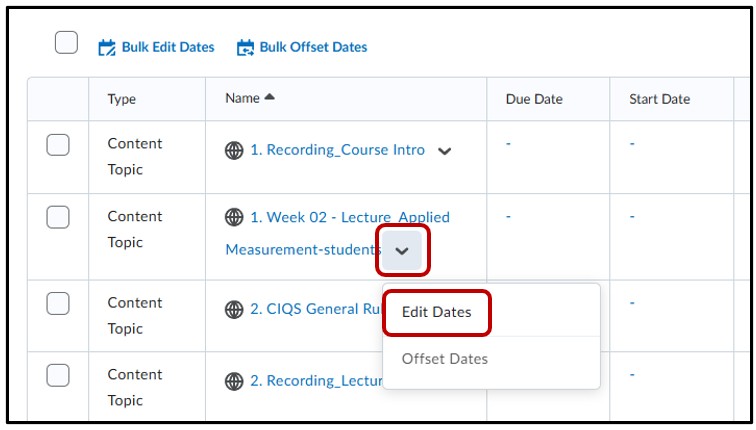
- Locate the item to modify > select the drop down arrow > select Edit Dates
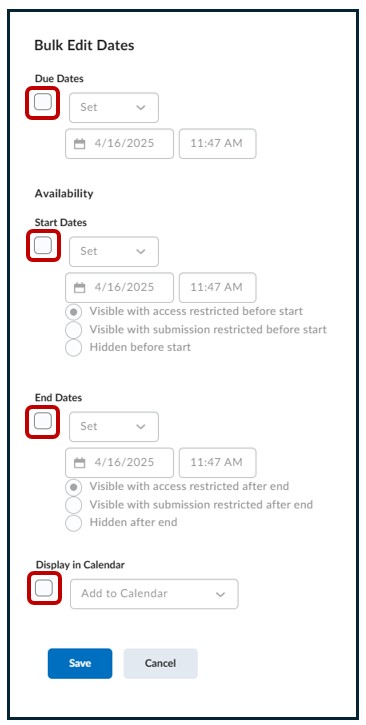
- Check mark the box for Has Start Date, Has End Date or Has Due Date depending on the restrictions you want.
- Set the new dates as needed.
- If you would like to have Start/End/Due dates appear in the calendar, check the box for Display in Calendar option.
- Save to make your changes.
Bulk Edit Dates- Add or change dates for multiple items with same date
- Check the boxes on the left side of each item you would like to add or change date with a same date.
- Click on Bulk Edit Dates button (do not select the box beside Bulk Edit Dates. This will select all of the items listed).
- Check mark the box for Has Start Date, Has End Date or Has Due Date depending on the restrictions you want.
- Set the new dates as needed.
- If you would like to have Start/End/Due dates appear in the calendar, check the box for Display in Calendar option.
- Select Save to make your changes.

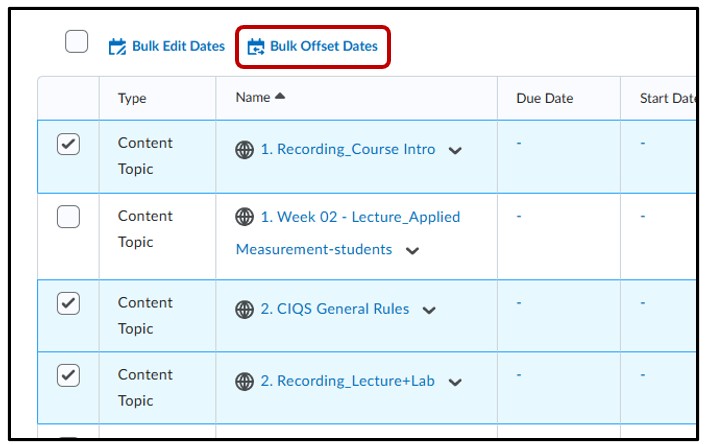
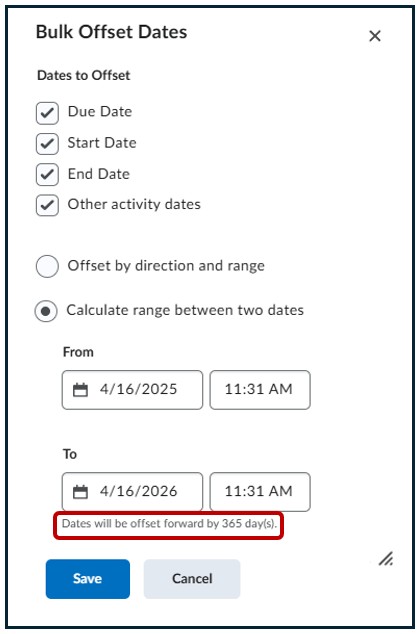
Offset Dates- Move dates forward to match a new term
The Offset Dates function allow you to offset some or all of the Start and/or End dates of your course by a specific number of days. This is helpful when you reuse/rollover your course material from last term to upcoming term. You can offset all Start and/or End dates by the number of days when the first assignment is due in the last term and when the same assignment is due in the upcoming term.
- Check the box next to each item containing a date you would like to offset
- Click on Bulk Offset Dates button
- Under Dates to Offset, choose one or more date types to offset –Due Date/Start Date/End Date
- Choose the option “Calculate range between two dates“.
- In the From field, put the start date of the last term course.
- In the To field, put the start date of the upcoming term course.
- Select Save to make your changes.
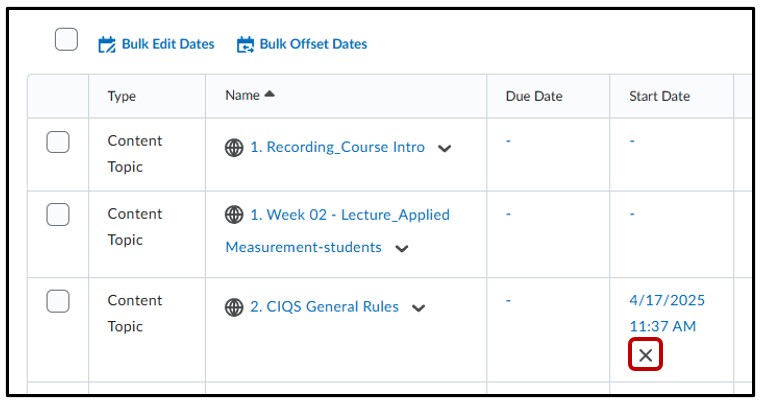
Remove individual dates for activities or content
- Locate the item you want to remove the Start Date/End Date/Other Dates
- Click’ X’ next to the date you would like to remove.
Related Posts
