


- Resource
- Content - Instructor
- How to Add or Delete Modules or Topics in the Content Tool
How to Add or Delete Modules or Topics in the Content Tool
The Content tool in the Learning Hub is where course materials are available for students to access. There are options of adding a variety of file types, such as Word, PDF, HTML and external web links. Once these file types are added to the course content they immediately become visible.
Other file types such as .AI files (Illustrator Files) will need to be download by the students onto their computer and opened using the correct software application.
Activities such as Quizzes, Assignments, Virtual Classroom (Bongo), and Video Assignment (Bongo) shortcuts can be added in the Content area for easy student access, and not always recommended.
Add a Module(s)
A module is used to organize a section of content. In some cases you might organize your modules by Chapter, or Week, or perhaps Topic. For example:
- Chapter One, Chapter Two, Chapter Three…
- Week 1, Week 2, Week 3…
- White Cat, Black Cat, Ginger Cat, Grey Cat…
- Roof, Wall, Foundation, Windows, Floor
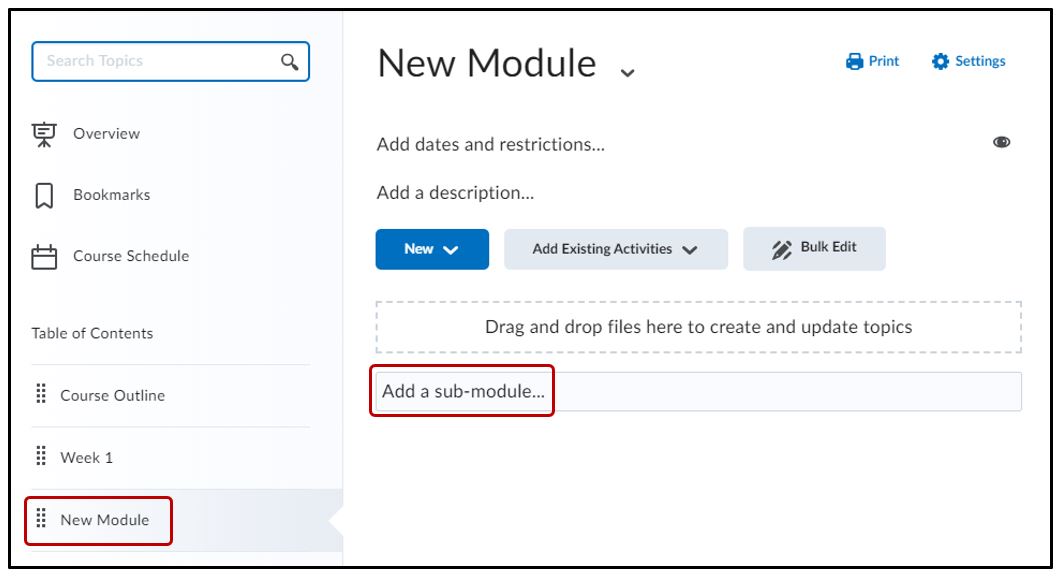
Click Add a module… which becomes a text box. Enter the module name and click Enter. This new module will now appear under Table of Contents. Repeat this process as many times as needed.

Adding a Sub-Module to a Module(s)
What is a sub-module?
When a module has more than one topic, sub module/s can be added to better organize the content. For example:
- Module: CATS
- Sub-modules: White, Black, Ginger, Grey…
- Module: BUILDING
- Sub-modules: Roof, Walls, Foundation, Windows, Floor…
NOTE: Modules need to be created before adding sub-modules.
Under the Table of Contents, click on the module that needs sub-modules added > click on “Add a sub-module…” which becomes a text box > enter the sub-module name and click Enter.
This new sub-module will now appear under the module. Repeat this process as many times as needed. These sub-modules can also be accessed from the Table of Contents area.

Note: the submodule is indented under it’s main module
Adding Content Files to Modules/Sub-Modules (Creating Topics)
Content can be added to the module by clicking on either the New or Add Existing Activities buttons inside the module or sub-module
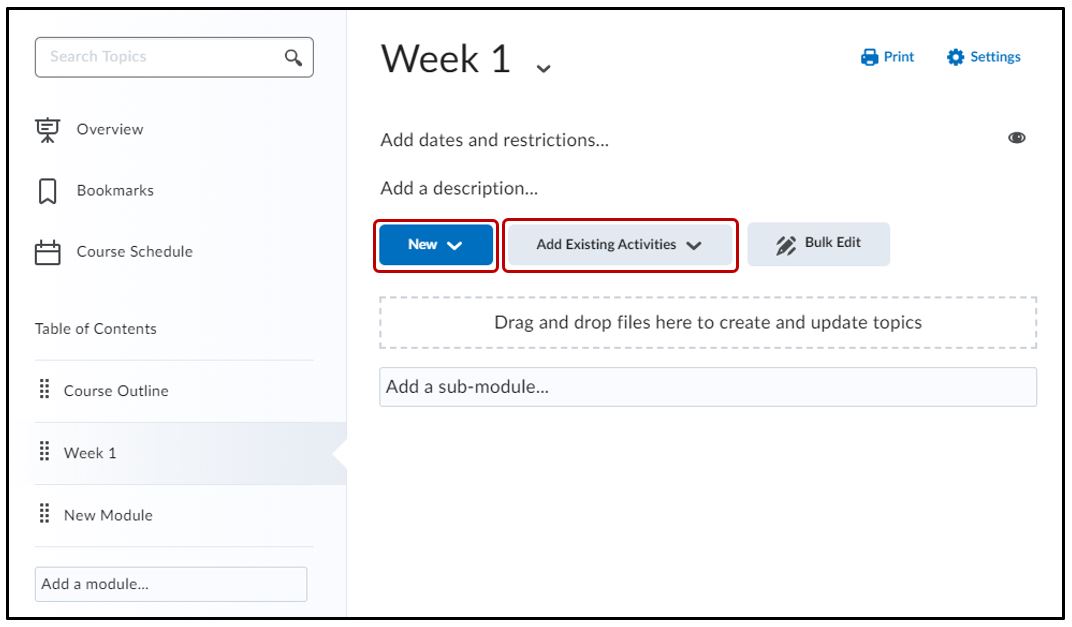
- NEW – Choose “New” to Upload Files (such as Word, PDFs, PowerPoint, Excel, etc.), or Create a File to add text. For more details on How to Add or Create a File,
- ADD EXISTING ACTIVITES – add activities that have previously been created. For example, these activities include quizzes, assignments or discussions.
Deleting a Module/Sub-module
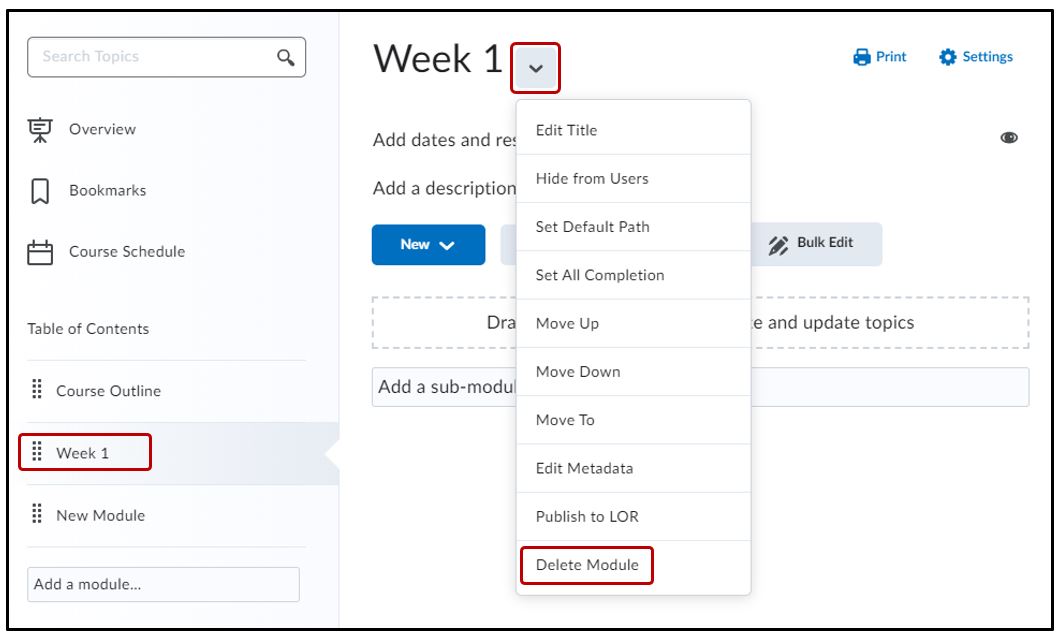
To delete a Module, click on the Module name on the left side (Table of Contents) > click on the drop down menu beside the Module > Delete Module
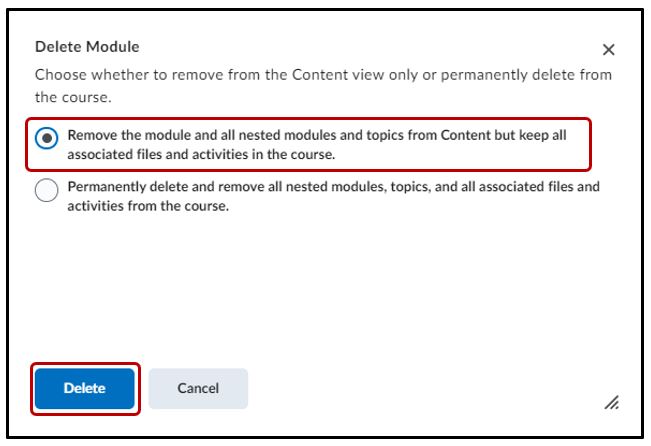
Once you click Delete Module you will be presented with two options:
- Remove the module and all nested modules and topics from Content but keep all associated files and activities in the course.
- Permanently delete and remove all nested modules, topics, and all associated files and activities from the course.
Please choose the first option > Delete
Deleting Files from a Module (Deleting Topics)
To delete a topic or file from within a Module (or sub-module), click on the Module name on the left side (Table of Contents). Next, find the topic/file you with to delete and next to it’s title click on the dropdown menu > Delete Topic
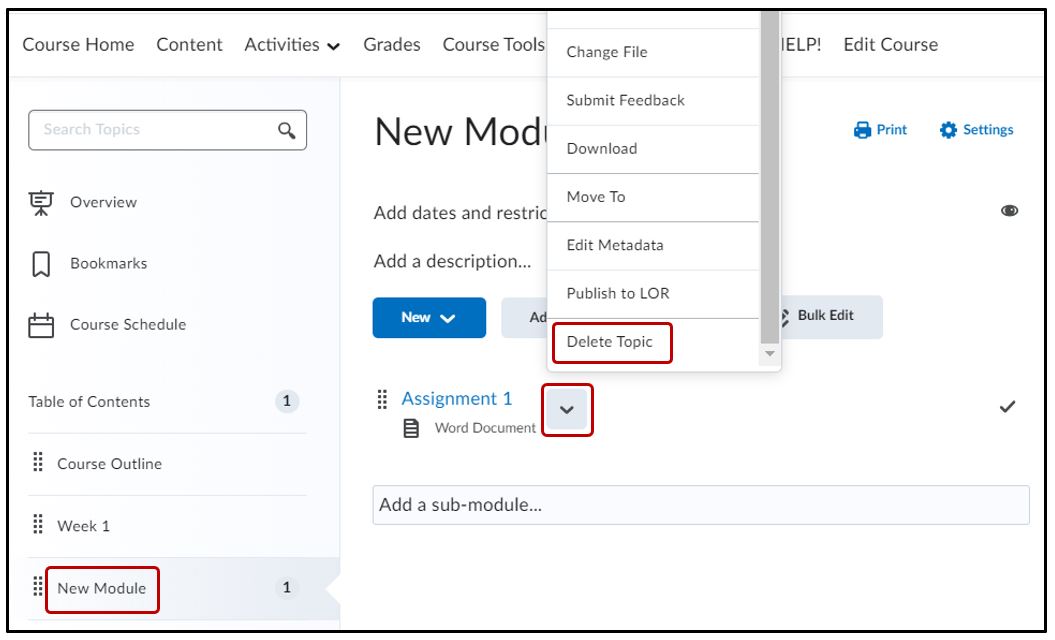
Once you click Delete Topic you will be presented with two options:
- Remove the module and all nested modules and topics from Content but keep all associated files and activities in the course.
- Permanently delete and remove all nested modules, topics, and all associated files and activities from the course.
Please choose the first option and then click “Delete”
Hiding Modules
If there is a reason you need to hide your topics or module from student view please see the following job aid
Related Posts
