


- Resource
- Class for Teams
- Class for Teams – How to record lectures in advance
Class for Teams – How to record lectures in advance
Faculty can record lectures ahead of time using Class for Teams (CfT). Follow the steps below to create and share your recordings.
Recording a Lecture
- Access Your Class for Teams Session
- Log in to the Learning Hub.
- Open your Class for Teams session.

- Join the Classroom
- Click Join a Classroom.
- Select Join.

- Prepare for Recording
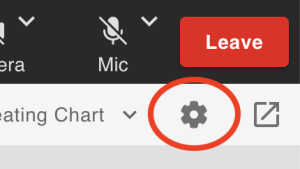
- Check your video and audio settings using the Settings icon.
- Prepare your lecture materials.
- Start Recording
- Click More, then Record.
- Turn Closed Captioning On.

- Stop Recording
- When finished, click More > Stop Recording.
- Exit the Session
- Close any CfT tools you are using.
- Click Leave > End for All.
Some Tools May Require Additional Setup for Recording
Please note that not all tools in Class for Teams are automatically captured when you enable the Record feature. Some components require additional steps to ensure they are included in the recording.
For detailed guidance on which tools are recorded and how to enable them, please refer to the following job aid:
Notify Co-Instructors Before Recording
Students cannot access the Join a Classroom button unless and cannot enter your Class for Teams classroom unless you have scheduled a specific time and date using the Settings & Schedules tool. However anyone with the Instructor role can access the Class for Teams virtual classroom at any time. If you plan to record a lecture in advance, notify your co-instructors beforehand to avoid potential interruptions during your session.

Optional: Locking the Main Classroom During Recording
If you are recording in the Main Classroom, you can add an extra layer of security by temporarily locking the classroom. This prevents students from seeing or accessing your Class for Teams session while you record. (Again, this does not affect co-instructor access)

Important: Remember to unlock the classroom once you finish recording to restore student access.
Sharing Your Recording
After recording, the playback will appear under the Recordings tab in the CfT dashboard. By default, recordings are only visible to participants who attended the session. To make the recording available to all students:
-
- Go to the Recordings tab.
- Select the checkbox next to the recording.
- Click Change Permissions.
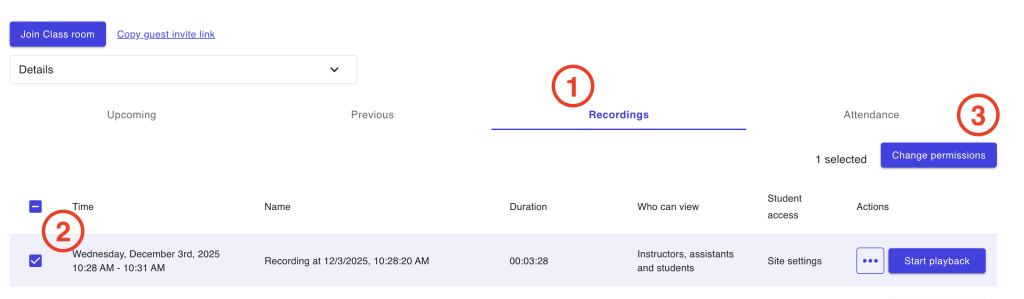
- Under Who can access this recording?, select All students can access.
- Click Save.

Reusing or Exporting Recordings
Recordings in CfT are tied to the original course and cannot be rolled over to new courses. If you would like to use a CfT recording for another course you have two options:
Option 1: Download and Upload
- Go to the Recordings tab.
- Click … > Download.
- Save the MP4 file and upload it to your preferred video repository.

Kaltura
The ETS supported solution for video courses in BCIT is Kaltura
Option 2: Make Recording Public
- Go to the Recordings tab.
- Select the checkbox next to the recording.
- Click Change Permissions.
- Under Who can access this recording?, select Public.
- Click Save.

- To share:
- Click … > Copy Link.
- Share the link or paste it into another course.

Privacy Considerations for Sharing Recordings Externally
We recommend sharing lecture recordings within the Learning Hub whenever possible. Class for Teams recordings include student names and faces, which may violate BCIT privacy policies if distributed outside BCIT systems.
If you need to share recordings externally, please consult the BCIT Privacy Office (IAPO) at privacy@bcit.ca before proceeding.
Related Posts
