


- Resource
- Content - Instructor
- How to Use the Content Tool
How to Use the Content Tool
The content tool in the Learning Hub is where you can load your course material for the students to access. You have the option of adding a variety of file types including: Word files, PDF’s, HTML documents, and external web links to name a few. Once you add these file types to the course content then they are visible right away for students to see. If you have other files types such as .AI files (Illustrator Files) the students will need to download the files to their computer and open them using the correct software application. For a list of acceptable files types that can be hosted by the Learning Hub please see the following document.
Besides the above file types you can also add existing activities such as; Quizzes, Assignments, Virtual Classroom, and Video assignment to the content area for easy student access.
1. Create A Module(s)
A module is used to organize a section of content. In some cases you might organize your modules by Chapter, or Week, or perhaps Topic. However, you choose to organize your course (unless it’s already organized for you), it’s best to keep the student experience in mind. What might make sense to you, might not make sense to them.
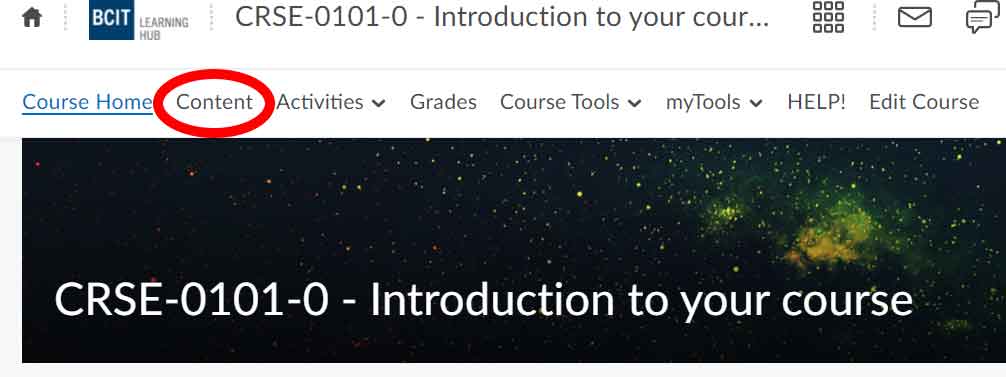
First go into you course and then Click on Content
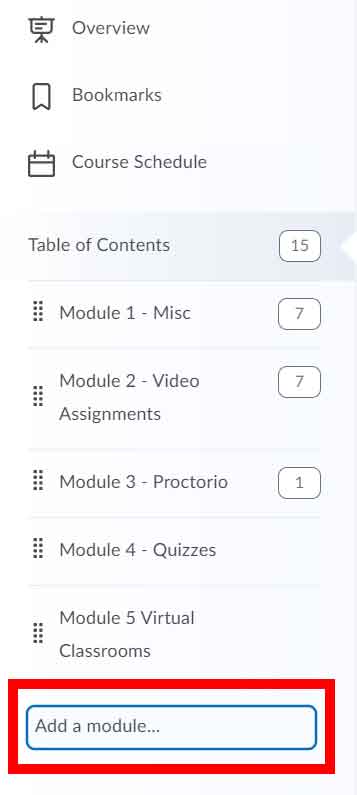
Click “Add a module…“, you will notice it now becomes a text box. Go ahead and enter your module name. Then hit “Enter” on your keyboard. You should now see it under “Table of Content”. Repeat this process as many times as you need.
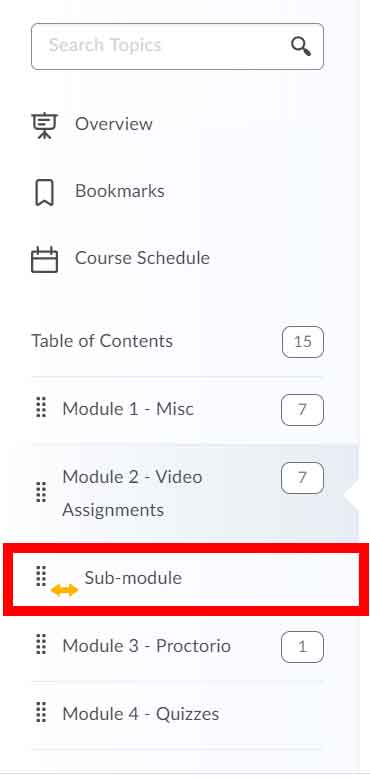
2. Adding a Sub-Module to a Module(s)
What is a sub-module?
When a module has more than one topic underneath of it, generally you would add a sub module to it, so you can better organize your content area.
*Please note: First you have to have a Module created before you can add a sub-module to it.
- Click “Add a module…” and enter another module name and click “enter” and you should see it added to the “Table of Contents”.
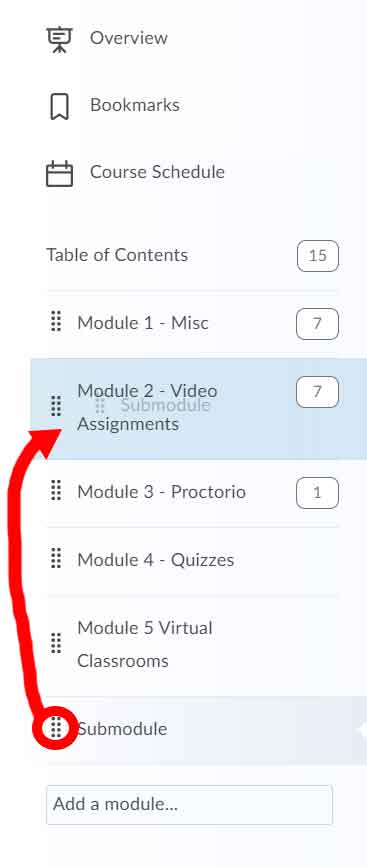
- Now, you will want to order/place your new module into the module it relates to, making it a sub module. To do this click on the module and hover over the eight dots, then drag it into the module you want it to be the sub-module of.
Alternatively:
- Go into a module and then scroll to the bottom or its contents, click on “Add a sub-module” and give it a name.
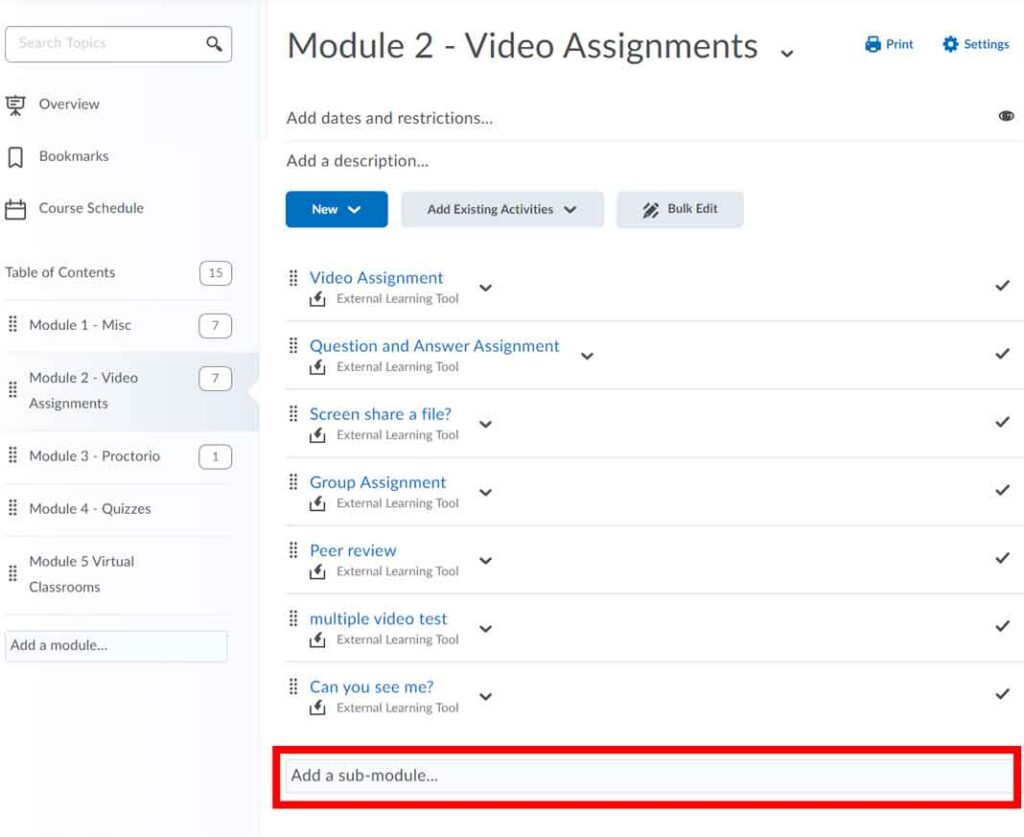
- Now you will see that submodule appear indented underneath it’s parent module in the left column. Click the submodule to go inside of it.
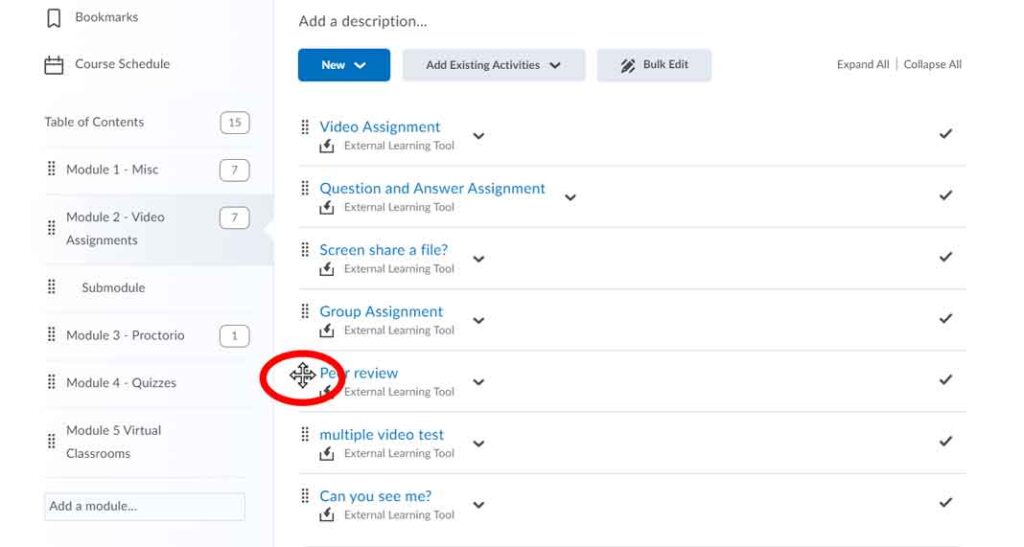
3. Re-Organizing Modules
You can reorganize Content files in the Learning Hub by moving them around. You can simply drag and drop files anywhere in a Module, or Sub-module to reorder files. The attached image highlights how you can position your mouse cursor to click and drag. You will know you’re ready to drag when your mouse cursor is highlighted with 4 arrows:
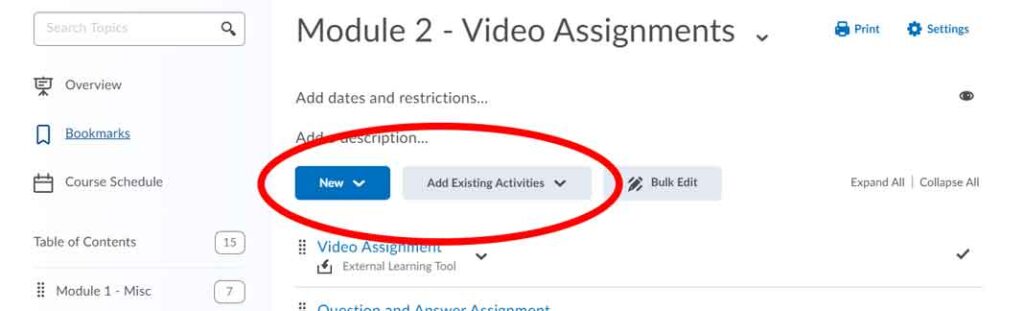
4. Adding Content Files to Modules/Sub-Modules
You can add files the following ways:
- Uploading Files from your computer or usb drive
- Add existing activities such as; Quizzes, Assignments or Virtual Classroom quicklinks
- Create new HTML pages (either with your own design or a page using the BCIT template design
To add files into you module or sub-module click on either the New or Add Existing Activities button near the top of the module you are currently on
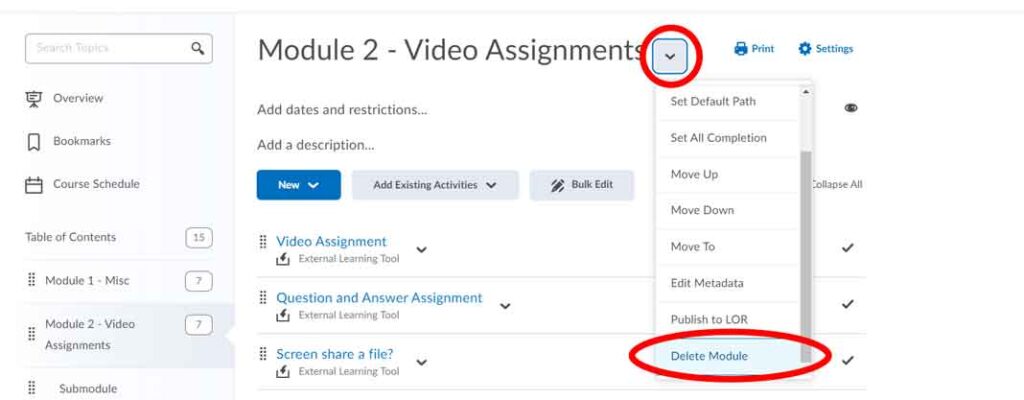
5. Deleting a Module(s)
To delete a Module, click on the Module name on the left side (Table of Contents), then click on the drop down menu beside the Module name up at the top and click “delete module”.
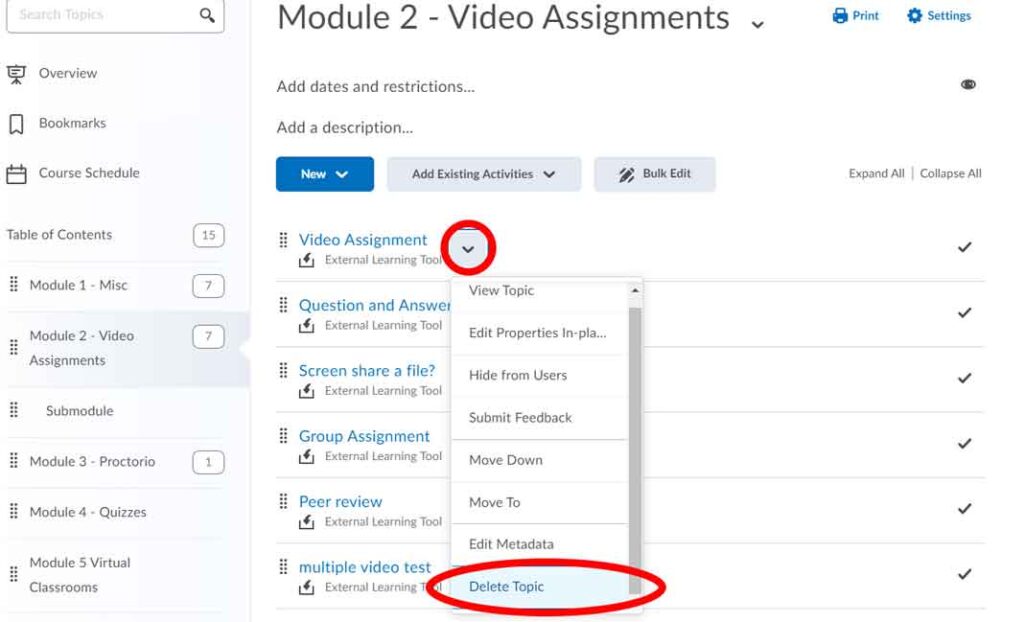
6. Deleting Files from a Module
- Click on the module you want to delete the file from.
- Find the file in the module, then click the dropdown arrow and then “delete topic”.
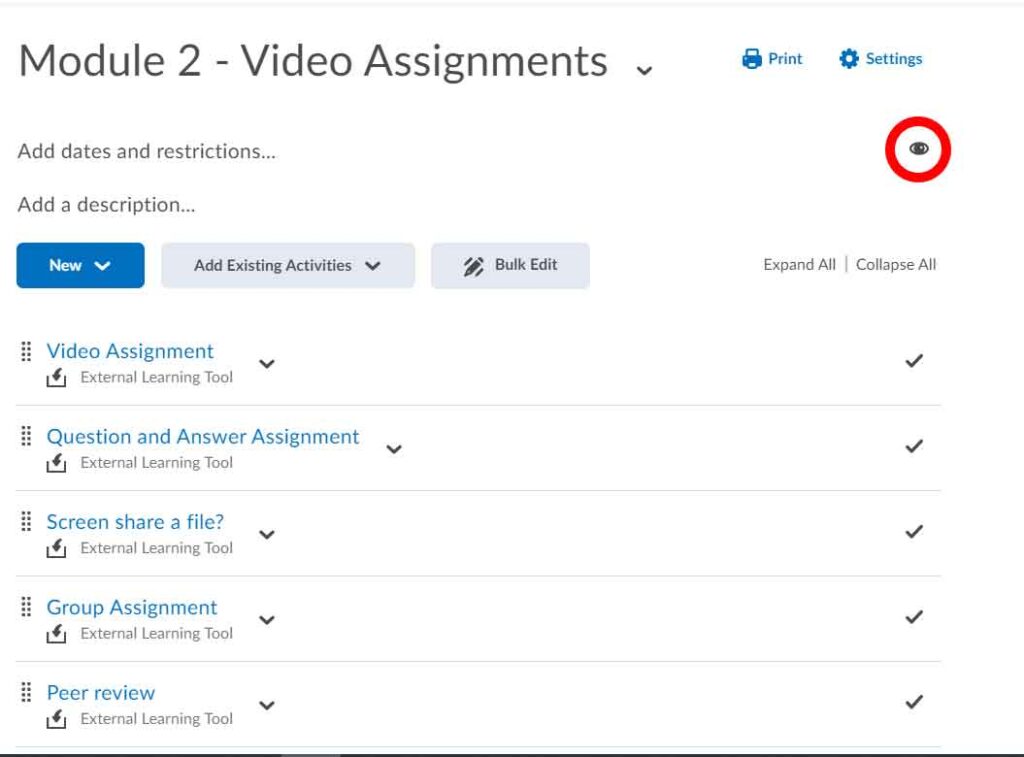
7. Hide/Unhide Modules
You might wish to hide specific files inside modules or entire modules/submodules themselves from students. How you do this depends on what it is you want to hide.
For Module/Submodules
- Click into the desired module/submodule from the left column (assuming you are not already inside)
- Locate the eye icon near the top right next to the module’s title
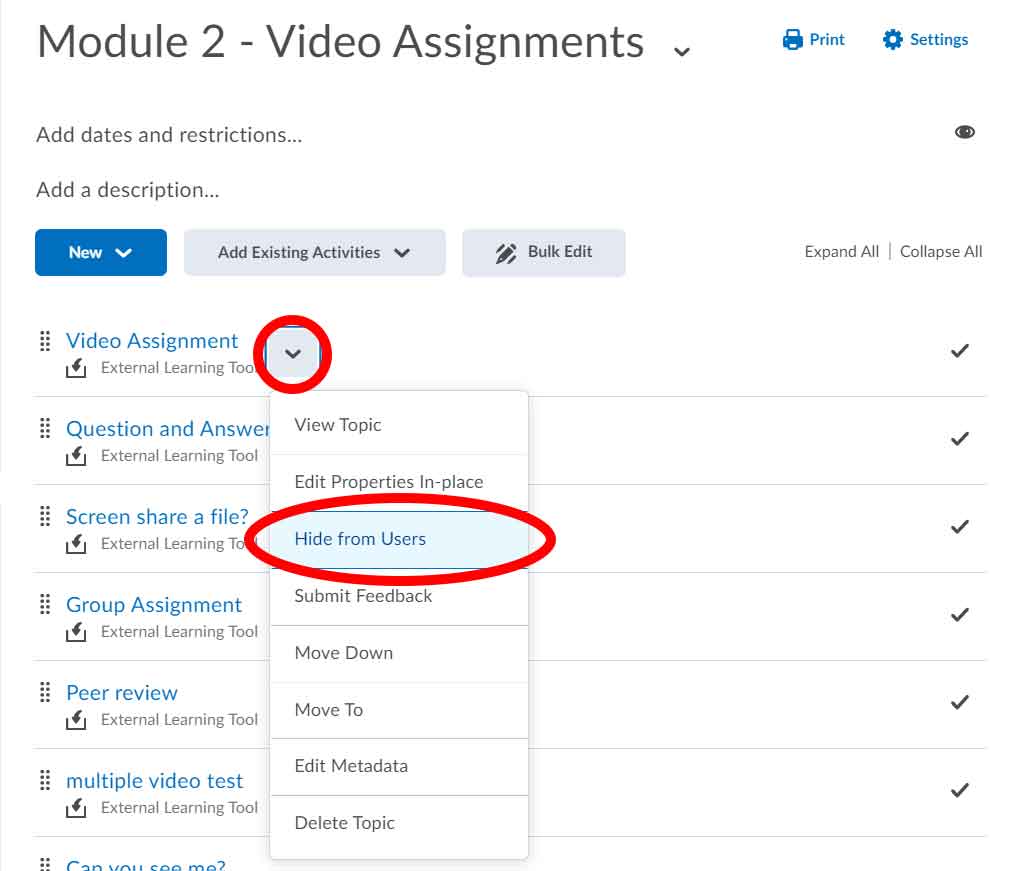
For Files in a Module
- Locate the desired file you wish to hide and click on the dropdown arrow next to it
- Click on “Hide From Users
Related Posts
