


Kaltura – Video Editor
The Kaltura video editor is a built in editor for Kaltura videos. This tool is useful for making simple edits to your videos such as cutting segments, adding fade-ins or making copies of your video. You can find the editor tool for your video inside your Kaltura My Media repository.
Limitations
The Kaltura editor cannot do the following:
- Editing video audio directly
- Splicing or combining footage from different videos together – although you can try to use media stitching for this purpose
- Adding transitional effects or annotations to videos
If you need to do these or make other sophisticated edits we instead recommend that you download your Kaltura video and use use an external video editor like adobe premier /after effects which is administered by IT services.
Accessing the Editor
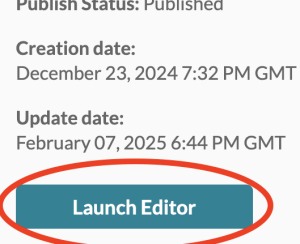
To find the Editor, access Kaltura My Media from your Learning Hub Course and either:
option 1
- Click on the pencil icon that is on a video entry.

- Then, click the Launch Editor button which you see on the right.
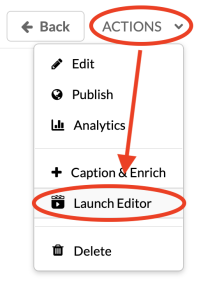
option 2
- Click on a video entry.

- Then, locate the Actions menu towards the bottom right and then select the Launch Editor option.
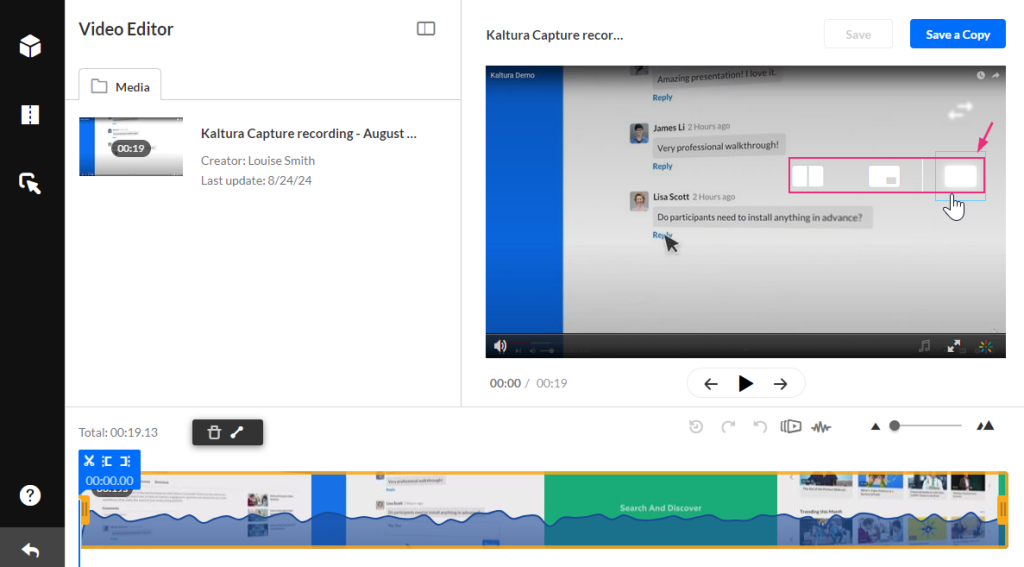
Editor Layout
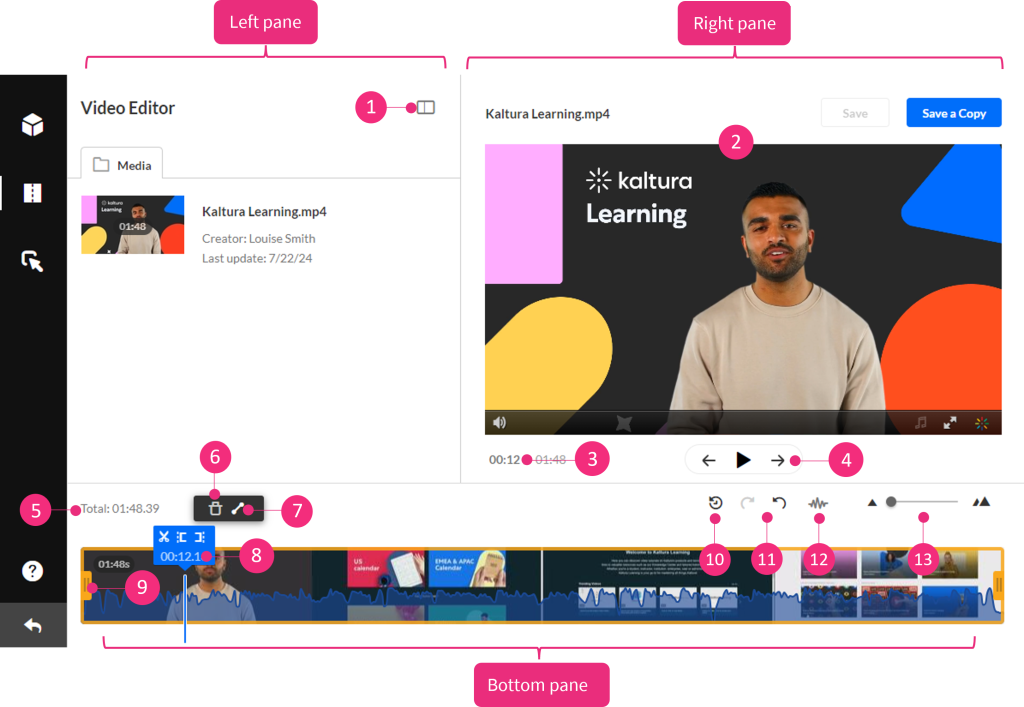
The editor has three main areas:
-
- Left pane – Displays your media details. You can minimize it by clicking the open/close button (1).
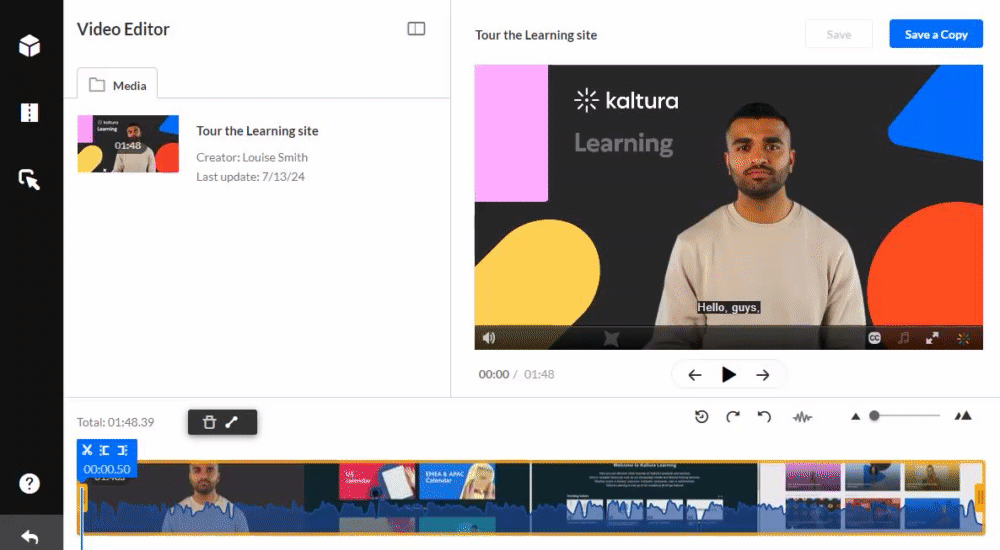
- Right pane – Includes: the player to preview your timeline changes (2); a real‑time input field (3); play, pause, skip to start and skip to end buttons (4).
- Bottom pane – Contains the timeline and its tools, including: total video duration (5); trash icon for deleting segments (6); fade in / out icon for setting fade cue points (7); a real‑time marker for tracking video on the timeline (hovering shows arrows you can drag) (8); split (scissors) tool;Set In / Set Out to crop start/end;

handlebars to create a range (9); reset icon for reverting to last saved state (10); redo/undo icons (11); show/hide audio (12); zoom function (which may add a scrollbar if zoomed in) (13).
Keyboard shortcuts
- Right arrow: 1 second forward
- Left arrow: 1 second backward
- Alt + Right arrow: 10 seconds forward
- Alt + Left arrow: 10 seconds backward
Trimming
Trimming edits the original video’s start or end and saves the change permanently. If the editor button is greyed out or the trimming tool isn’t available, it might be because the source file is no longer available.
- Set the start and end times using any of the methods below:
- Click on the timeline to activate the handlebars, then drag the handlebars to the start and / or end point with your mouse.

- Enter a start or end time in the real‑time input field and press Enter; the marker will jump to that time, then use Set In / Set Out.

- Move the real‑time marker to the desired position, then drag handlebars to snap to it or click Set In / Set Out.
- Play and pause at the time you want; the real‑time marker will position itself. Then snap handlebars or click Set In / Out.

- Click on the timeline to activate the handlebars, then drag the handlebars to the start and / or end point with your mouse.
- Preview your edits by clicking Play under the video.
- Click Save (this will permanently alter the original media). A confirmation dialog will notify you that the action cannot be undone and may take time. Click Save to continue.
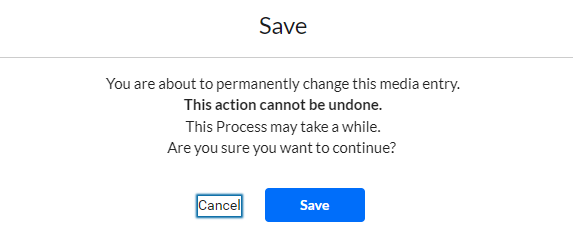
- Saving may take time; you can leave the browser tab open and return later. The edited video is saved in “My Media.”
Clipping
Clipping a video creates a new copy with a new start or end, leaving the original intact.
- Set the range using one of the methods listed in the trimming section.
- Preview the clip by clicking Play.
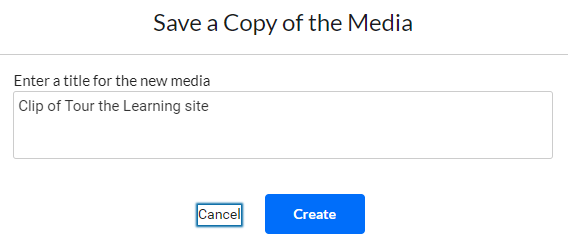
- Click Save a Copy to generate the clip (the original is unchanged).
- In the dialog that appears, you can accept the suggested title or enter a new one.
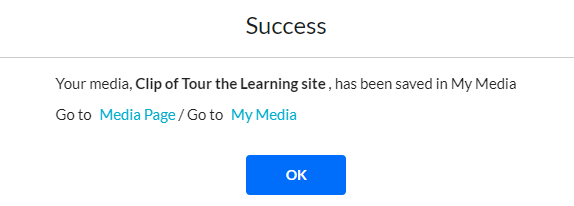
- Click Create. A success message appears, showing the clip is saved in My Media. You can go to Media / My Media to confirm.
Chopping and Splicing
Chopping cuts and removes a section in the middle of a video. Splicing joins the remaining sections together automatically (you don’t need to manually move segments). The timeline always reflects the original video timespan. After editing, you may see white gaps where chopping, trimming, or clipping occurred — they don’t indicate pauses but show where playtime had been removed.
- Click the timeline and drag the real‑time marker to where you want to cut.
- Click the scissors (split) icon to cut the video.
- Drag the real‑time marker to where you want the cut section to end, and click scissors again.
- Click the section you want to remove (it will show a border). Then click the trash icon or press Delete to remove it.
Once removed, Kaltura automatically splices the remaining segments — you don’t need to drag them together on the timeline.

Fading
- Click on the segment on which you want to apply a fade.
- Click the fade in / fade out icon and enter the number of seconds for fade in or fade out.
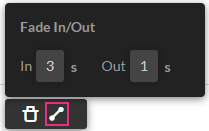
- Click outside the dialog or press Enter to confirm and close it.

Fade markers appear on the segment, indicating where fades begin.

Clipping and trimming media with multiple streams
If a video has multiple streams (for example, screen + camera capture), the timeline loads with the primary stream by default.
- Hover over the player to reveal a content selector icon; click it and choose which stream to edit from the menu.
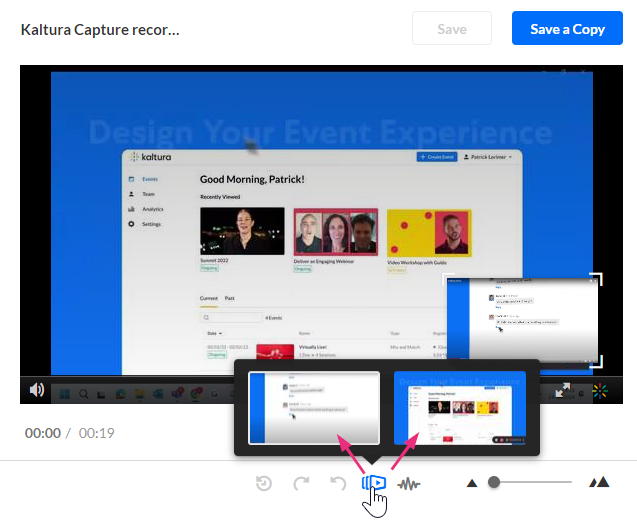
- The timeline will update to display that stream, letting you see where to clip or trim across multiple streams.
- Then set the range (using the same methods as above), and click Save or Save a Copy when done.
Exiting the Editor
When done editing, click the exit arrow in the bottom left corner to close the editor.
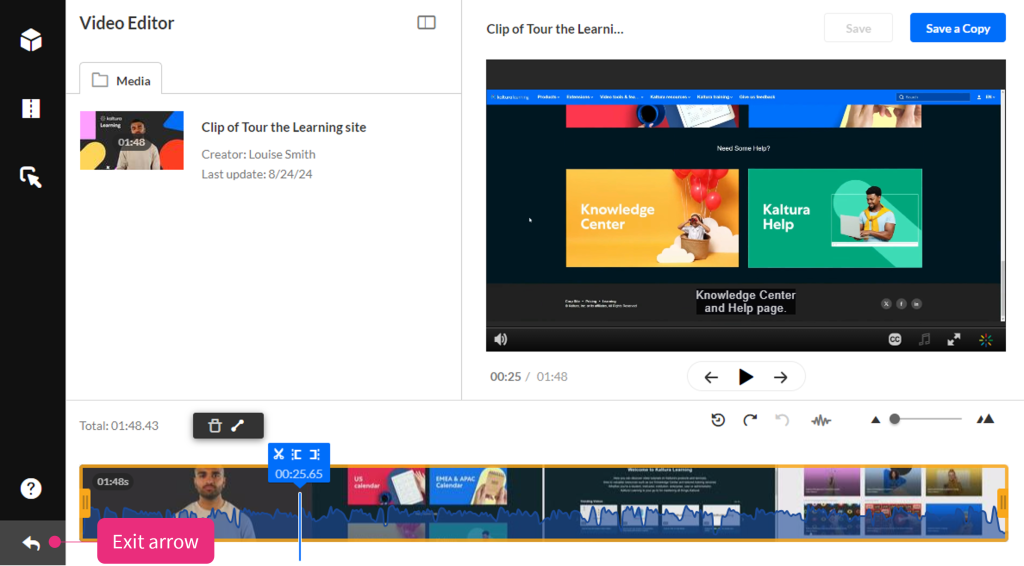
If you want to start over, click the exit arrow, then re‑enter the editor to begin again.
Related Posts
