


- Resource
- Content - Instructor
- How to Add New Files to the Content Area
How to Add New Files to the Content Area
The Content area of your course can be populated using different files. Below are the various methods which you can use to upload new files into your course.
Option 1: Creating a New file (webpage/HTML)
1. Click on a module and create a file
Templates
To create a new course content page in your course Content, it is best to use the “template” which has been updated to the new style created by the Course Production Team. Here is an example:
Go to a module in your Content, and then click on NEW > Create a File:

2. Select a template
Create a title for your new web page and then click on Select a Document Template and choose a Template. If this is for a course that is not part of the bachelor’s of nursing program please select bcit-default-template. Otherwise select bsn-template.
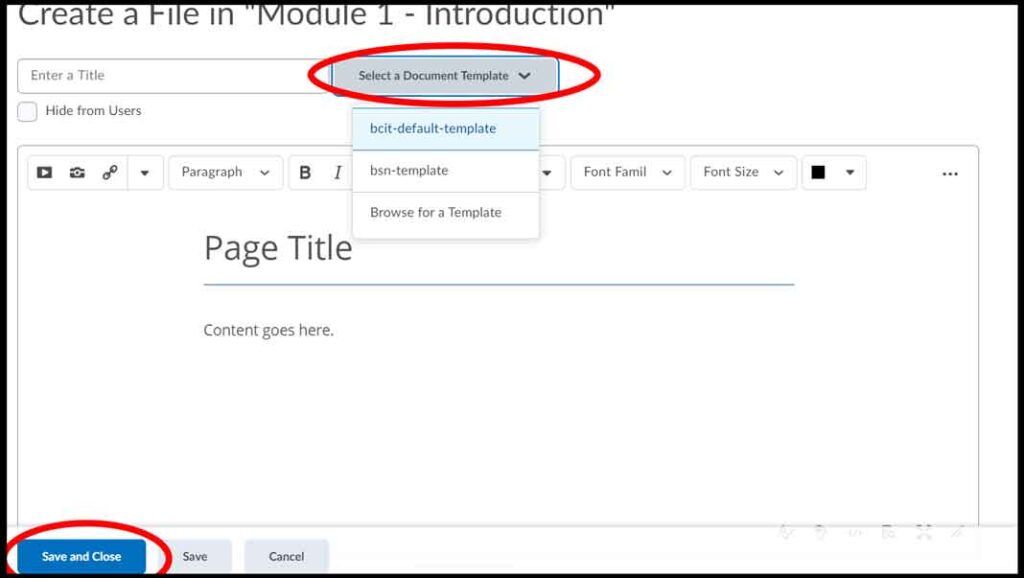
Using a ‘template’ will style your course content page to a clean and professional look. Use the toolbar in this area to change headings and modify your text:

3. Save and Close
Then click Save and Close. This step needs to be repeated for every new course content page.
Conversion Guide
If you want to add other components, such as learning activities, readings case studies, etc., the following link will be helpful: Course Production – Conversion Guide
If you want to see the HTML code on a webpage, click on the ‘HTML’ icon from the menu:

Option 2: Uploading Video/Audio Files
Kaltura Required
Video and audio files that you would like to display in the Content area of your course will have to be uploaded and imbedded using Kaltura. If you are unfamiliar with uploading videos in Kaltura please watch this tutorial
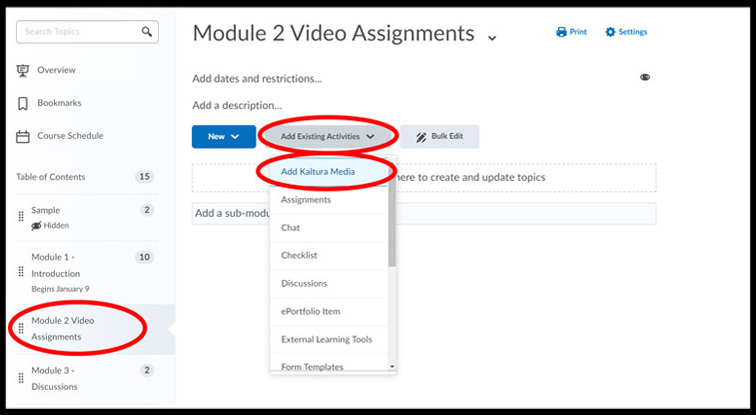
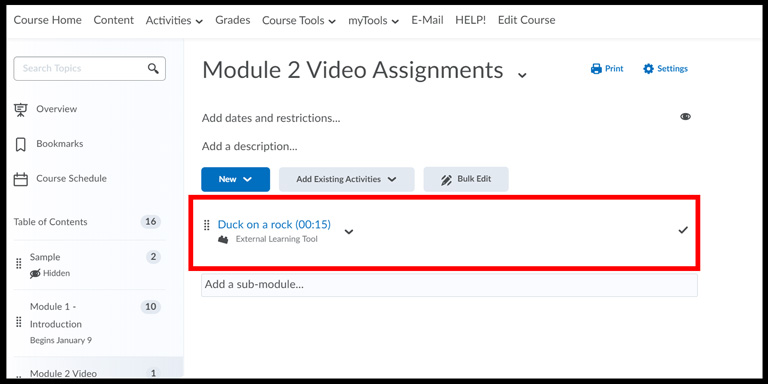
1. Click on a module then Add Existing Activities
Go to the Content area of your course, click on the module that you want to add your video to (or create it), then click on Add Existing Activities > Add Kaltura Media
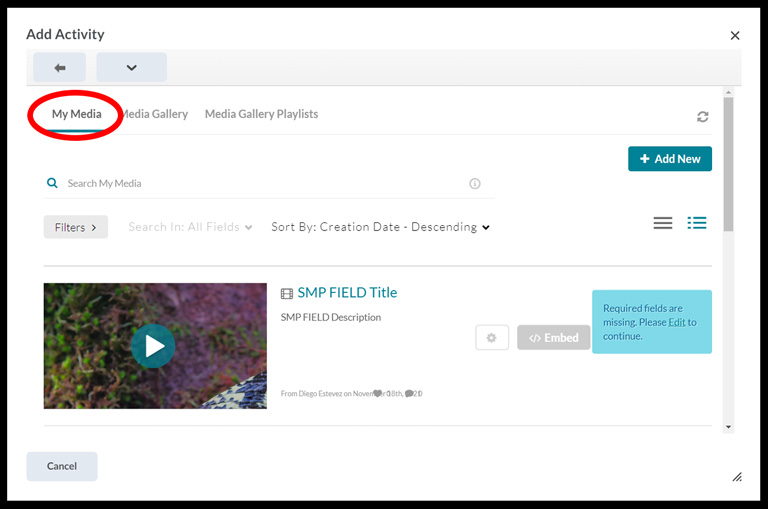
2. Embed your video from My Media
Click on the My Media tab (if it is not selected by default).
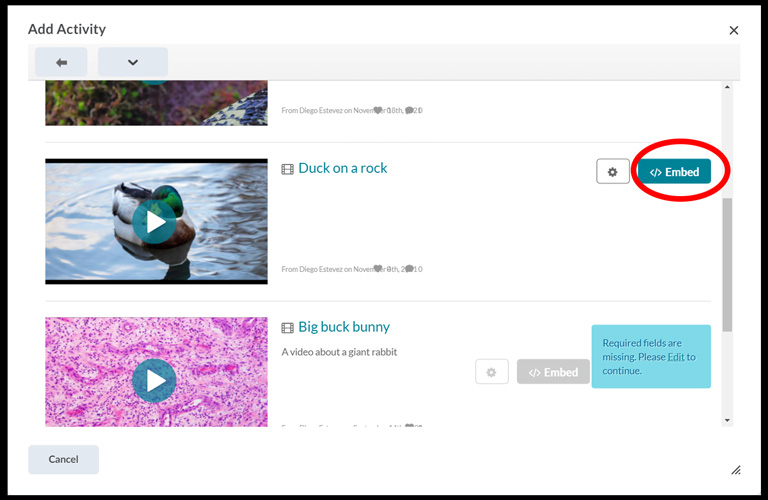
Next, locate the video you would like to use and then click ‘Embed’ to embed the video into your course module
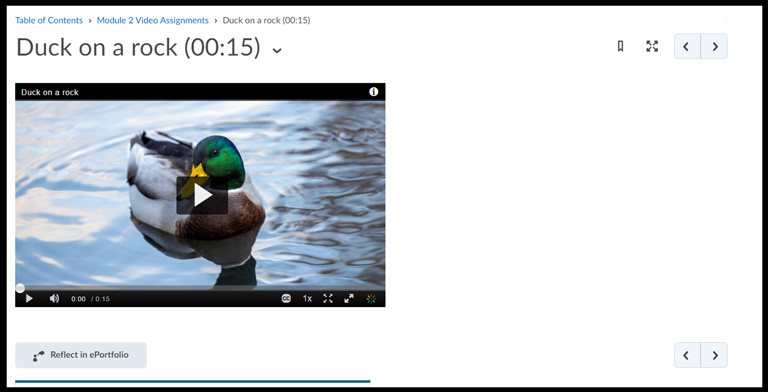
3. View your video
You will now see that your video is now an item inside your module
Your students can now click on this item to watch your video
Option 3: Create an External Link
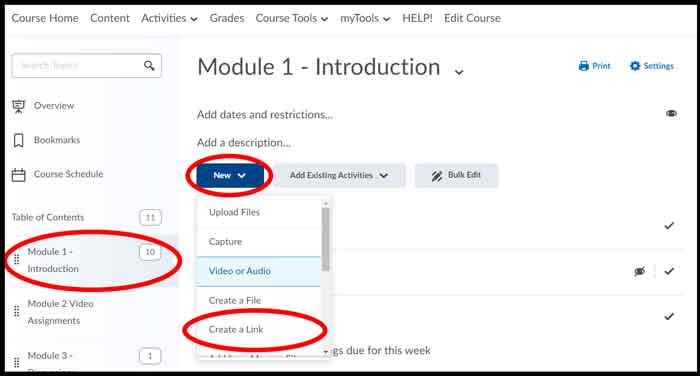
1. Click on a module then click Create a Link
Go to the Content area of your course, click on the module that you want to add your link to. Select your module, click Create a Link.
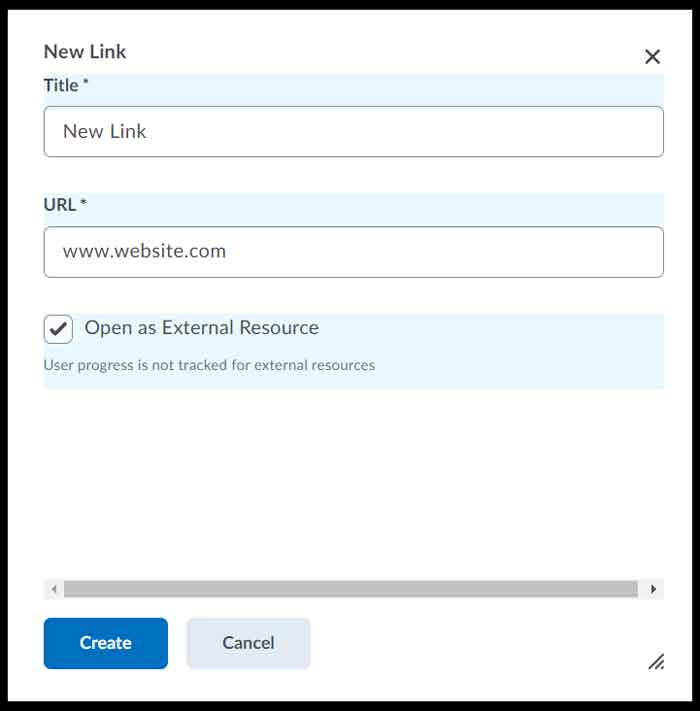
2. Create link and Save
To create a new link add a Title and a URL. Keeping the Open as External Resource box unchecked will render the webpage you are linking to entirely inside the Learning Hub. Some links will not work unless if they are displayed as an External Resource, for this reason we recommend that you always check the Open as External Resource box.
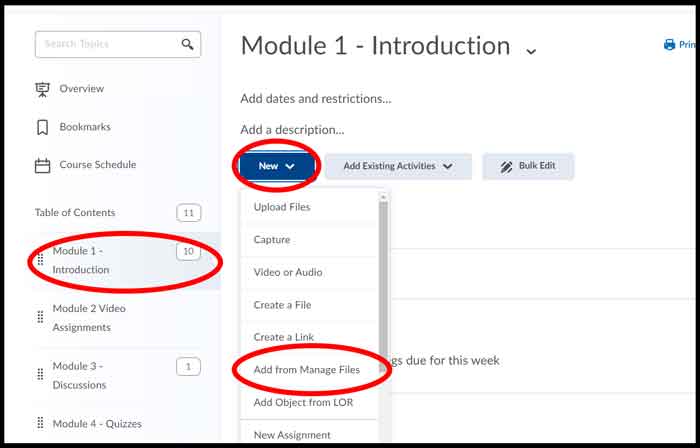
Option 4: Adding files from Manage Files
1. Click on a module then click Add from Manage Files
Go to the Content area of your course, click on the module that you want to add your file to. Select your module, click Add from Manage Files
2. Find and Add files
You will now see a popup box that has the list of files and folders from your manage files area. To access files inside a folder, click on the name of the folder.
To add any files into Content, find the desired file, tick the checkbox next to it and then click on Add

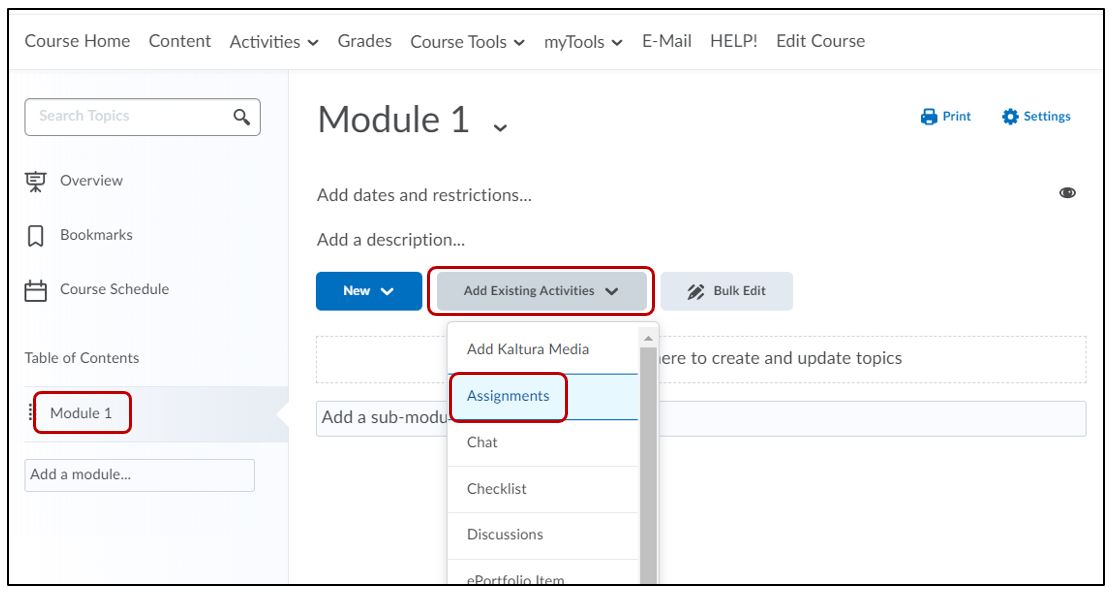
Option 5: Adding Existing Activities in the Content Area
1. Click on a module then Add Existing Activities
Go to the Content area of your course, click on the module that you want to add your file to. Select your module, then click Add Existing Activities. From the drop down menu, select the desired Activity – Assignment, Discussion, Quizzes, etc.
- This will only work if you have already created an existing Activity – Assignment, Discussion, Quiz, etc. Learn How to Create an Assignment or How to Create a Discussion
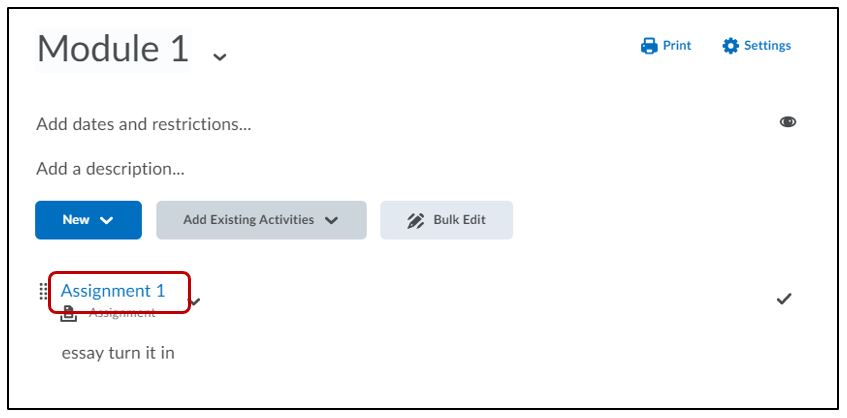
2. Select the Activity
Select the desired Activity from the list of already created Activities (Assignment, Discussions, Quizzes, etc.)

3. Activity is listed in Content Area
The Activity is now listed within the Module
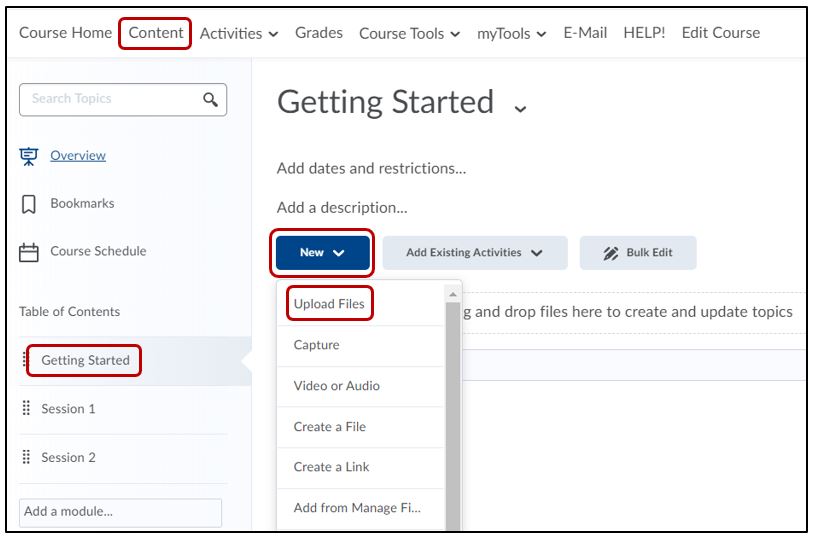
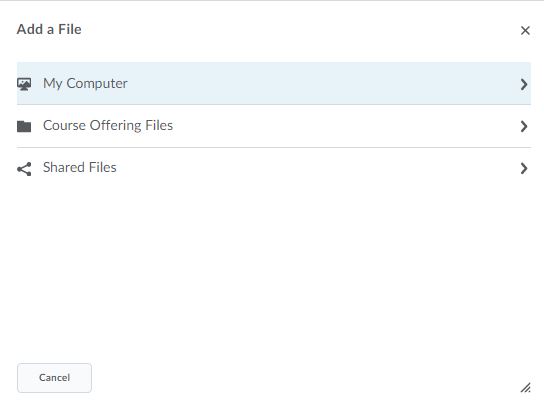
Option 6: Uploading Files From Your Computer
1. Create or Click on a module
To create a module, select Content > Add a module
Click on the module that you want to add your file to. Select your module, click New and Upload Files:
2. Choose the Location of your file
Where is the file stored? Is it on your personal computer, or your manage files area of the course?
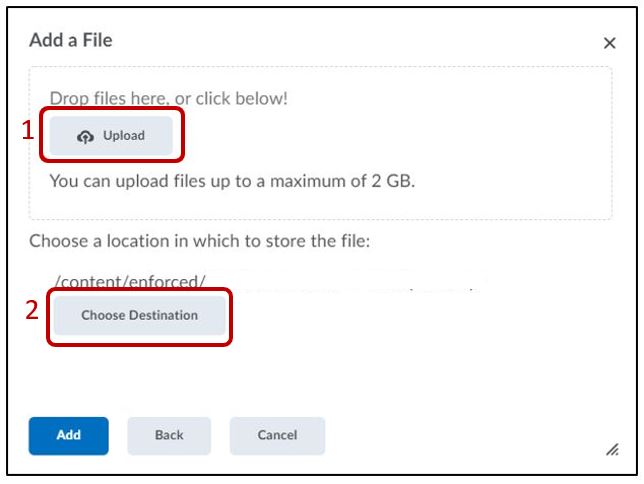
3. Upload the file
Select Upload > locate the file on your computer > Open > select Choose Destination
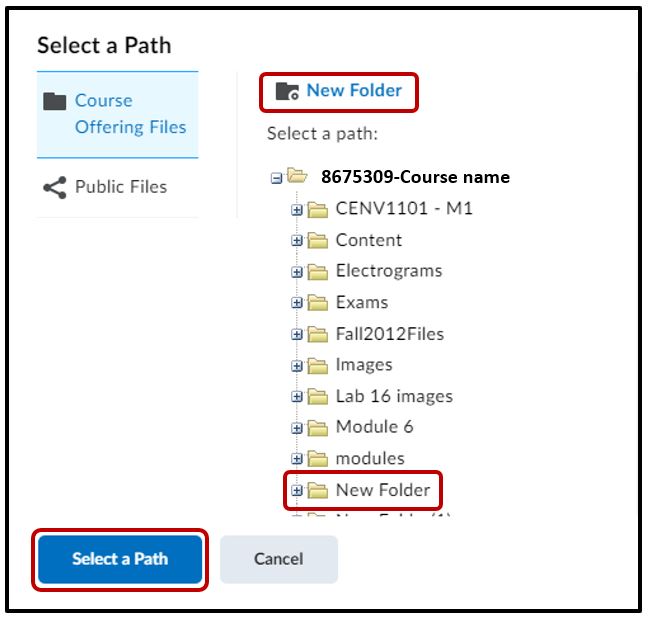
4. Organizing files
** it’s important to organize your files into folders. Otherwise, the system will simply place all uploaded files into one main folder. It’s recommended to create folders. For example, Module 1, 2, 3; images; videos
Select the folder to place your file in > Select Path
or select New Folder > name the folder > then select the newly created folder > Select Path
Note
We recommend the 6 options above for uploading New files into the Content area of your course. For new activities (New Assignment, New Discussion, New Quiz, New Survey), it is best to create these using the Activities tools. Once these have been created you can add them using Add existing Activities.


Related Posts
