


- Resource
- Uncategorized
- Kaltura Capture – Recording PowerPoints
Kaltura Capture – Recording PowerPoints
Recording a PowerPoint slideshow with Capture helps viewers navigate your video more easily by clicking on specific slides or searching for text that appeared in your presentation. Slides are automatically turned into time-based chapters and indexed for search.
How it works
Set your inputs
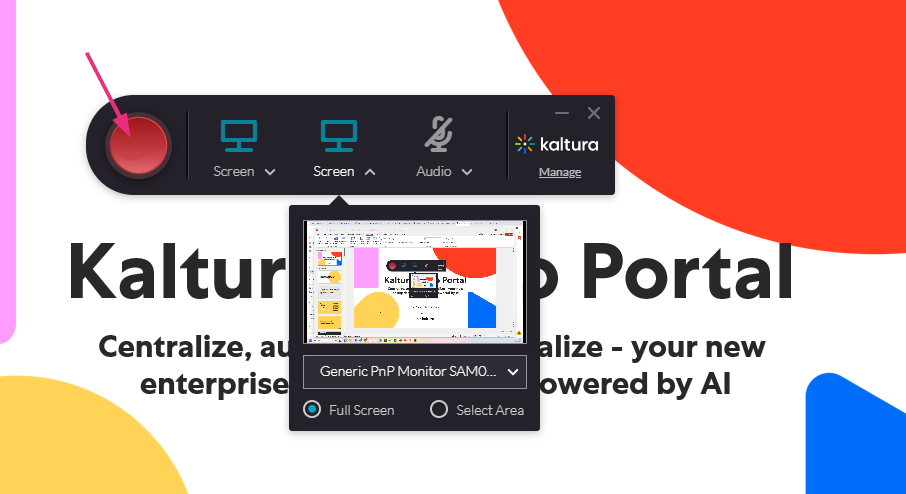
- Make sure Screen is selected as one of your recording inputs.
- Optionally, add a second input like webcam or another screen, if you want to show something else alongside the presentation.
Multiple Screens
If using multiple screens, slides are only captured and recorded from the screen being recorded.

Recording a slideshow with audio
Windows Only
The audio system recording is available in Windows only.
When recording a PowerPoint slideshow with audio, the Capture audio input must be enabled along with the system audio.
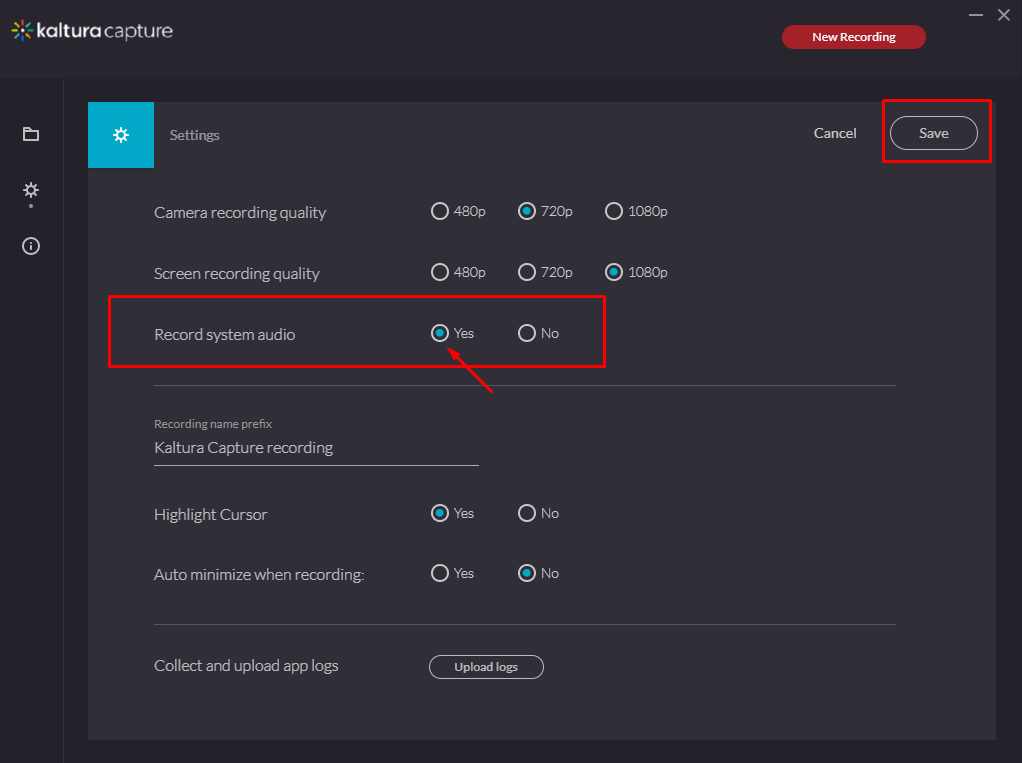
- Launch your Kaltura Capture application.
- Navigate to the Settings tab and set Record system audio to ‘Yes’.
- Click Save.
Start Presenting
Click the big red button to start your recording.
Protect Mode
If PowerPoint is opened in Protected Mode, slides cannot be captured in the recording. You can click Enable Editing to fix it.
Open the PowerPoint presentation in Slide Show mode and present your slides.

As you present:
- Each slide is captured as a chapter with a time stamp.
- Slide text is indexed, so it becomes searchable in the player.
When Pausing Recordings
Slides shown while the recording is paused will not be captured.

End your recording by clicking the grey square, then click Yes, stop it.

View Chapters and Search Slides
Go to My Media.

On the My Media page, click the title or thumbnail to open the media page and play the video

On the media page, click the magnifying glass icon in the top-right corner of the player to view the chapters.
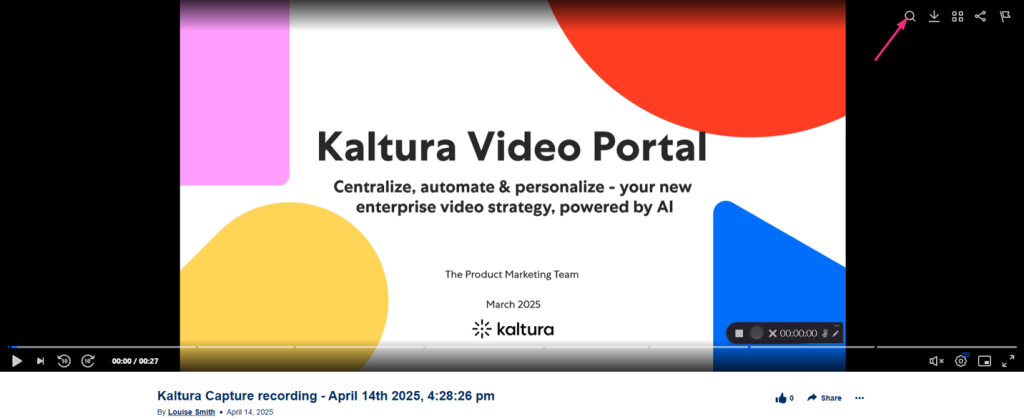
From here the list of slide-based chapters displays. You can use the search bar to find specific text in your slides. Click any chapter to jump to that point in the video.

Related Posts
