


- Resource
- Class for Teams
- Class for Teams – Enhanced Learning Management System
Class for Teams – Enhanced Learning Management System
The Enhanced LMS integration (ELMS) allows you to link your existing course content from the Learning Hub and use it inside Class. This feature replaces the pre-built tools Class has for Course Content and replaces them with whatever is inside the Content area of your Learning Hub course.
With this enhanced integration your Classlist, Sections, and course Content are synced:
- Roster sync: The Class Roster mirrors your Classlist inside the Learning Hub
- Sections and groups sync: Attendance is tracked in sections and students can join based on their section.
- Content sync: Learning Hub course content appears in your Class instead of the default Course Content.
Enabling ELMS and Sync your LMS and Class
To enable ELMS first go to the your course on the Learning Hub and do the following:
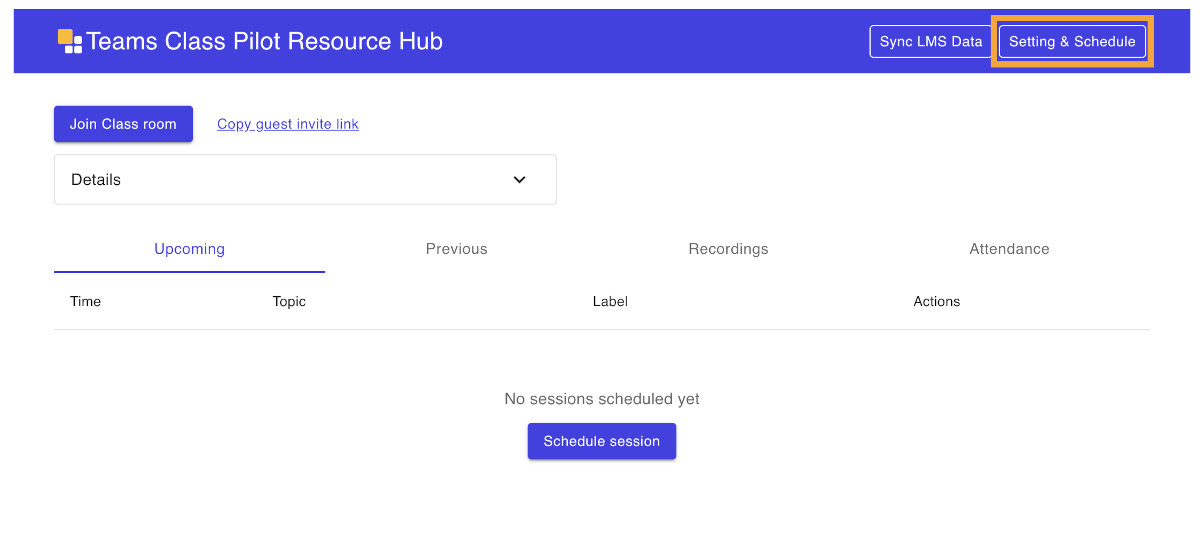
- Click on Activities > Class for Teams.
- Click on Settings & Schedule (or Schedule Session if you have created Class sessions yet)
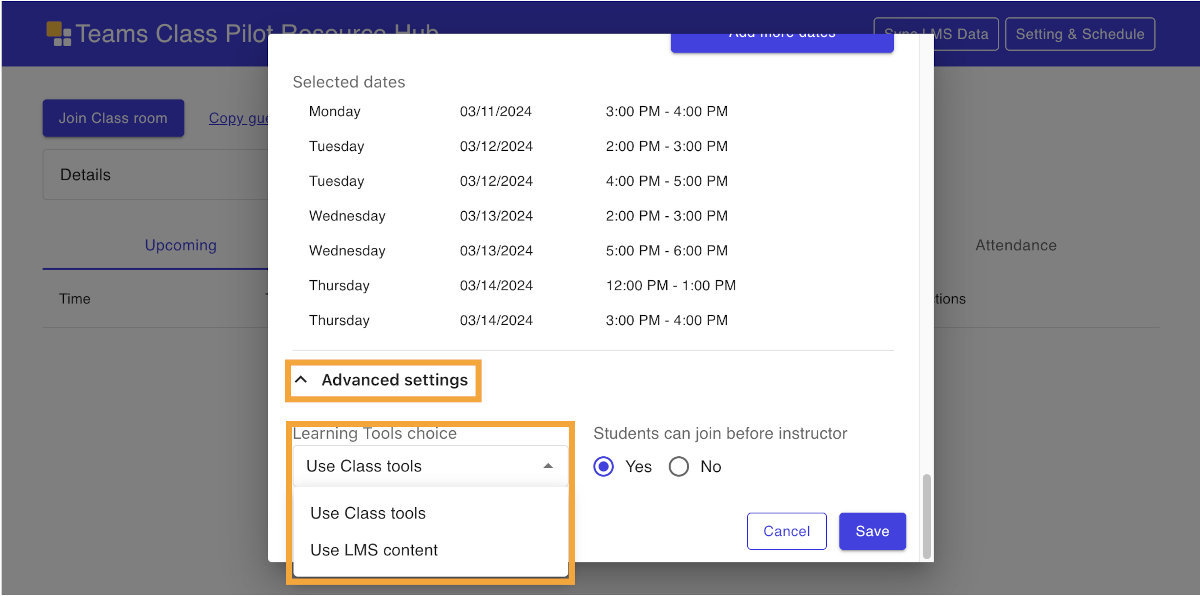
- Go to Advanced Settings and locate Learning Tools Choice
- Select Use LMS content and then click Save
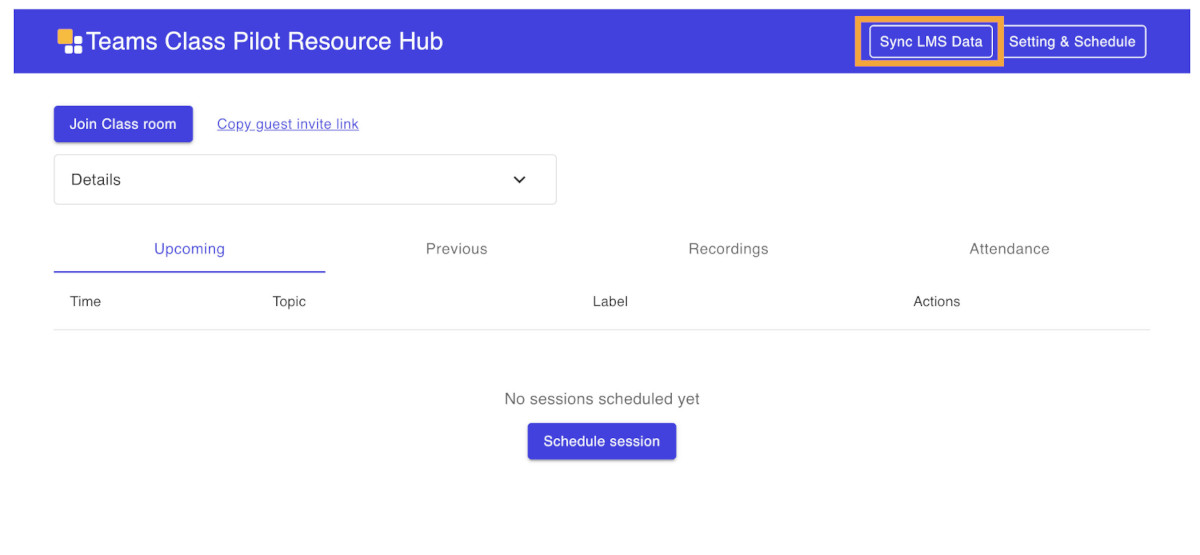
- Click on Sync LMS Data
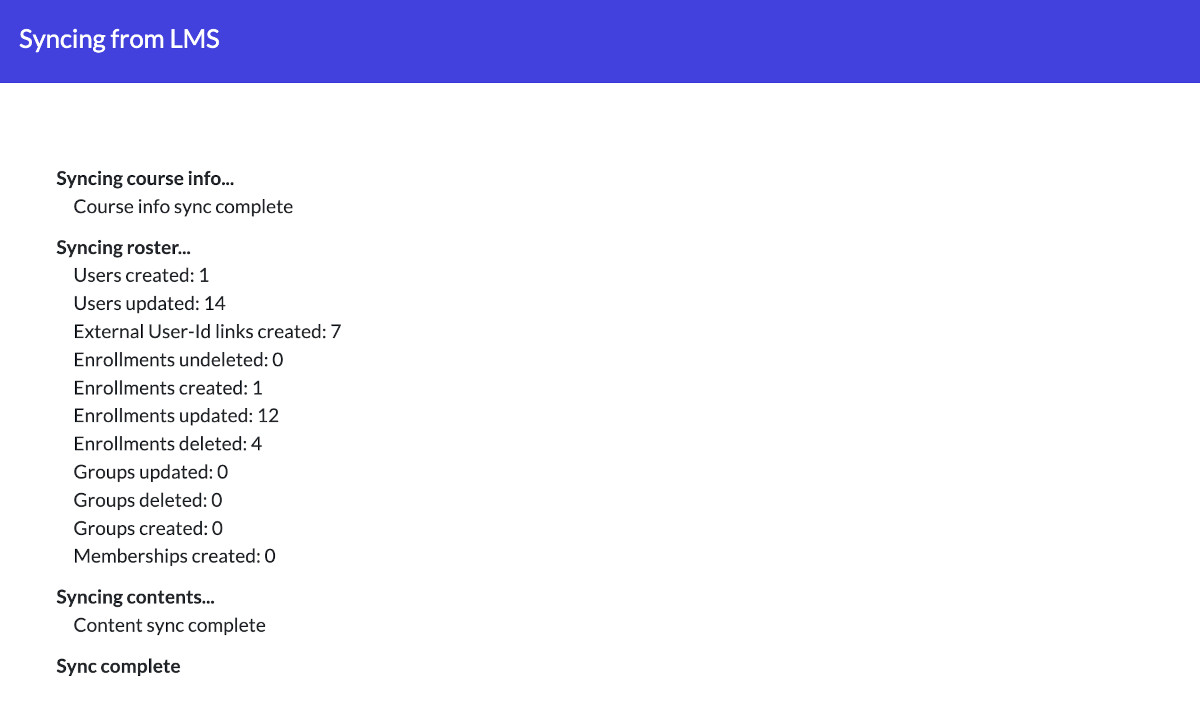
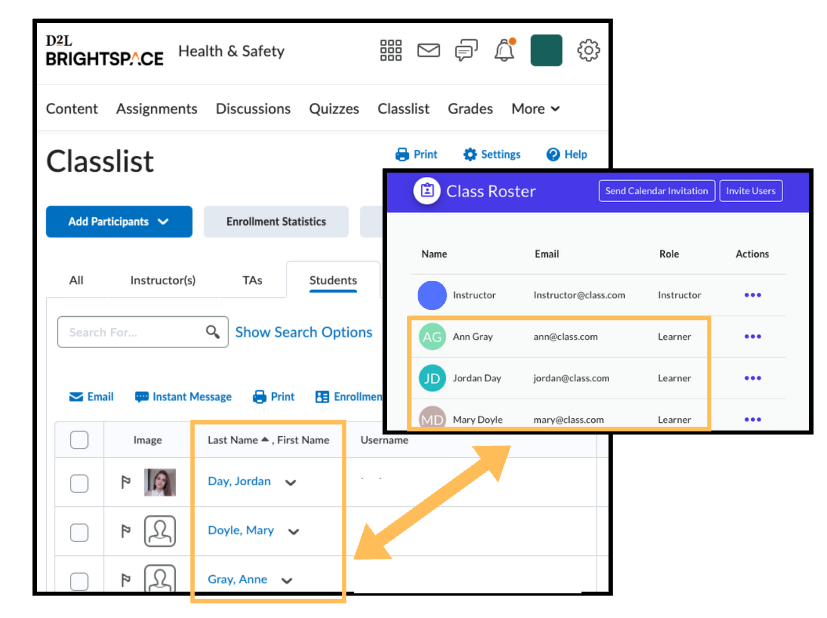
Roster Synchronization
The ELMS integration pulls the list of learners from the Classlist in your Learning Hub course, and automatically adds them to the Class Roster. This means that:
- You’ll be able to see instantly which of the learners enrolled in your course are in the room, and which are absent, including those who have yet to join a Class session.
- All learners from your course will appear in the attendance report, not just those who have joined a Class session.
- All learners from your course will appear in the engagement report, not just those who have joined a Class session.
What happens someone is removed from the Classlist of the Learning hub?
If you ask an administrator to remove a learner from a Learning Hub course for you it will remove them from the Class Roster as well, and the data associated with their previous attendance and activity will not be available anymore. However please note that any changes do not automatically take affect until you either click on Sync LMS Data from the Learning Hub Class tool or wait until 12am the next morning when Class will auto sync all Learning Hub courses with ELMS enabled.
Please note that if you add a learner or instructor to the Class Roster in Class, it will not add them into the Classlist of your Learning Hub course. Alternatively if you remove a learner or instructor from the Class Roster, the learner or instructor will remain inside the Classlist of your Learning hub course.
Sections and Groups Synchronization
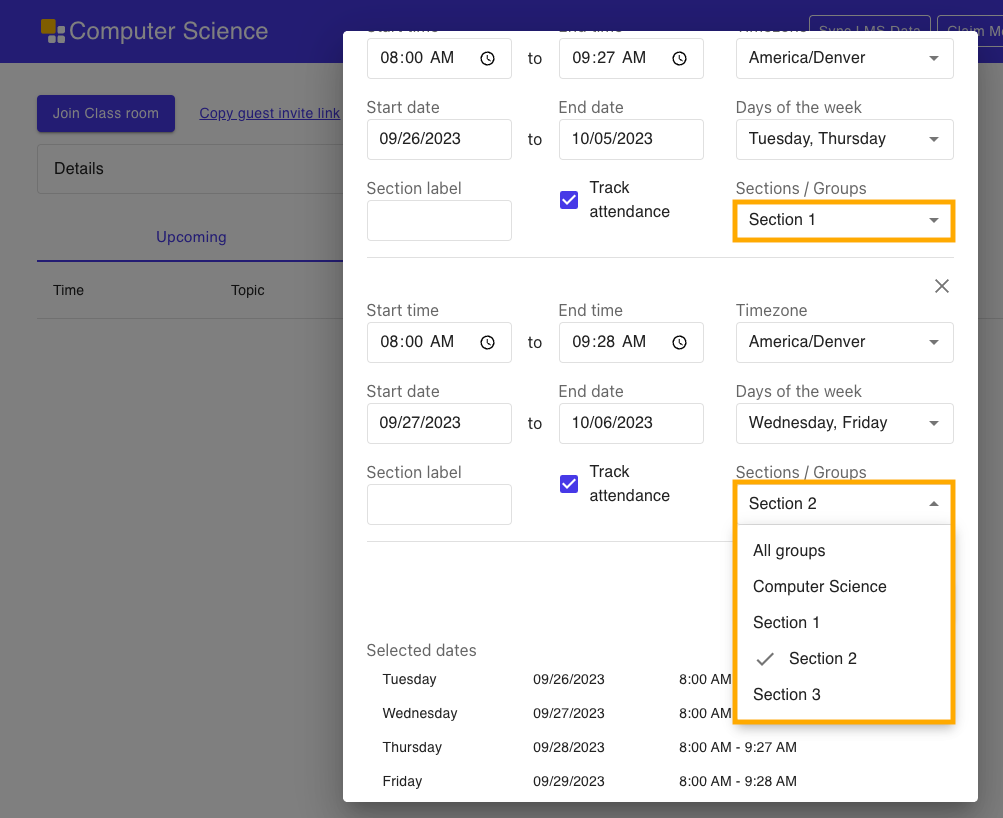
The sections and groups synchronization pulls which section each learner is enrolled in. Sections and groups synchronization is enabled automatically.
When you designate the times your course meets, you may attribute a section to each time. Class will only track attendance and engagement for learners in the designated section. Learners will only see recordings for classes that match their section. Depending on your configuration, learners may only see the option to join your Class during their section time.
How do I use sections and groups sync?
If your course has different sections that meet at different times, you can designate those times when you set up the course. Your attendance reports will be broken up by section. You’ll only see absent students in the current section.
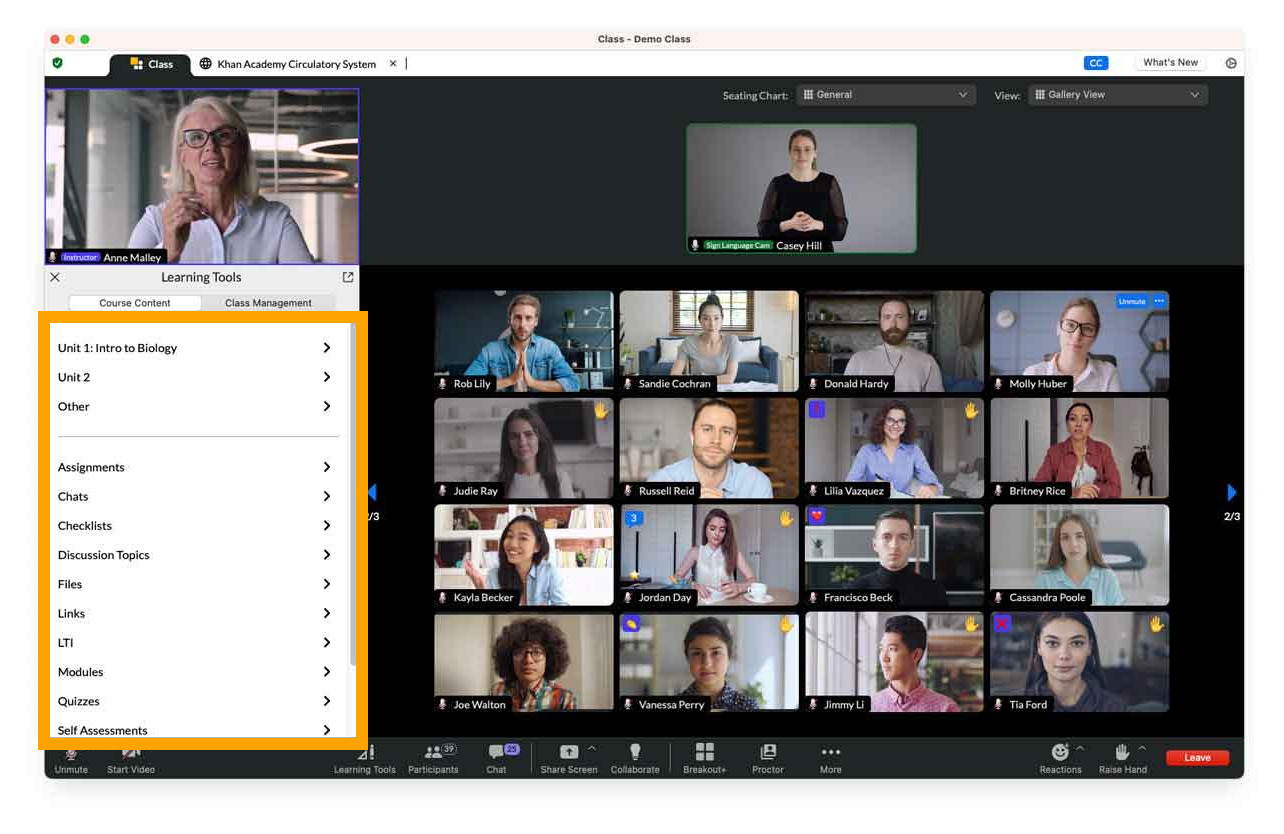
Content Synchronization
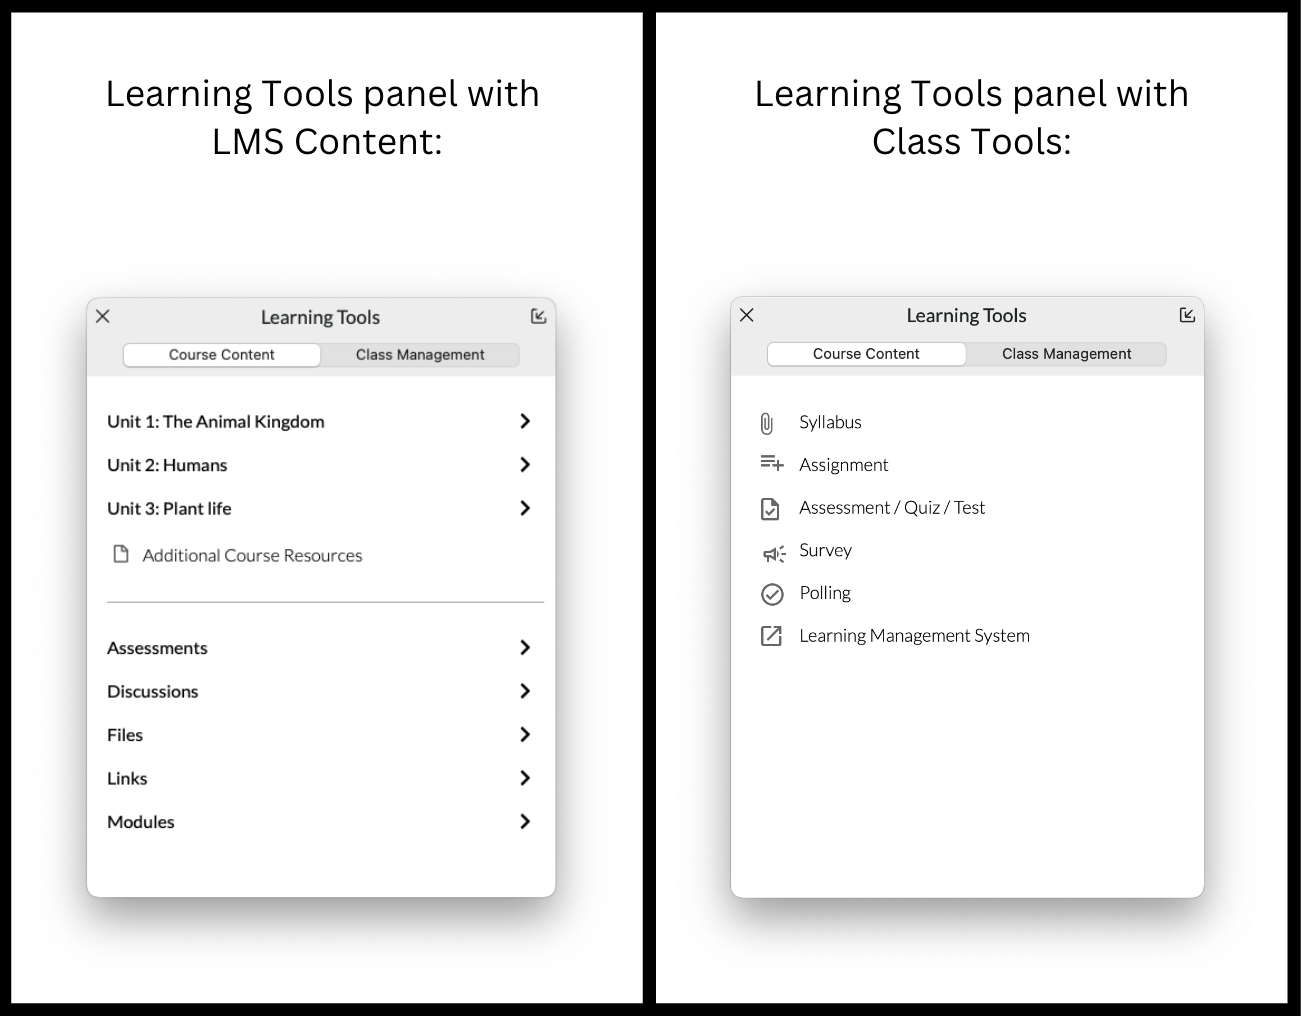
Content synchronization puts your Learning Hub course content directly into the Class Learning Tools panel. Only the instructor can see this panel in Class. When launched by an instructor, Learning Hub content will appear as a new tab for students as well.
Content is sorted in two ways:
- In the order it appears in your course at the top of the panel.
- Grouped by content type at the bottom of the panel.
Within a container, the order of items may not exactly match the order in your course, especially if you’ve moved them around. In some cases it will download the file rather than show it embedded. For example, for MS Word and MS Powerpoint files.
One thing to note is that if your Learning Hub content has a release condition associated to it then students will not be able to see that content unless they have met that release condition. The same thing will happen if you have content in your course that is not visible to students but visible to you, students will only see what is visible to them.

How is the course content in Learning Tools different from the native class tools?
| Feature | LMS Course Content Experience | Native Class Tools Experience |
|---|---|---|
| Direct link to all LMS course content | On | Off |
| Class Syllabus | Off | On |
| Class Assignments | Off | On |
| Class Assessments/Quizzes/Tests | Off | On |
| Class Surveys | Off | On |
| Class Polling | Off | On |
| LMS Login Portal | Off | On |
| Other Class features such as podium, hand raise, whiteboard, and so on | On | On |
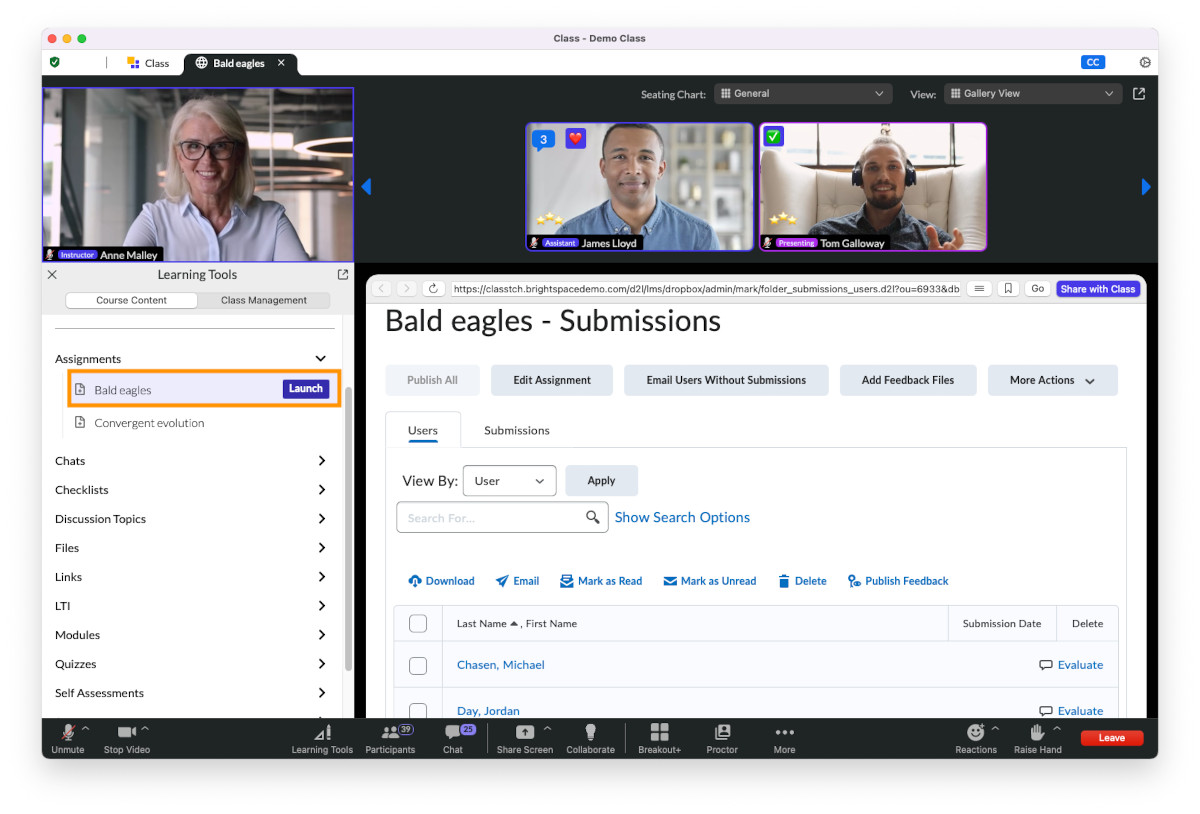
How do I use the course content?
- Join your Class session.
- Select Learning Tools.
- Find the content you want to share and select Launch.
After you share the content, you’ll see the instructor view, and your learners will see the learner view. For example, if you launch a quiz, the instructor can see submissions and edit controls, whereas each learner can see and take their quiz.
Why can’t my class see something I’m sharing?
The content sync pulls all content in your course. Including content your learners don’t have access to. For example, unpublished content, or content with release conditions. If you share something learners don’t have access to, they’ll see a blank page or an error message.
Can I switch between Class tools and Learning Hub (LMS) content?
You can.
- Go to the Class tool in your Learning Hub course. Find it under Activities > Class for Teams
- Select Setting & Schedule.
- Expand Advanced settings.
- Use the Learning Tools choice menu to switch between LMS content and the native Class tools
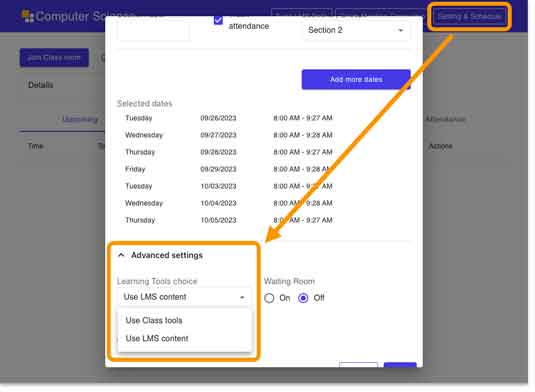
- Click on Sync LMS Data
Related Posts
