


- Resource
- Uncategorized
- Kaltura Capture – Install Capture for Windows
Kaltura Capture – Install Capture for Windows
This guide walks you through downloading and installing Kaltura’s desktop recording app, Capture, on Windows.
Desktop Only
Kaltura Capture is not supported on mobile or tablet devices.
Where to find the app
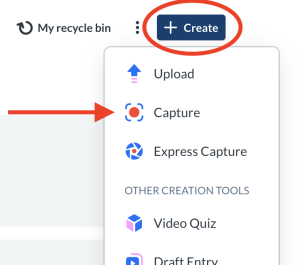
Capture isn’t available in app stores or public download sites – you download it directly from the Capture page found inside My Media. Go into your Learning Hub course, then from the top navigation bar, select My Tools and then Kaltura My Media. Click +Create and then select the Capture option
After clicking Capture in the menu, you’ll be directed to the page to download the application.

Select Download for Windows to begin installing Kaltura Capture.
Ignore pop-up
If you see a pop-up similar to the one below please ignore this and move on to the next step.

Once initiated, a progress bar like the one below will appear.

When the download is completed, you will see a file called ‘KalturaCapture‘ in your downloads folder.

Install Wizard
In your downloads folder, find the KalturaCapture file and click Open File. The Welcome to the Kaltura Capture Setup Wizard screen displays.

Click Next. The Installation Settings screen will display.

Set a custom directory (optional)
You can set the recordings folder to a location that’s easier to access. Delete the path after your username in the Recordings Folder field and enter a new location, such as “desktop.”

Click Next. The Ready to install Kaltura Capture screen will display.

Click Install to begin the installation. A progress bar will display.

When the installation is completed, you will see this screen.

Click Finish.
Troubleshooting Capture
Error messages
If you see error messages when trying to start or stop a recording, ensure that Capture has permission to access your camera and microphone. After adjusting permissions, restart your computer and try again.
Enable camera access
Open your Windows settings by clicking the Start menu and clicking the Settings icon (or press Windows + I on your keyboard), or by right-clicking the Start icon and selecting Settings from the menu.

The System page displays by default.

In the menu on the left, click Privacy & security.

The Privacy & security list displays.

Scroll down to Camera in the list and click it to open its settings

The Camera settings display.
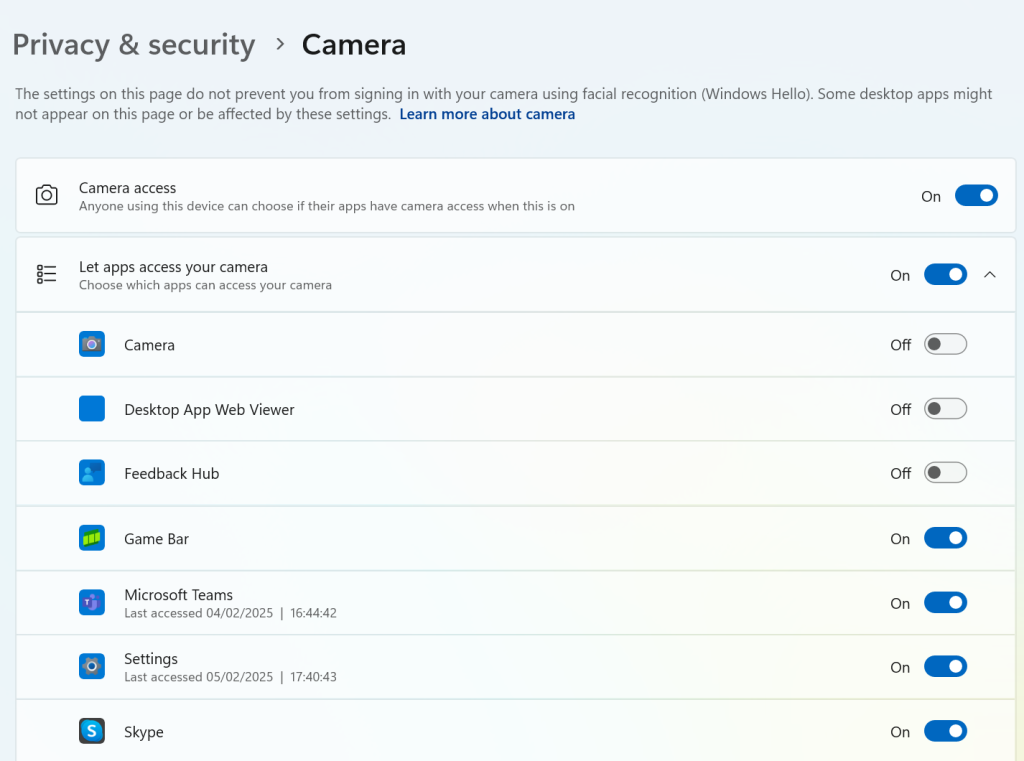
In the Camera settings, scroll down to Let apps access your camera and confirm that Kaltura Capture is listed and enabled.

Enable microphone access
Start by opening your Windows settings by clicking on the Start menu. Click the Settings icon and then click Privacy and security. In the Privacy & security list, click Microphone.

Scroll down to Let apps access your microphone and confirm that Kaltura Capture is listed and enabled.

You may have to restart your computer for the changes to take effect.
Related Posts
