


- Resource
- Class Progress - Instructor
- Class for Teams – Inviting guests into Class for Teams
Class for Teams – Inviting guests into Class for Teams
Access to Class for Teams virtual classrooms is secured so that it should be done through the BCIT Learning Management System (The Learning Hub) first.
Anyone accessing Class for Teams at BCIT should do so through the Learning Hub, using the Activities > Class for Teams option in the course navigation bar. This method ensures that individuals enrolled in the course Classlist of the online course authenticate into the associated Class for Teams virtual classroom.

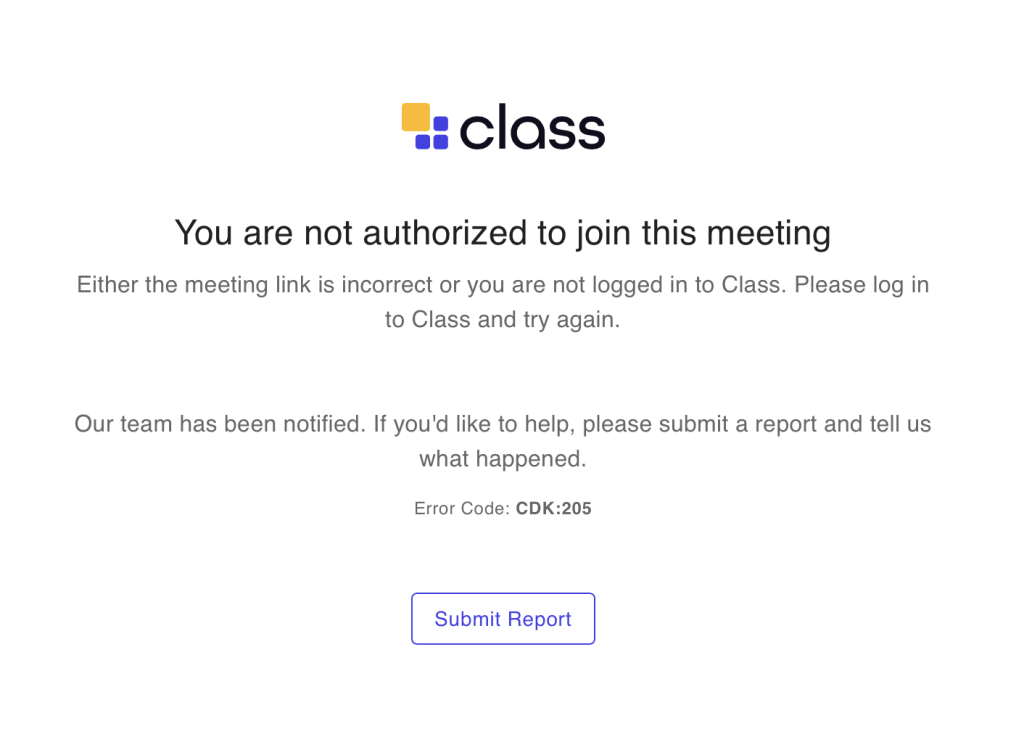
Guests who do not have access to the Learning Hub
Guests who do not have access to the BCIT Learning Hub can only join a Class for Teams classroom through a shared link sent to their email by the course instructor. If you are a guest and have clicked on a link to access Class for Teams you might see one of the following errors:

INSTRUCTORS ONLY - Invite guests using the Class Roster
The method for inviting guests to your Class for Teams session is via the Class Roster tool. This approach allows you to assign specific access rights to each guest and revoke their access when it’s no longer needed.
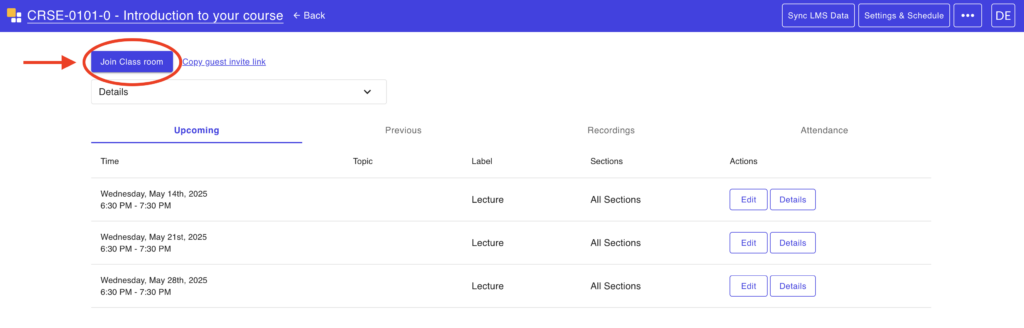
To invite guests through the Class Roster in Class for Teams, begin by entering your Class for Teams classroom.
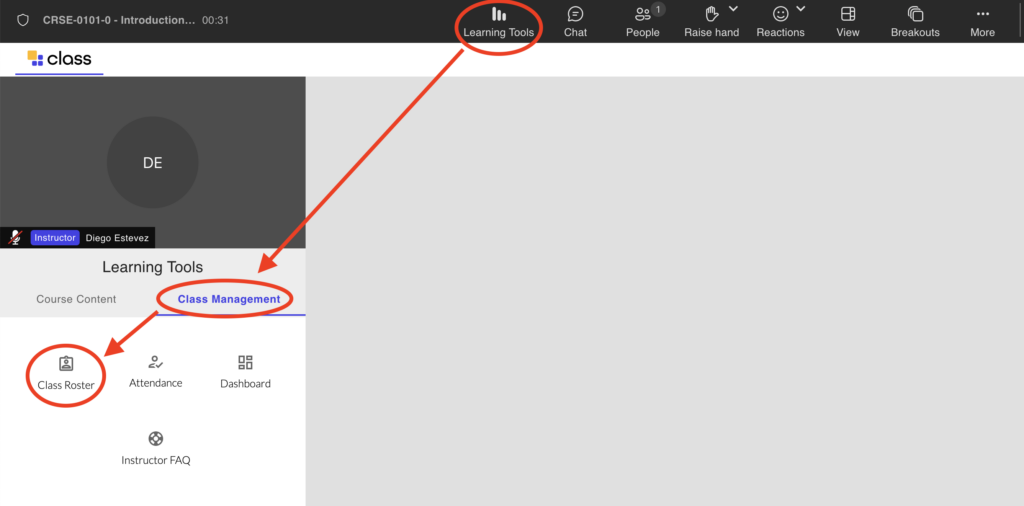
Next, click on Learning Tools in the top navigation bar. Then click on Class Management, followed by Class Roster.
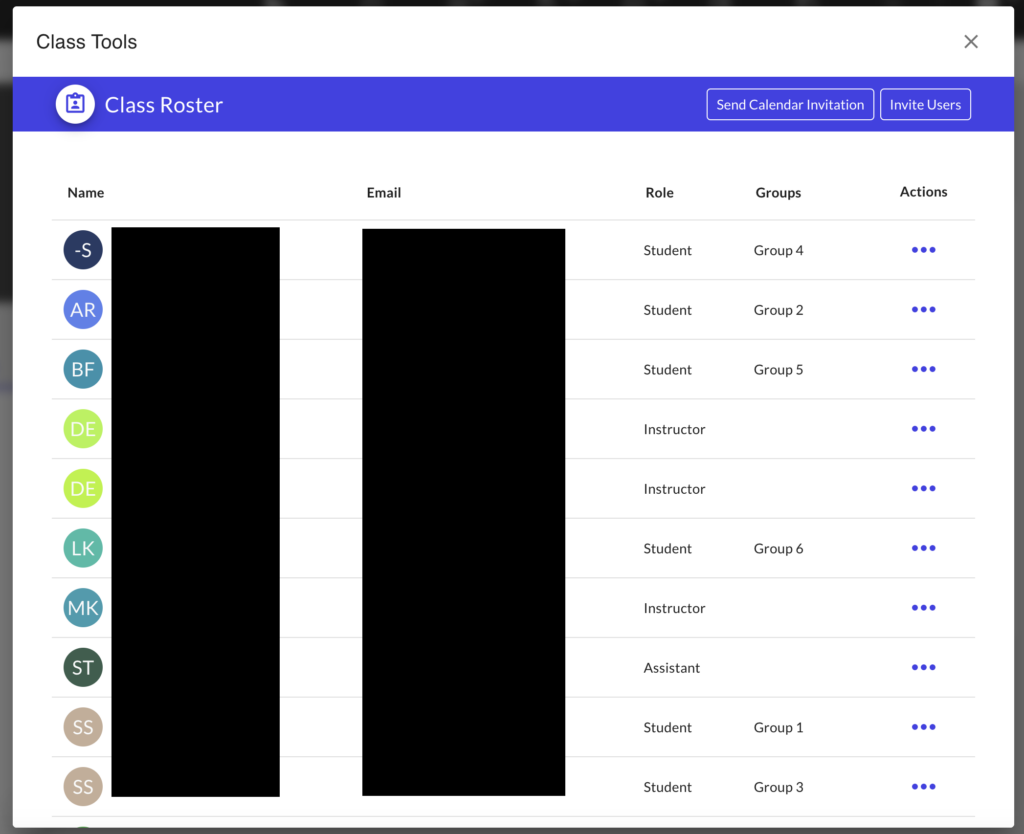
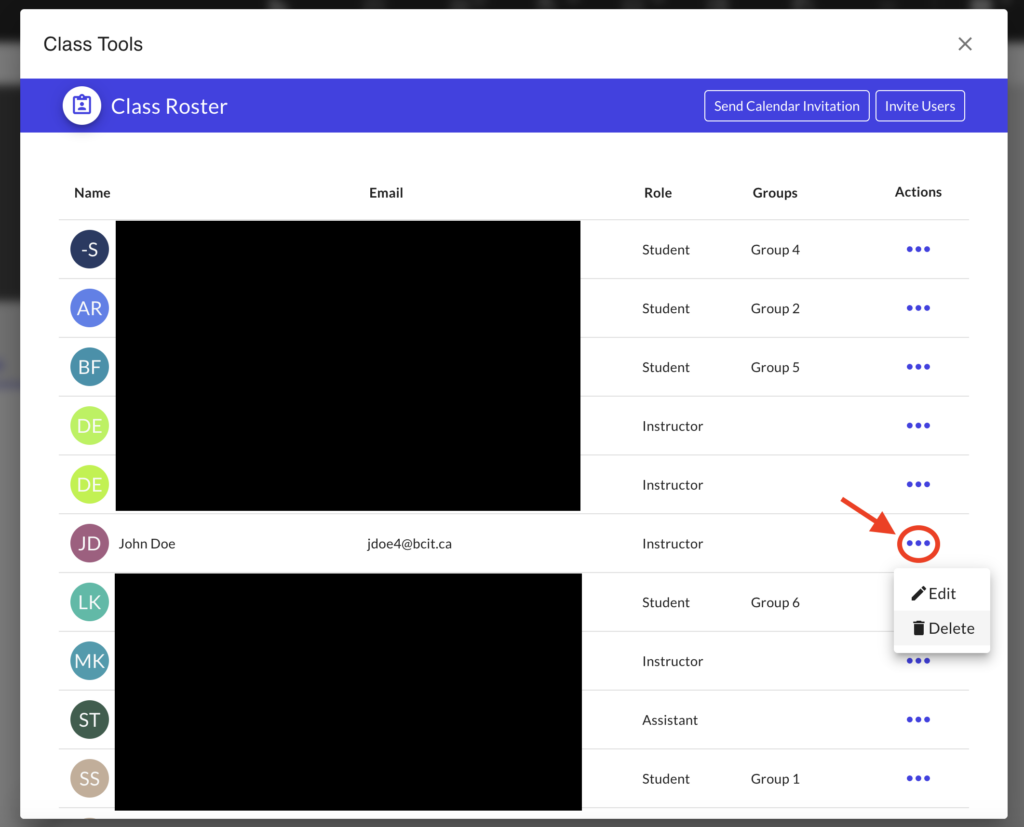
You will now see a list of all students and instructors in the Class for Teams classroom.
Note: Students from the Classlist are enrolled here automatically every 24 hours. If this is not the case please click on Sync LMS Data to manually sync the student Classlist
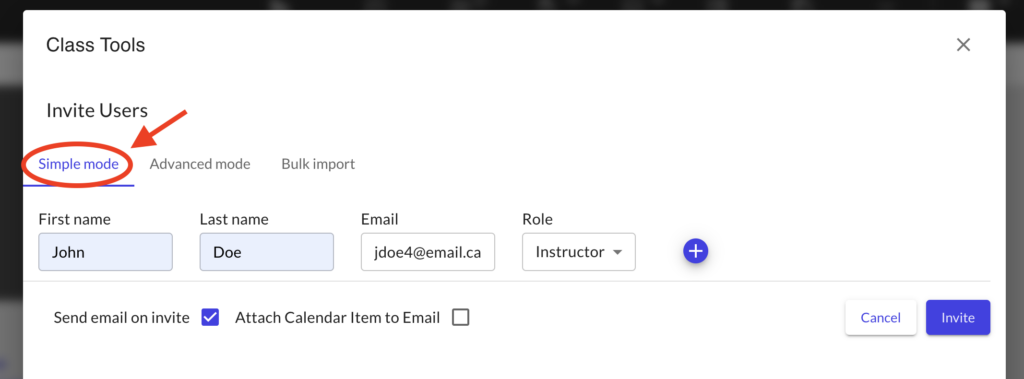
Click the Invite Users button. Under the Simple Mode tab, enter your guest’s first name, last name, and email address. Assign them either the Student or Instructor role, and check the box labeled Send email on invite (you can leave the other option unchecked). Then, click Invite.

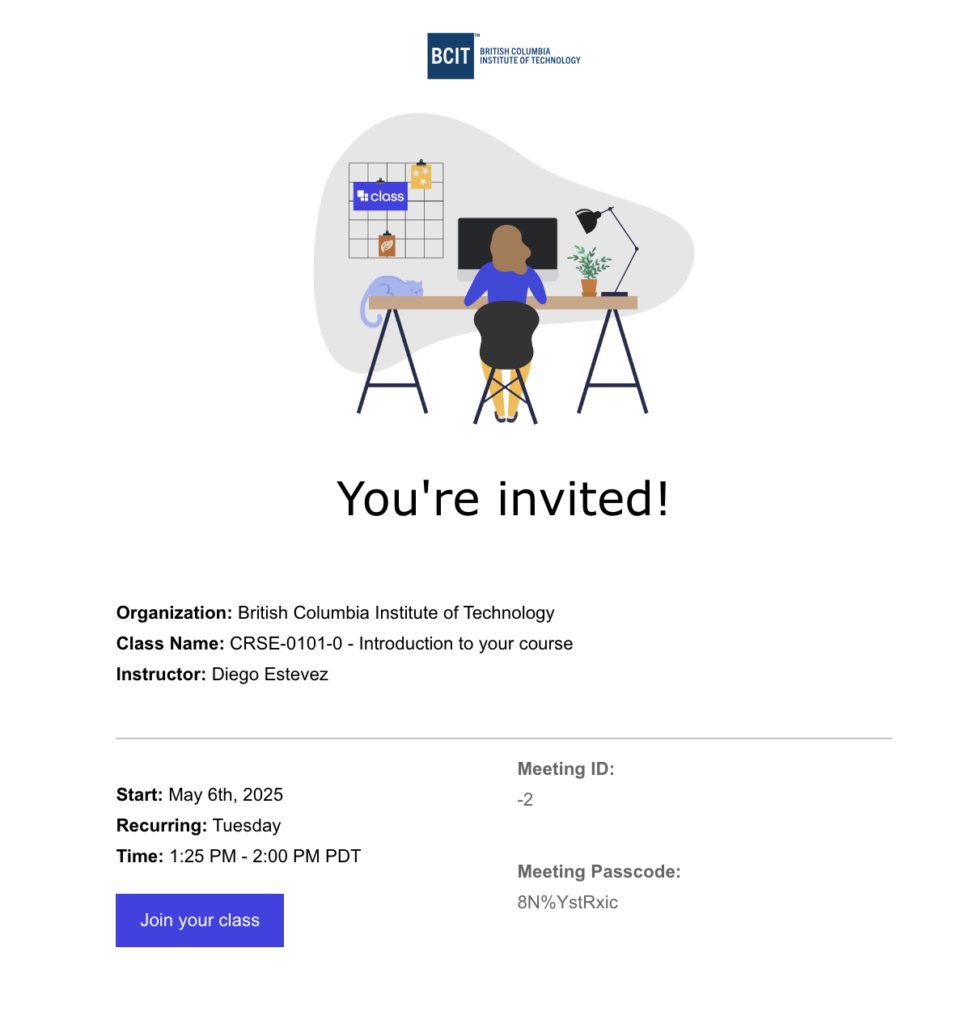
An access link to your Class for Teams classroom will be sent to your guest’s email. Using this link, the guest can enter the classroom with the role you assigned.
Important: Please ask your guests not to share this link as it grants full instructor (or student access) to anyone using it.
When guests no longer need access, it’s recommended that you remove them from your Class Roster. Invite links do not expire, so removing them is the only way to prevent further access. To do this, return to the Class Roster and click the trash icon next to the guest’s name. Once removed, even if they still have the link, it will no longer function, and the guest will be unable to enter your Class for Teams classroom.
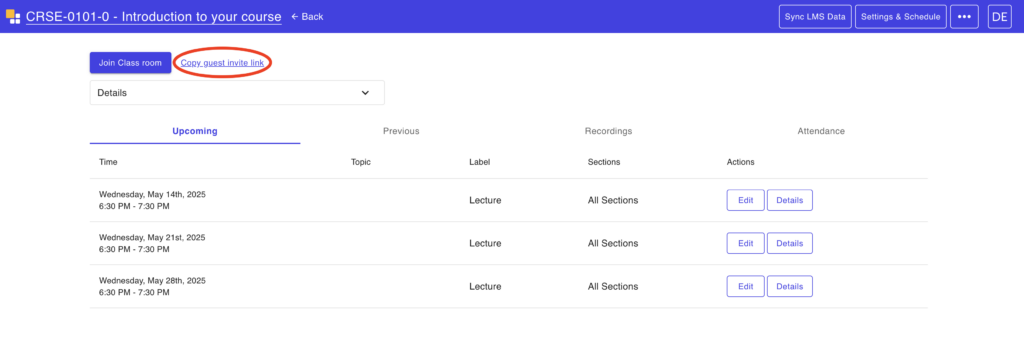
DO NOT USE THE COPY GUEST INVITE LINK
Please do not use Copy guest invite link to invite Guest users or students. This link does not work for external users and will make students in the Learning Hub enter the Class with a guest account limiting their ability to participate fully in class. Unfortunately we cannot remove link this from the admin side as it is pre-built into the Class for Teams application itself.
Related Posts
