


- Resource
- Assignment - Instructor
- Assignments – How to Create
Assignments – How to Create
The assignment tool allows:
- You to create and deliver assignments
- Your learners to submit their assignments to you
- You to grade and provide feedback
Everything that occurs in the assignment tool is archived with your course and all learner activities are time stamped. Rubrics can be integrated with assignments. If associated with a grade item, grades are automatically posted to the course Grades area.
Steps for creating and using an assignment
Create a new folder
Go to your course > select Activities > Assignments > New Folder

Set up the Assignment
Customize your assignment settings – give your assignment a name and include instructions. ** Optional – upload any attachments, add links, include audio/video instructions.
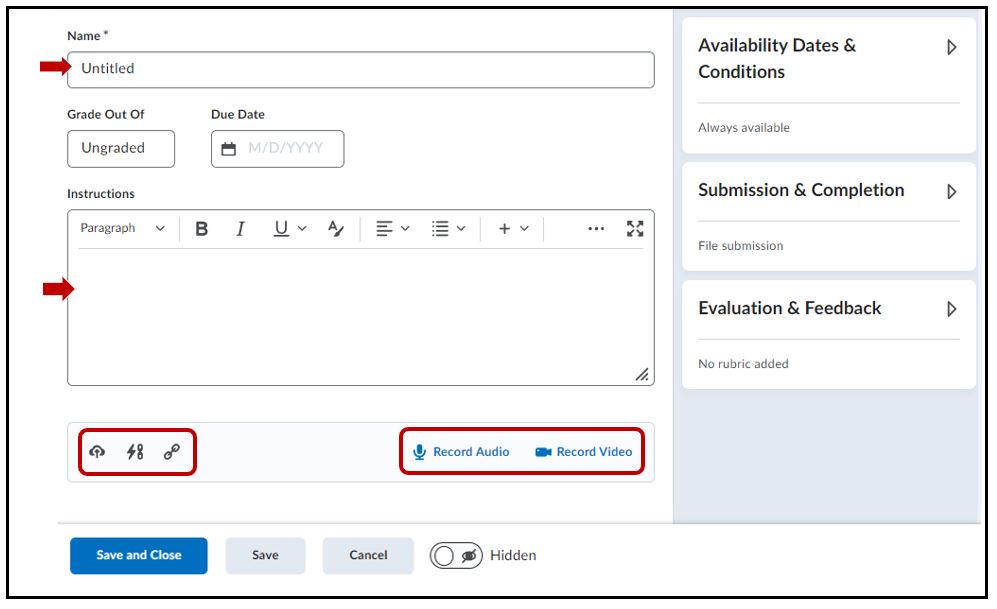
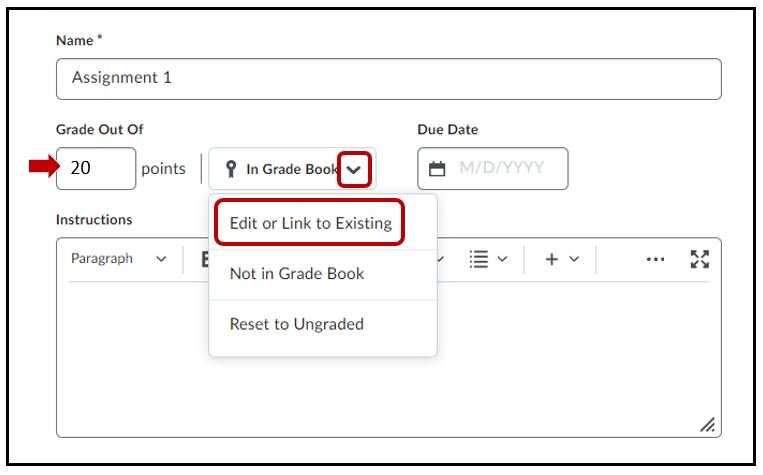
Under Grade Out of box, enter the point value of the assignment. Optionally, select the In Gradebook dropdown and select Edit or Link to Existing
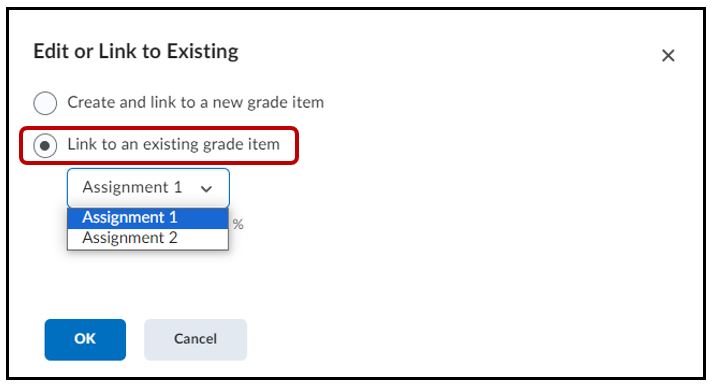
Select Link to an existing grade item > locate and choose the Grade Item (eg. Assignment 1) > OK
If you do not have a grade item for this assignment, you can create a grade item from within the assignment. Select Create and link to a new grade item > OK
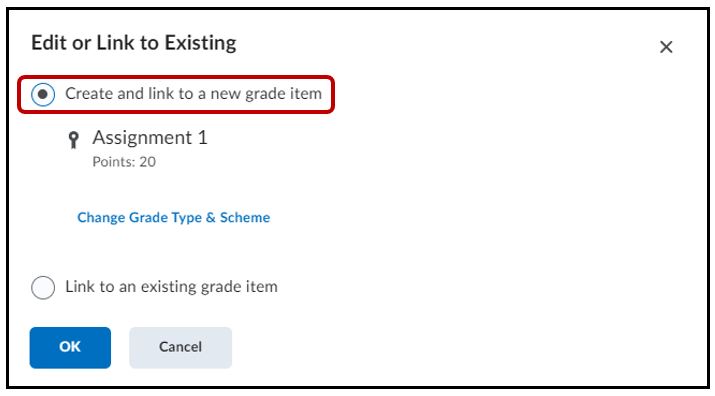
The system will automatically create a grade item and name it the same as the assignment.
Set a start and end date
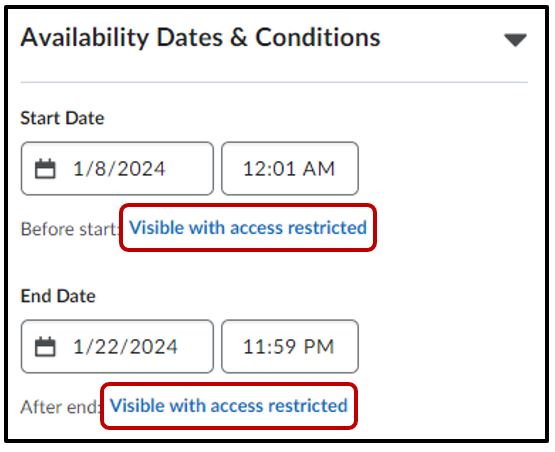
Expand the Availability Dates & Conditions accordion > enter a Start Date/Time and End Date/Tim
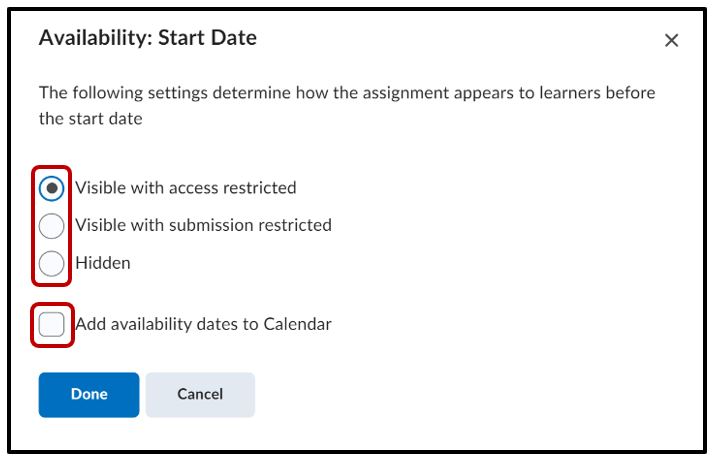
Availability: Start Date. The following settings determine how the assignment appears to learners before the end date. The 3 options are
Under the Start Date > select Visible with access restricted option. This gives you 3 options to choose from
- Visible with access restricted – this option shows the title of the assignment with the available dates. No access to the assignment
- Visible with submission restricted – this option allows users to see the instructions, start/end dates and submission is not possible
- Hidden – the assignment is hidden until the start date/time
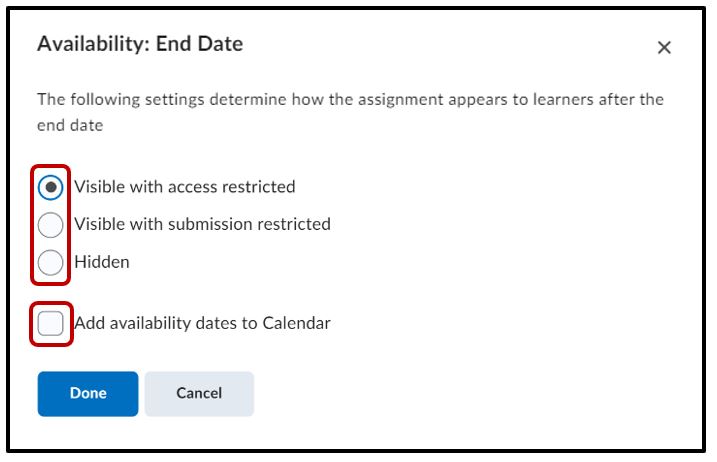
Availability: End Date. The following settings determine how the assignment appears to learners after the end date. The 3 options are
- Visible with access restricted – this option shows the title of the assignment with the available end date. No access to the assignment
- Visible with submission restricted – this option allows users to see instructions, start/end dates but submission is and possible is not possible
- Hidden – the assignment is hidden after the end date/time has passed
Select Add availability dates to Calendar if you want the start or end date available in your course calendar.
Note: You can also click the link below the start and end date fields to change the default settings for availability dates. When you collapse Availability Dates & Conditions, the summary text displays the selected start and end date information. The default time for an assignment start date is set to 12:00 AM. The default end date time is set to 11:59 PM.
Submission & Completion
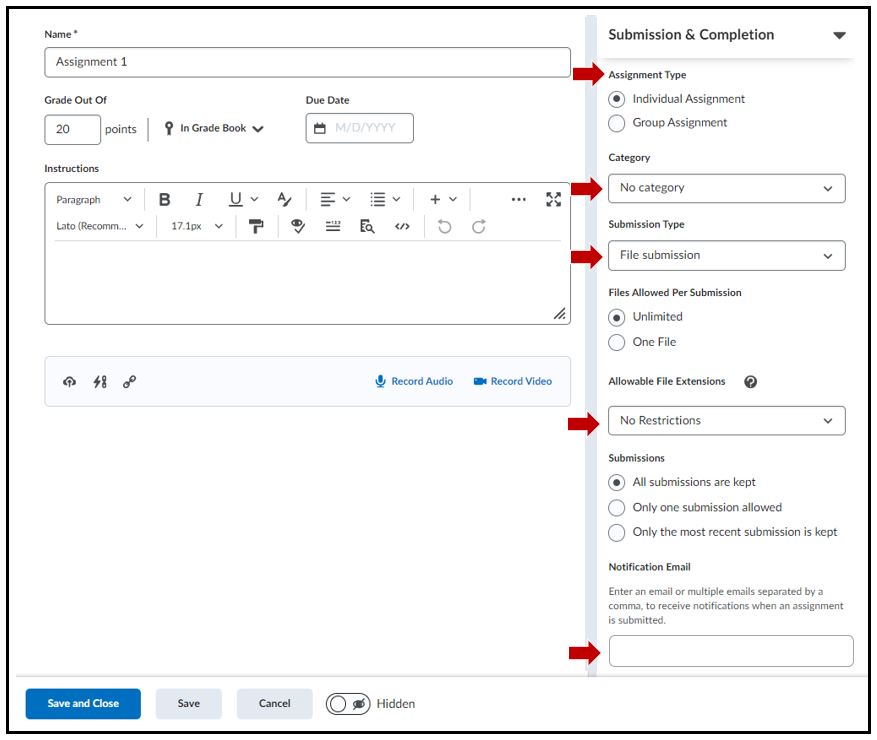
Assignment Type – select either Individual Assignment or Group Assignment
Category – lets you organize your assignment folders into categories. (Optional)
Submission Type – choose from text submission, paper submission, observed in person
Allowable File Extensions – choose desired file type to be uploaded (eg. PDF)
Email – enter email address to receive notification when assignment is uploaded
Evaluation & Feedback
Add Rubric – add an existing one or create new rubric
Annotation tools – switch on or off to make notes available for assessment
Anonymous marking – select to hide names while marking assignment
Remember to Save and Close
If you have specific questions regarding the above features including the ones not mentioned here then please call the help desk at 604-412-7444-2.
Here’s what you see when you have created several assignment folders.
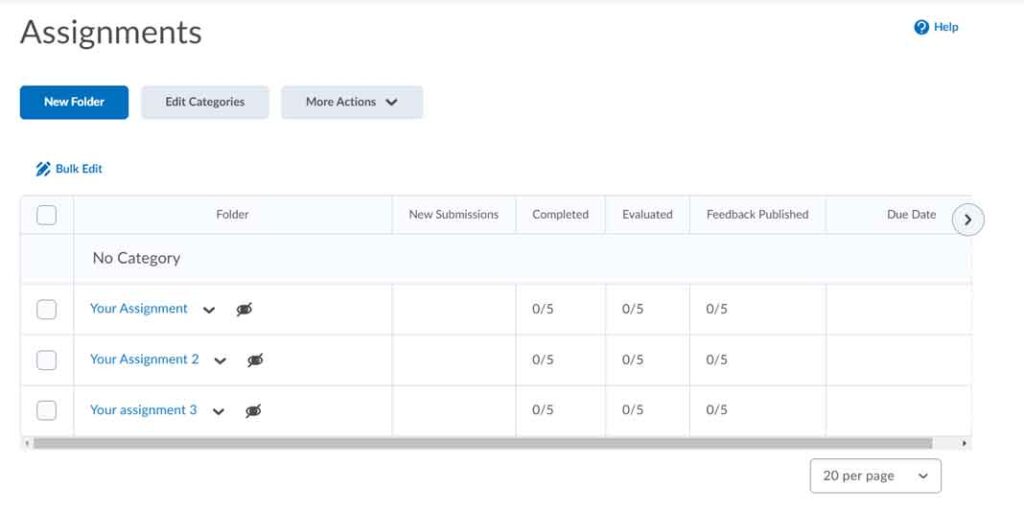
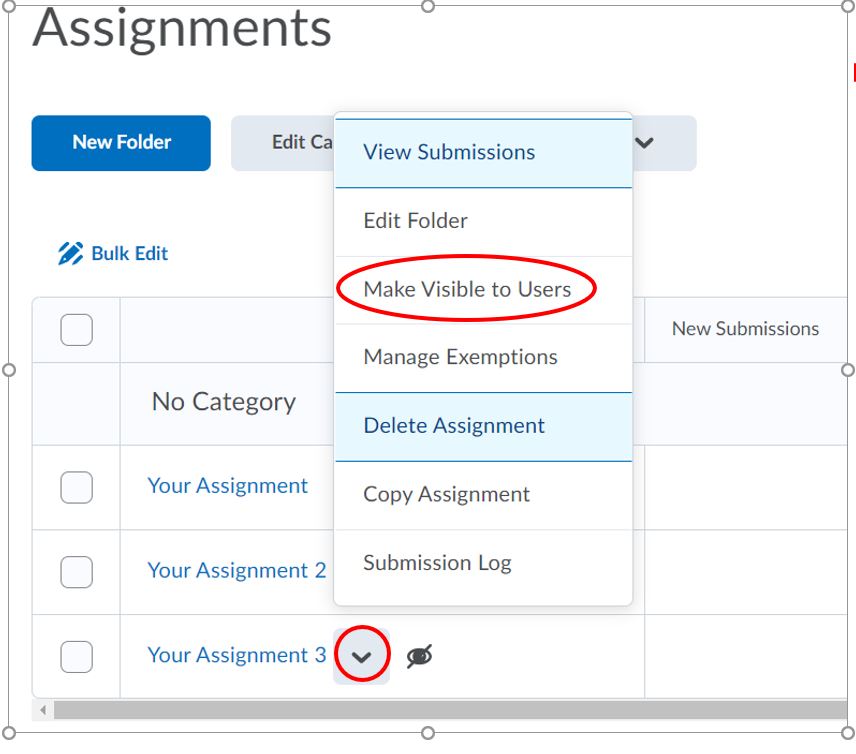
Click the drop down arrow beside each assignment. Make each assignment visible to students.
Bulk Edit & Due Dates
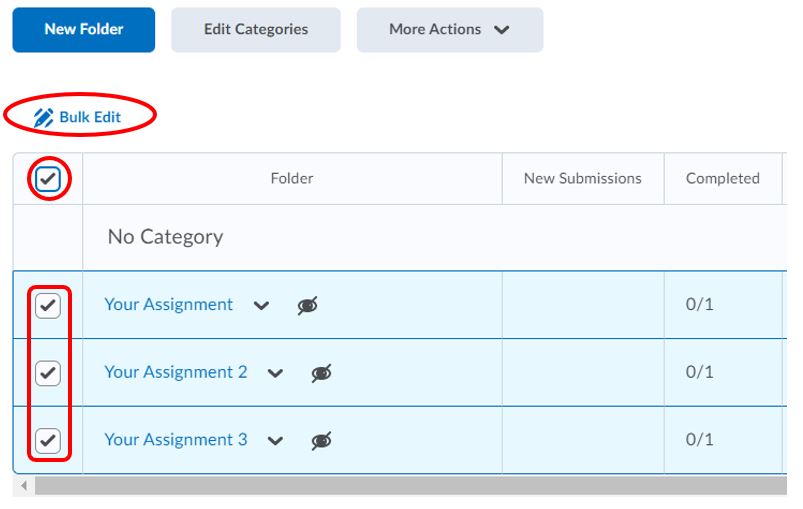
The Bulk Edit feature allows you to edit the names and set dates for several assignments at once. You can select the assignments individually by ticking the little boxes in front of each one.
You can also select all of the assignments at once by ticking the box at the top of the table. Once you select your assignments, click the Bulk Edit link.
In the Bulk Edit area, change the names, fix spelling mistakes, and/or set dates, if applicable, for all your assignments.
Due dates will show up on the calendar of the course home page and will allow students to hand in assignments AFTER that due date.
Start dates will allow students to access the assignment ONLY AFTER the date set.
End dates will not allow students to hand in after the date set.
Save your changes
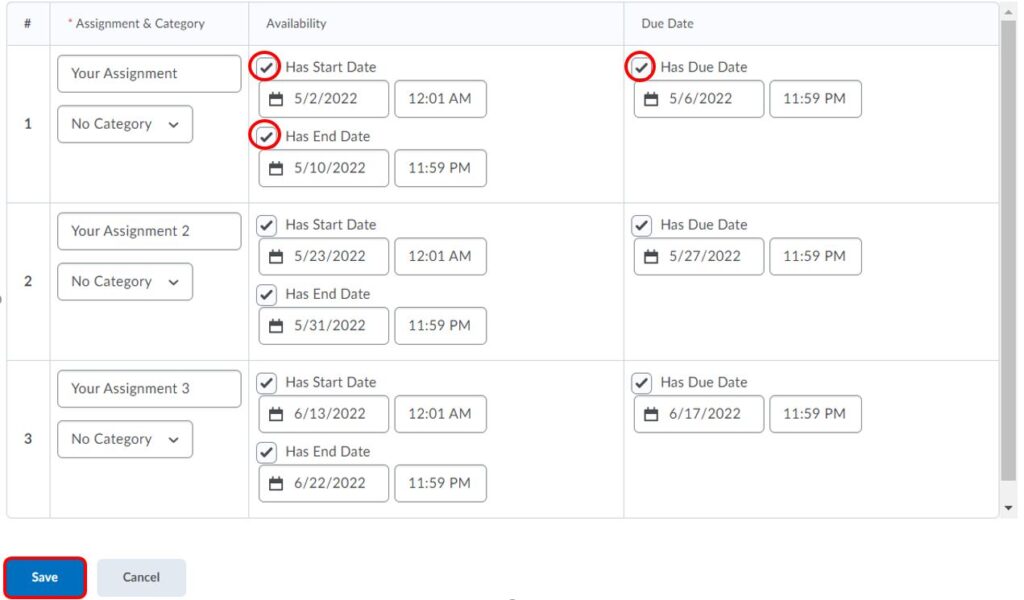
The Assignments area looks like the following when you set dates. Under the Due Date column, students can see when things are due.
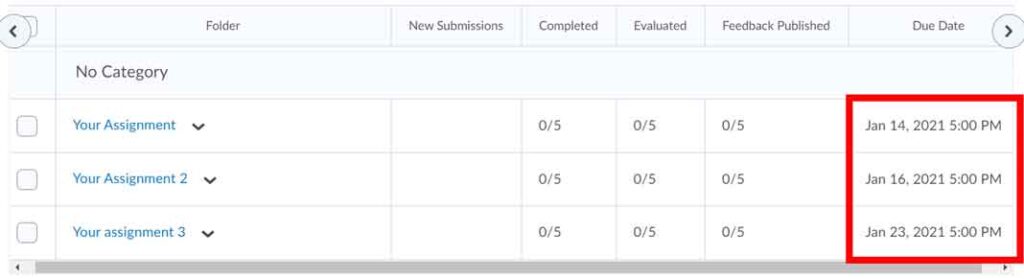
Assignment with due dates, end dates or start dates will also show up in the student’s calendar tool in the Course Home page. You will see only one of these dates for each event. Notice that “Your Assignment” has a due date, an end date and start date set, but only the due date shows. Likewise “Your Assignment 2” has a start date and an end date but only the end date shows. The hierarchy for what shows is as follows due date > end date > start date.
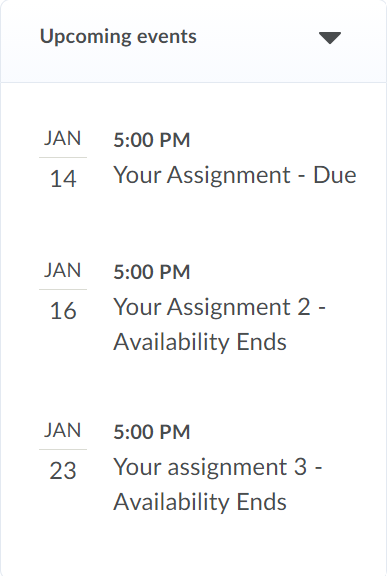
How will the Assignments info appear in the calendar?
The course calendar will display the name of the assignments folder along with an accompanying label that describes that folder’s calendar event: Available, Due, or Availability Ends.
Even if you check more than one of Has Start Date, Has Due Date, and Has End Date, the folder will get only one event, on one day, in the calendar. D2L selects on which date to show a folder’s event using the following priority order:
- Due date
- End date
- Start date
Related Posts
