


- Resource
- Uncategorized
- Kaltura Capture – Recordings
Kaltura Capture – Recordings
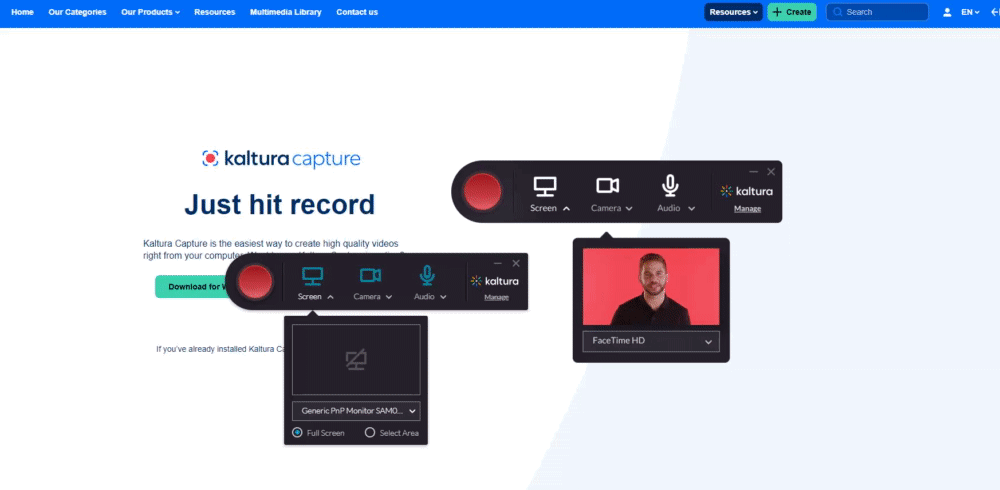
Kaltura Capture is a desktop recording application that can record your screen, camera, and/or audio. The settings are optimized for the best quality by default, so you can start recording right away without the need for additional configurations.
Before Getting Started
Before using Capture you may wish to look at the following job aids which explain how to install Capture on your device as well as the minimum installation requirements.
- For information about validating the hardware and software requirements for Kaltura Capture, see Kaltura Capture – System Requirements.
- Mac users: Make sure your system’s privacy settings allow the app to access your screen, camera, and microphone. For instructions, see Kaltura Capture – Install Capture for Mac.
- Windows users: If you encounter error messages, you may need to adjust system access settings. For instructions, see Kaltura Capture – Install Capture for Windows.
Launching Capture
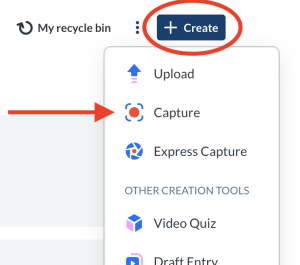
Inside My Media, navigate to the +Create button and select Capture from the drop-down menu.
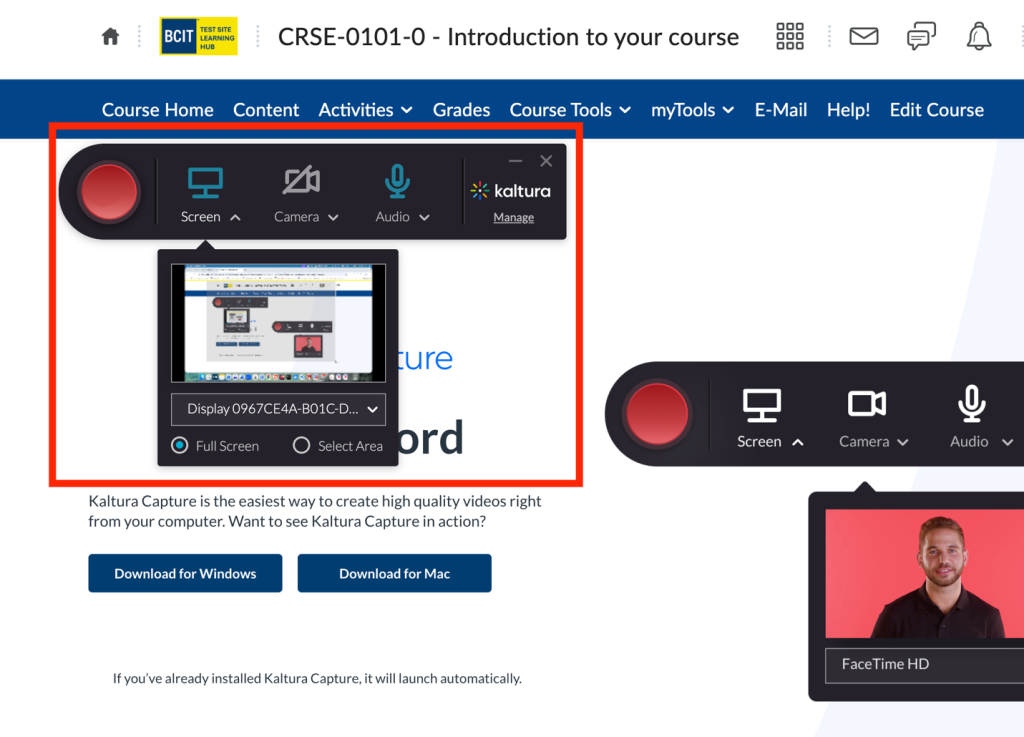
If the Kaltura Capture application is already installed on your device, it will launch automatically on your screen:
When launching the app for the first time, a pop-up message will ask to allow opening the Kaltura Capture application:
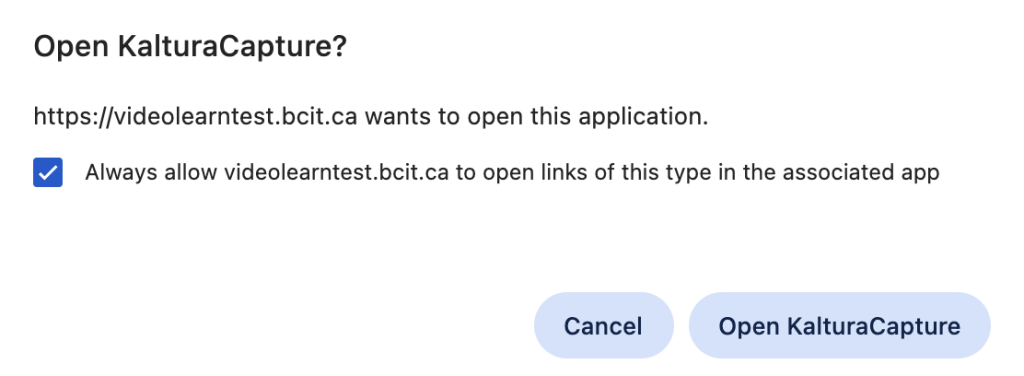
To enable automatic launching, check the box next to Always allow videolearn.bcit.ca to open links of this type in the associated app, then click Open Kaltura Capture.
After launching, a Capture icon appears at the bottom of your screen. Click it to open the app and create additional recordings during your session without returning to the Create menu.
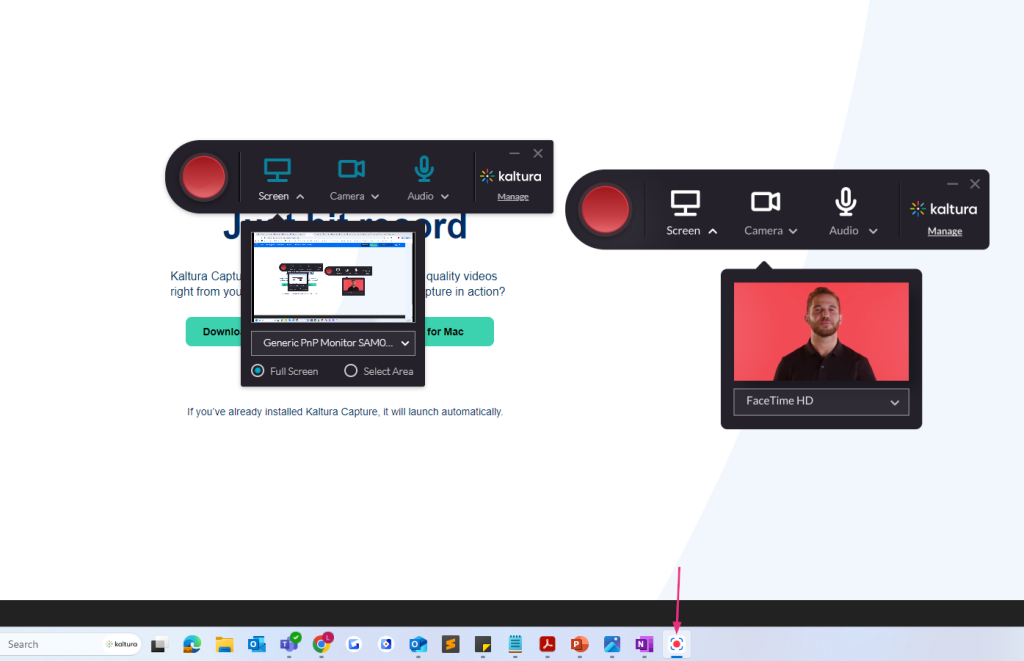
you can drag the app to any position on your screen.
The Recording Tool
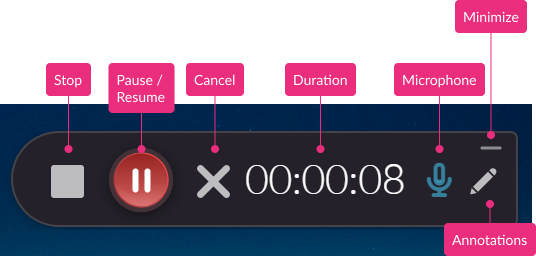
- Stop – When you stop, a warning message displays: Are you sure you want to stop this recording? Choose ‘Yes, Stop it’ to stop the recording and go to the entry page. Choose ‘No’ to return to the previous state (paused or recording).
- Pause / Resume – Click to pause or resume your recording at any time.
- Cancel – Click the ‘X’ to cancel your recording. A warning message displays: Are you sure you want to discard this recording? Choose ‘No’ or ‘Yes, Discard’. Cancelling will delete your recording.
- Duration – As you record, the timer counts up from 00:00:00 so you can track your time.
- Microphone – The microphone icon displays the sound levels.
- Minimize – Click the underscore to hide the recording menu. The Capture icon with a red dot indicates recording.
- Annotations – Use the various tools to annotate your screen during recording. For more information, please see Kaltura Capture – Annotations job aid.
Start Recording
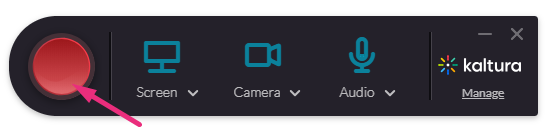
- When you’re ready to record, select your video and audio sources using the Screen, Camera, and Audio drop-down menus. If you want to remove a source entirely, click the icon to disable it.
Audio Capture
Please note that if you’re using macOS, Capture cannot record audio playing from your computer (for example, the sound from a video you’re screen recording).
- Click the red button to start your recording
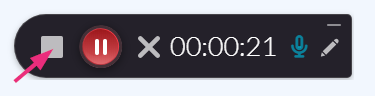
A three-second countdown begins, and then the recording starts. During the recording, the recording tool is minimized to the lower corner of your screen. If you’d like to make screen annotations as you record, you can learn about them in our article Screen annotation tools. - When you’ve completed the recording, click the grey square to stop.
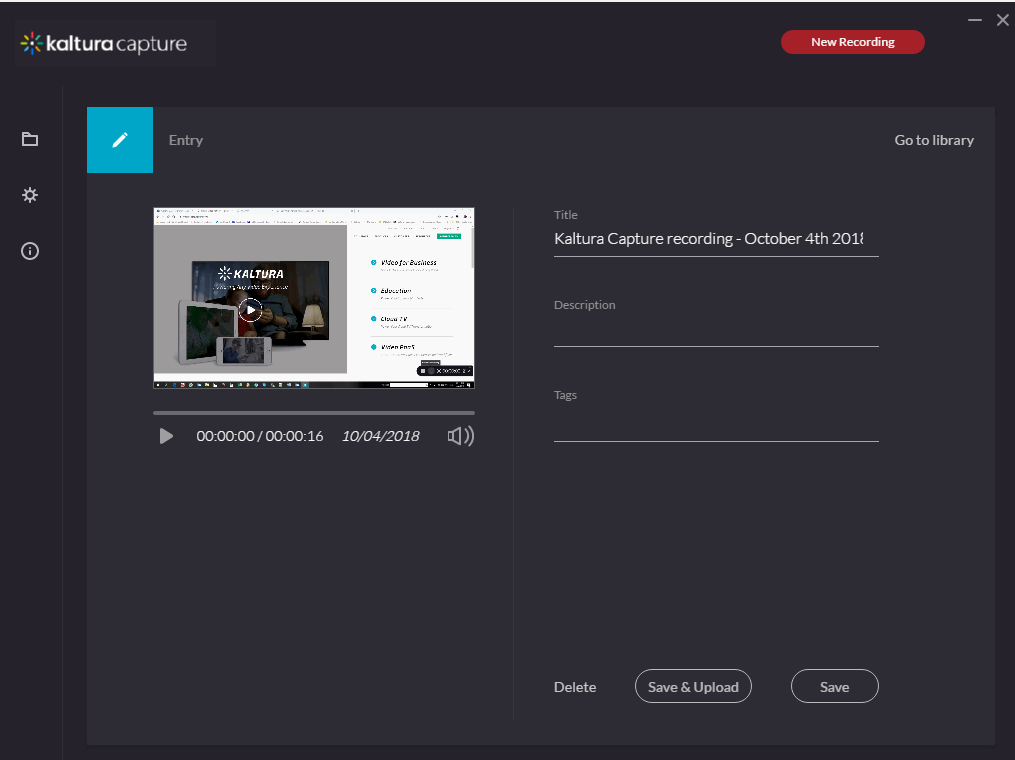
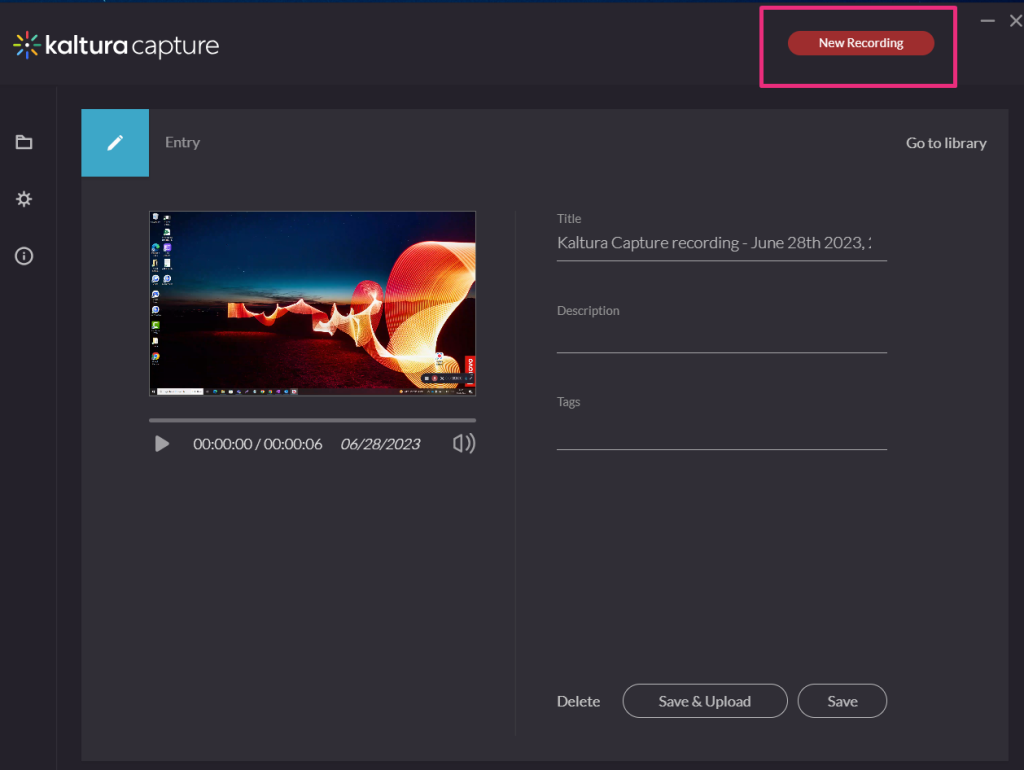
 You’ll be automatically directed to the Recording Management window, as shown below:
Manage Recordings
- To preview the recording, click the play button on the thumbnail located on the left of the recording management window.

- If you’re happy with your recording, enter the recording details of the new entry: title of the recording, description and tags.
- Choose one of the following options:
- Click Save & Upload if you want to immediately upload the entry to My Media.
- Click Save if you want to save the entry in the recording library (and then upload or delete later).
- Click Delete if you don’t want to save the recording.
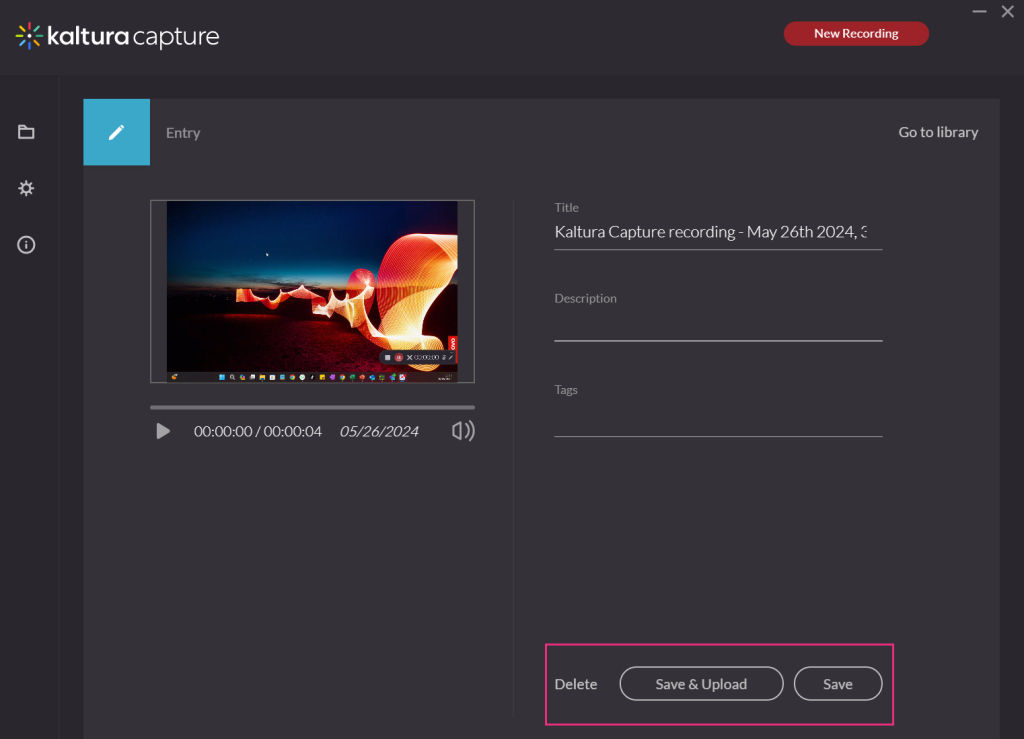 If you click Save & Upload, a pending status displays next to the entry.
 This uploads the video to your My Media.
Background Uploading
You can close the application during an upload, and your recording will continue uploading in the background as long as you’re logged into the computer. You can lock the computer, but don’t sign out. Uploading will pause if you log off.
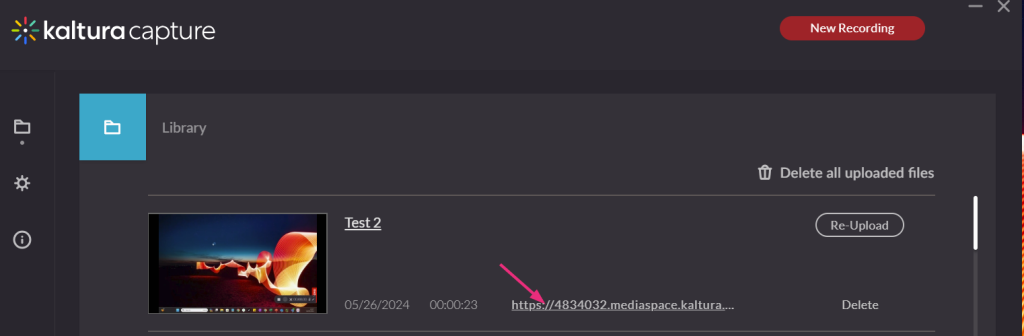
After saving, your video appears at the top of the library in the recording management window. It will remain there until you delete it.
You can click on the link to navigate to the entry in your video portal.
New Recordings
To create a new recording, click New Recording at the top right.
Capture launches automatically on your screen.
Related Posts
