


- Resource
- Course Home - Instructor
- News Items – Create, Update, Edit, Delete, Dismiss, & Pin
News Items – Create, Update, Edit, Delete, Dismiss, & Pin
The News tool is a central location for welcome messages, deadline reminders, weekly task reminders, or course updates. Here you can insert text, multimedia or links for everyone in your classlist to see
Create/Post a News Item
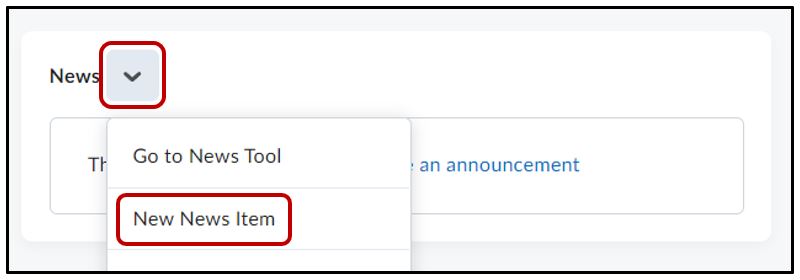
Click the drop down arrow beside News > New News Item
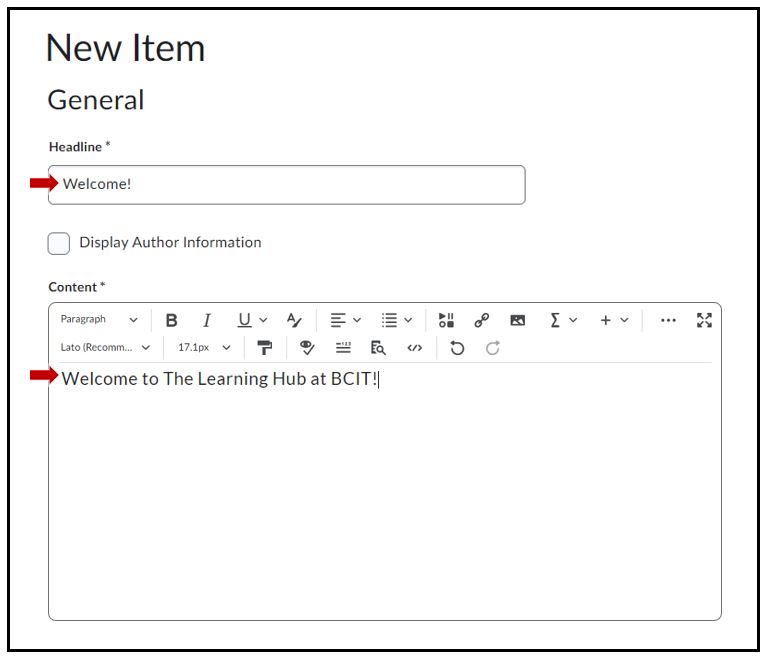
In the Headline field, enter a title for your news item. In the Content box, compose your announcement.
Use the editor toolbar to format your announcement just as you would in MS Word (mouse over the tool icons to see what they do). Try clicking back and forth from the Basic to Advanced tabs to see the different formatting options.

To add images select the Insert Image option. To add multimedia to your News Item select the Insert Stuff option. A popup window allows you to select a file from either your computer, the course files or from an external url (eg. YouTube). To add links to your News Item select the Insert Quicklink (chain link icon). A popup window allows you to insert links from inside your course like specific files or activities or from outside your course like another webpage.
Optional
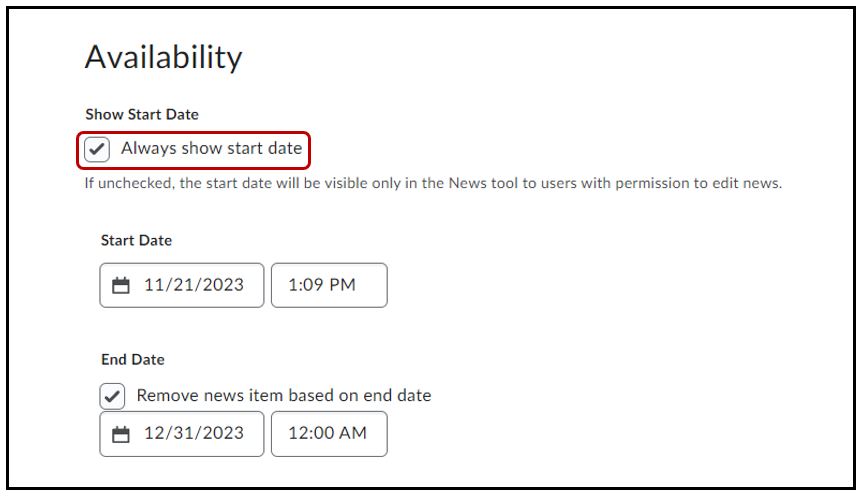
Selecting Always show start date will display the date the news item was created and will be visible to students. If copying News items from previous term courses, remember to either deselect this option or change the start/end date. Enter a Start Date or End Date to allow your news item to appear or disappear on/after a specific date.
Optional
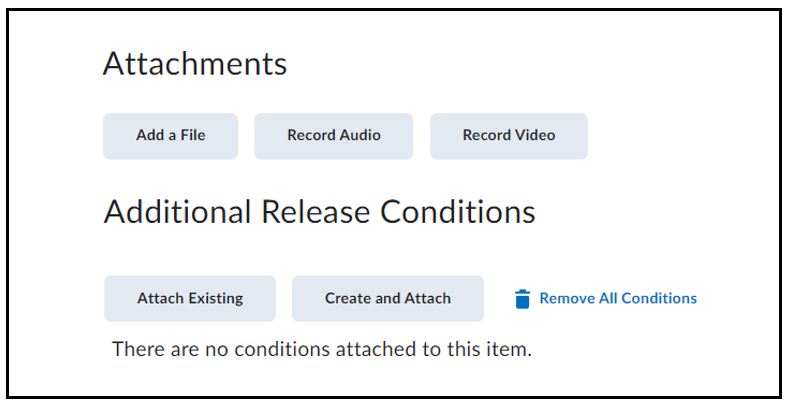
You can also upload a file (eg. PDF, word) or an audio/video recording under the Attachments section inside your News Item for students to download. Setting a Release Condition will allow you to hide the News item until the student fulfills the release condition like completing a quiz or being enrolled in a certain group.
 Once you have finished setting everything up click on the Publish button at the bottom of the screen.
How to Create a Release Condition
Update/Edit a News Item
To edit a News Item after it has been created you can do one of two things: click the dropdown beside News > Go to News Tool or select the dropdown beside the specific news item on your course page > Edit
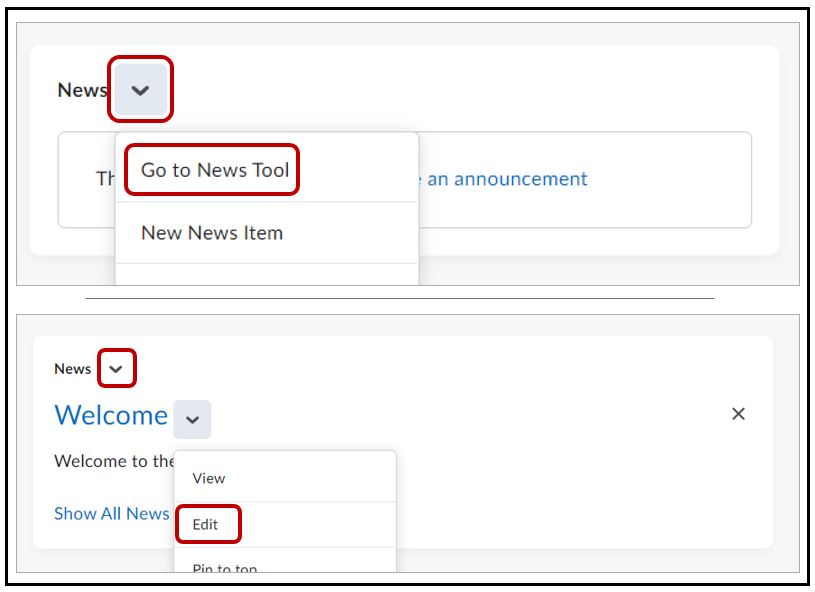
Simply edit the Contents of your News Item > Update
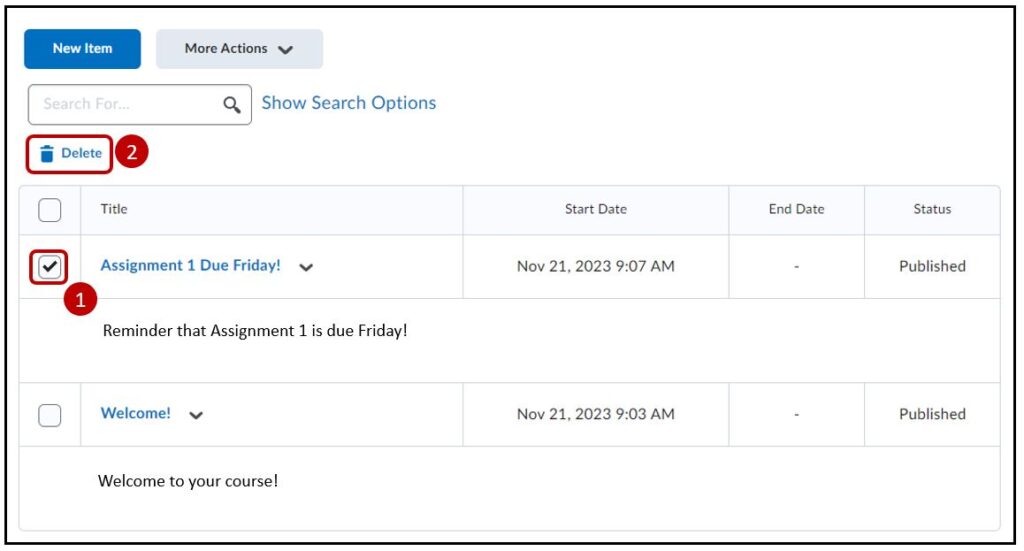
Delete a News Item
To Delete a News Item after it has been created first click on the drop down arrow next to News > Go to News Tool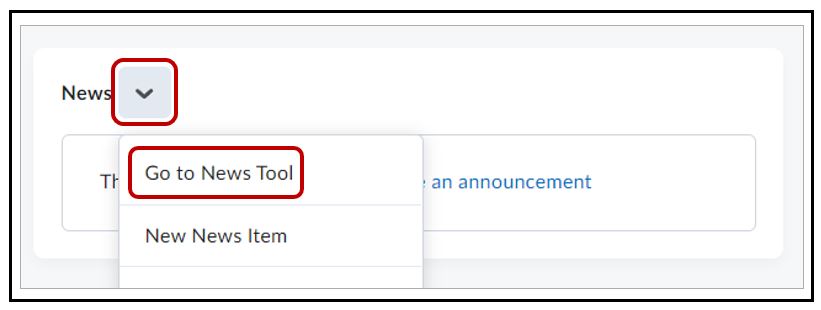
Locate the news posts to be deleted. Select the box > Delete
How to Restore a Deleted News Item
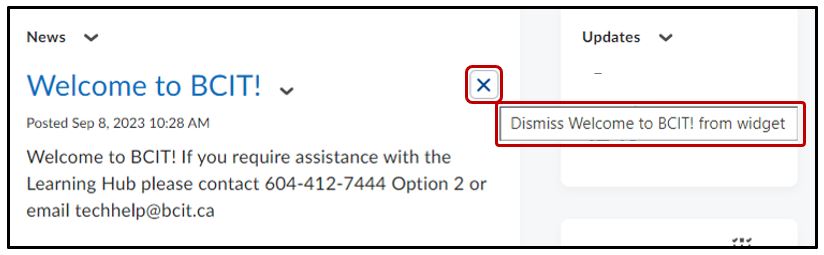
Dismiss a News Item
Selecting the X beside the News item will dismiss or hide it from you only. If you are an instructor and have dismissed a News item, that News item will still appear to students.
Pin a News Item
You can pin a News item to the top of the page to ensure that it is easily seen by learners. From the News widget > create a new News item or select an existing item> drop-down menu > Pin to top.

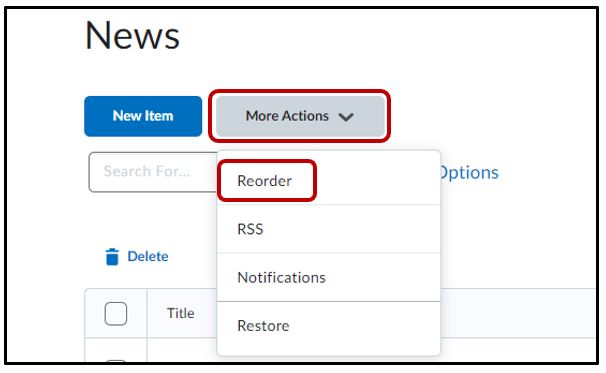
Reorder News items
Reorder your existing News items regardless of the publish date. Select the drop down besides News > Go to News Tool
Select More Actions > Reorder
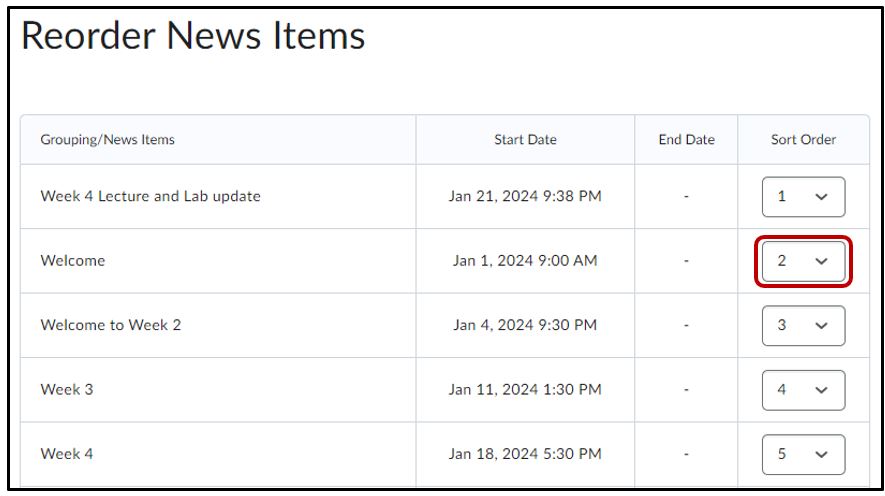
Under the Sort Order column, choose the desired number from the dropdown
Some Advanced Uses
Try inserting a replace string into your message. The most popular one is
{firstname}
Type it just like it’s shown above. This will place the individual’s first name into your message giving the impression you are talking directly to them. This is very effective for getting the attention of your learners. For example,
Welcome to BCIT, {firstname}
Related Posts
