


- Resource
- Uncategorized
- Kaltura My Media – Options (Clipping)
Kaltura My Media – Options (Clipping)
If you would like to enable other users to create clips of one of your entries, you can do so by enabling clipping from the Options Tabs from an entry’s Edit page.
This option is useful if you would like someone enrolled into one of your courses to create a full or partial copy of your entry without them having to download a file and upload it manually into their own My Media.
Please be aware
The following method will enable anyone enrolled into the course to create clips or copy your video if it is published into the course Media Gallery.
If you would like to create a clip of or copy your video without giving anyone else access then please see the clipping section in Kaltura Editor – Kaltura Video Editor instead.
Enabling Clipping for an entry
- From inside Kaltura My Media, select the entry and access its Edit page.
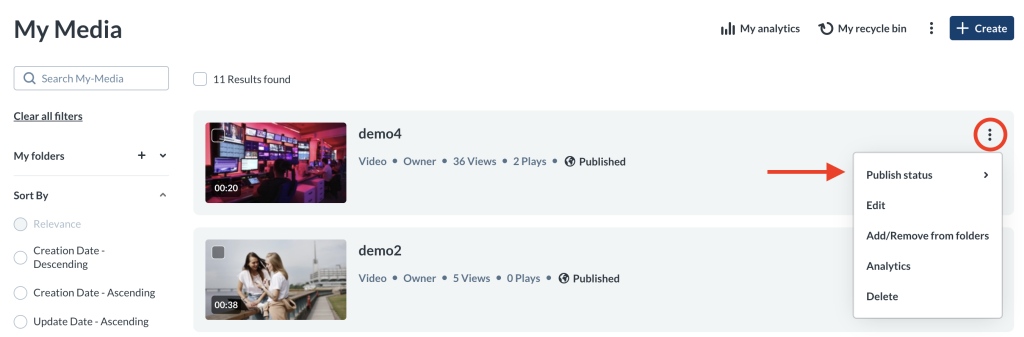
- Click the Options tab.
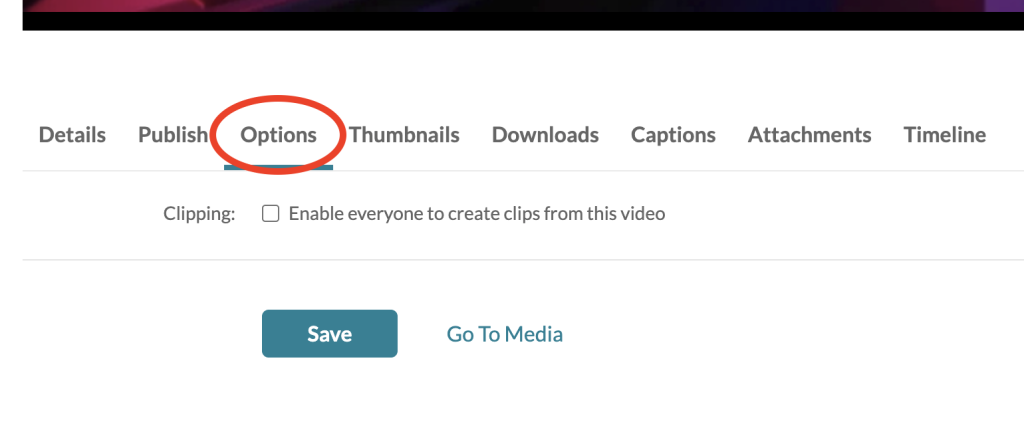
- Next, click the checkbox labelled Clipping: “Enable everyone to create clips from this video”.

- Lastly, click Save.
Creating a Clip
Before a user can create a clip, your media entry must be published to a course Media Gallery. If you are unsure how to do this, please refer to the Kaltura – Publishing Media guide.
Once the entry is published:
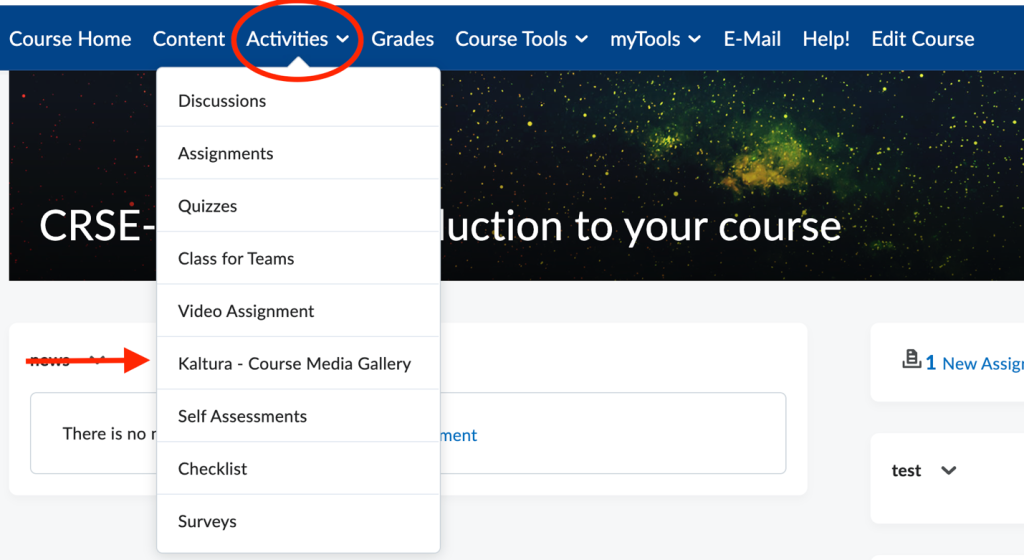
- Have the student or staff member open their Learning Hub course.
- From the Activities dropdown in the navbar, have them select Kaltura – Course Media Gallery.
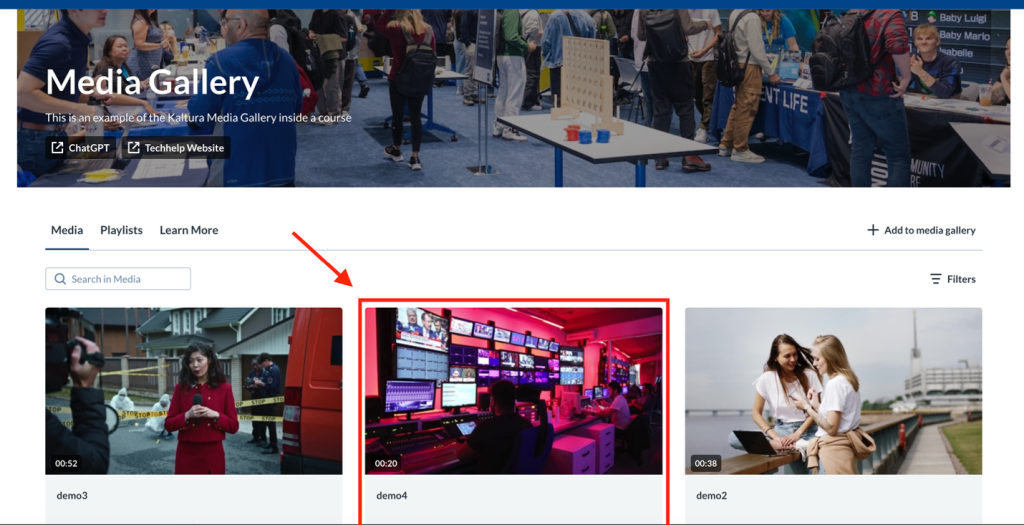
- Inside the course Media Gallery have them click on the desired entry
- On the entry’s preview page, have them click the ellipses and choose Create a clip.
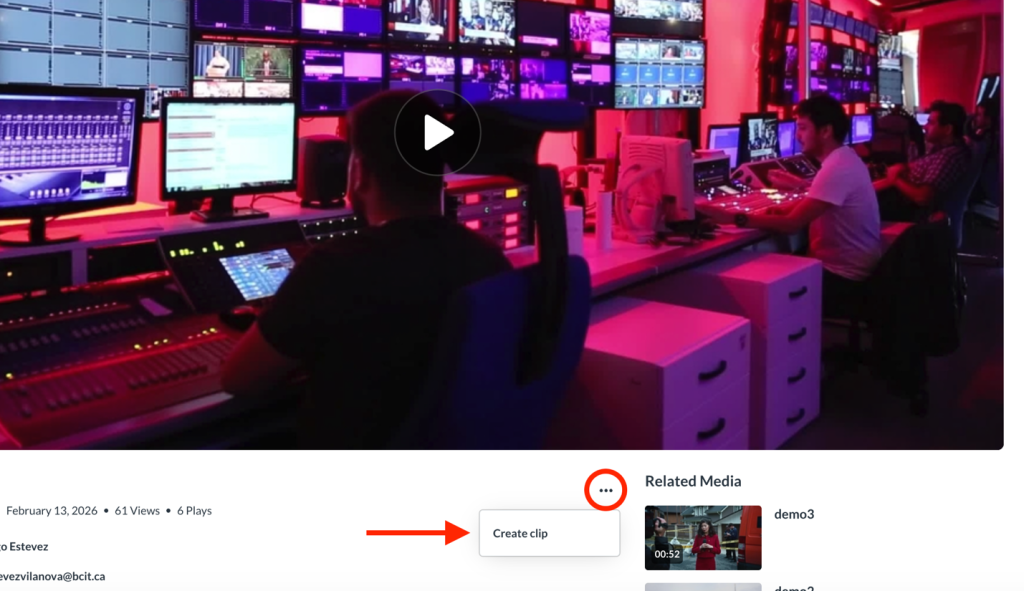
- The user will be taken to a modified version of the Kaltura Editor Tool. Here, they can trim or adjust the clip as needed.
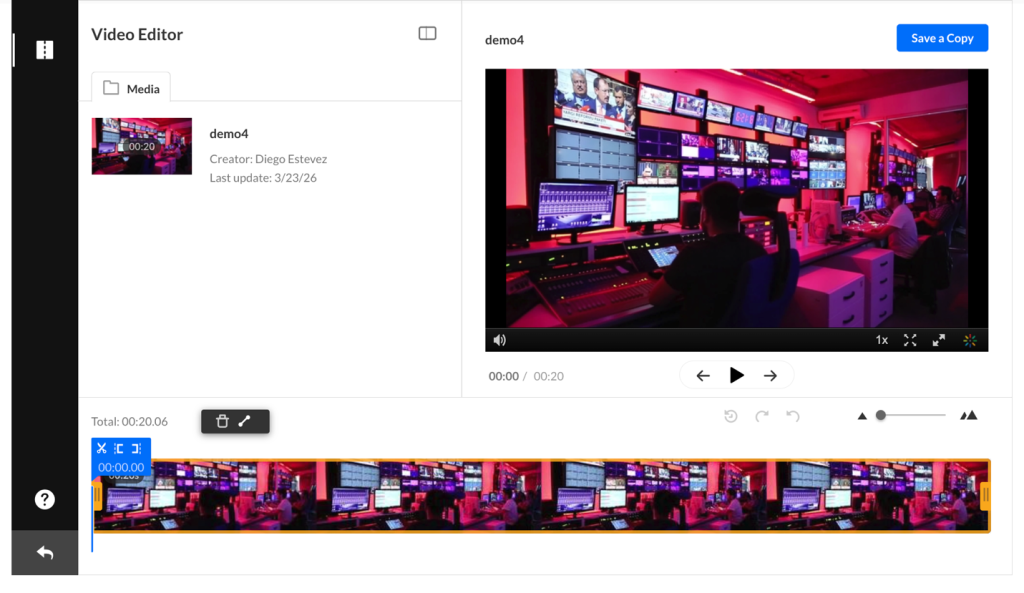
Kaltura Editor
If the user is unfamiliar with using the Kaltura Editor tool please have them review the section related to clipping found in Kaltura Editor – Kaltura Video Editor
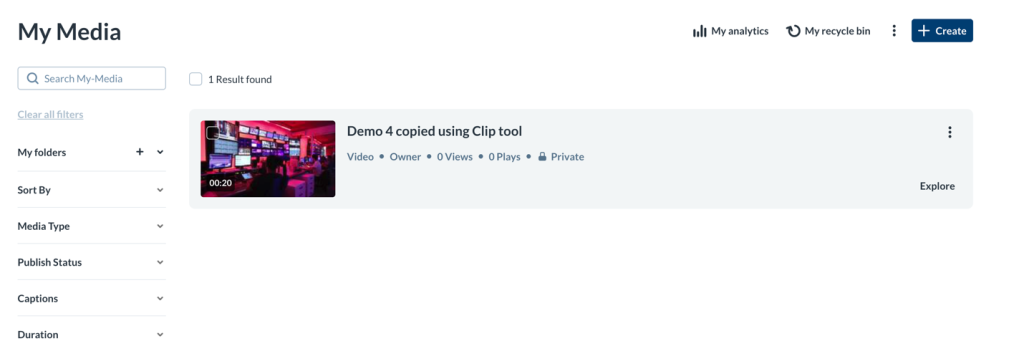
- When the user clicks on Save a Copy it will save a new copy of the (modified) entry into their own My Media repository.
Related Posts
