


- Resource
- Uncategorized
- Kaltura Media Gallery – Overview
Kaltura Media Gallery – Overview
The Kaltura Media Gallery acts as a dedicated media library for each course where users can view media assigned to the course. Only users enrolled in that course will be able to view the content added to its Media Gallery.
Accessing Media Gallery
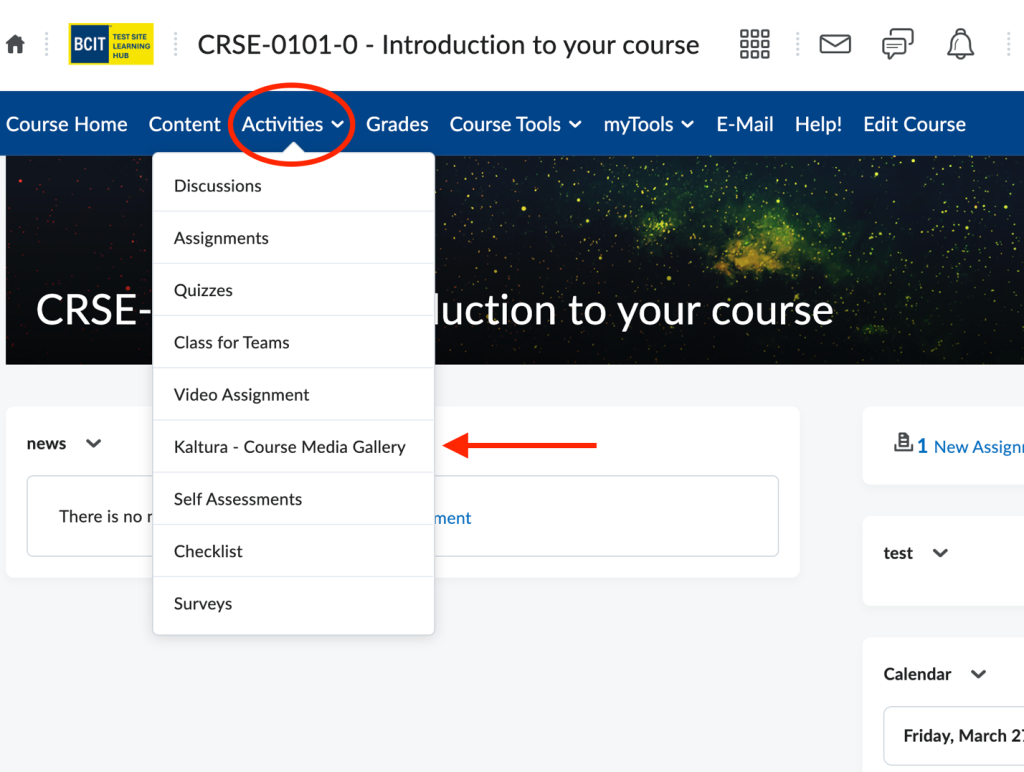
To access Kaltura Media Gallery, open a course in the Learning Hub, select the Activities menu, and choose Course Media Gallery.
Media Gallery Layout
The course Media Gallery is made up of several configurable components. Depending on how the instructor designs the gallery, some features described below may not be visible to users.
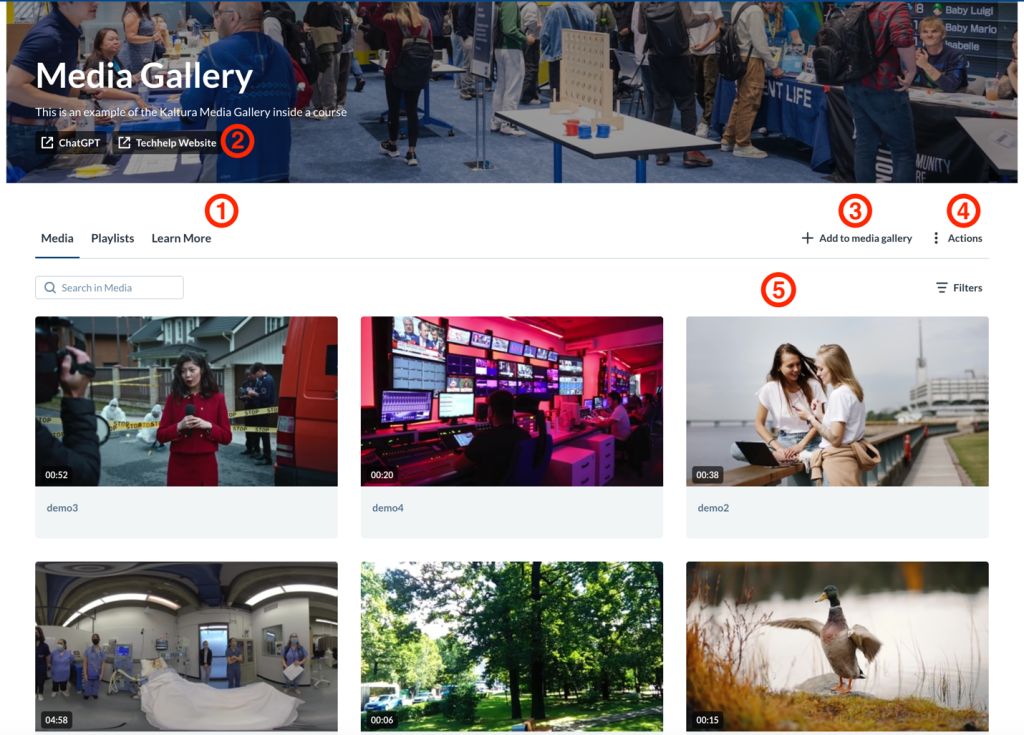
- Tabs (Media, Playlists, Learn More) – Tabs organize how content is presented within the Media Gallery. Instructors can control which tabs are displayed and adjust their order. The Playlists tab is automatically hidden if no playlists have been created.
- Custom Link Buttons – Up to two optional custom link buttons can be added to the Media Gallery. Each button can be labeled and linked to a specific HTML page or external resource, allowing instructors to point students to related content or instructions.
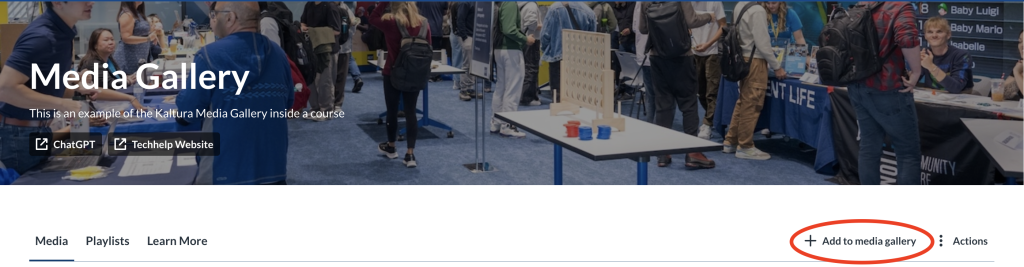
- Add to Media Gallery Button – Use + Add to media gallery to publish existing media or upload new content to the course gallery. This button is only visible to users who have permission to add media (students and instructors only). If moderation is enabled, student-submitted media will require instructor approval before becoming visible.
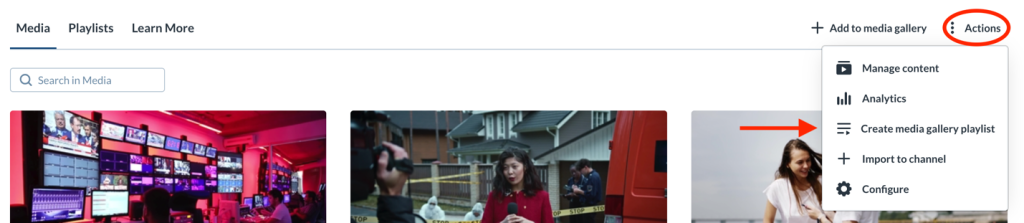
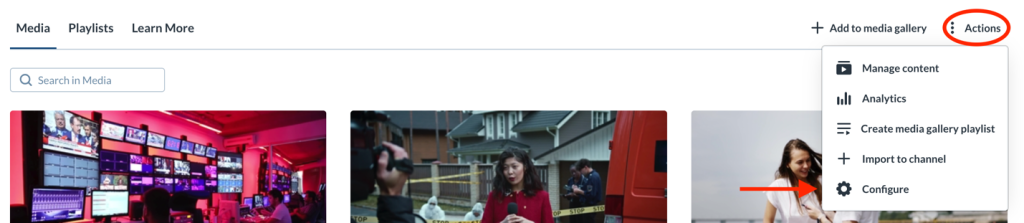
- Actions Menu – The Actions drop-down menu provides access to additional management options, such as configuring the gallery, viewing analytics, creating playlists, or importing content from another gallery.
- Gallery Display Options – Published media can be displayed in either a grid view or a detailed view. Instructors may also enhance the gallery by adding a header or banner image at the top of the page. An optional video can also be embedded in the header to provide context or set expectations for students.
Media Gallery Actions
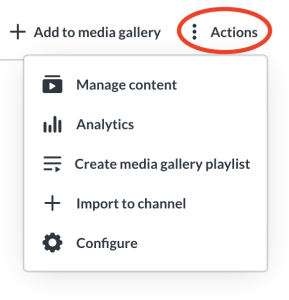
Use the Actions menu in Media Gallery to manage and customize your course’s gallery. The Actions menu includes four options:
- Manage Content – Add, remove and organize how media appears in the gallery.
- Analytics – View engagement data and usage statistics.
- Create a Media Gallery Playlist – Build playlists from entries published in the gallery.
- Import to Channel – Import all entries and playlists from other Media Galleries you own.
- Configure – Adjust the gallery’s settings, appearance, and behavior.
Managing Media Gallery
Control how media appears in your Media Gallery by clicking the Manage Content option.
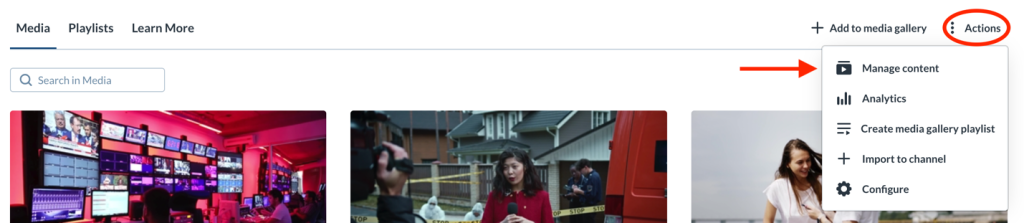
From the manage page you can add, remove and preview media, as well create and edit your playlists. See Kaltura Media Gallery – Managing Media
Analyzing Media Gallery
View engagement statistics for the course Media gallery by clicking the Analytics option. See Kaltura Media Gallery – Analytics

Creating Playlists
Create playlists from entries published in the course Media Gallery by selecting the Create Media Gallery Playlist option.
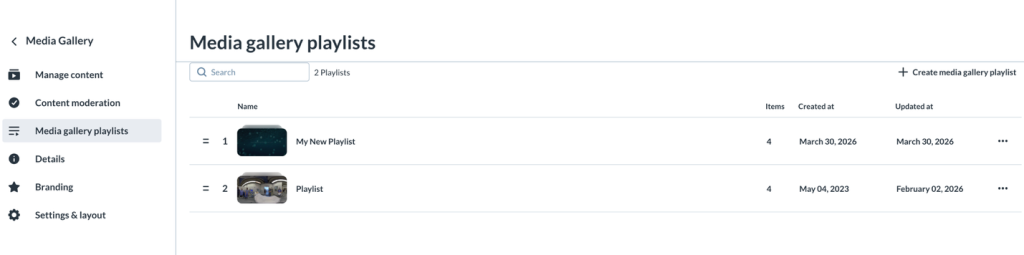
You can edit or delete these created playlists from the Media gallery playlists tab within the Configure option from Actions.
Importing into Media Gallery
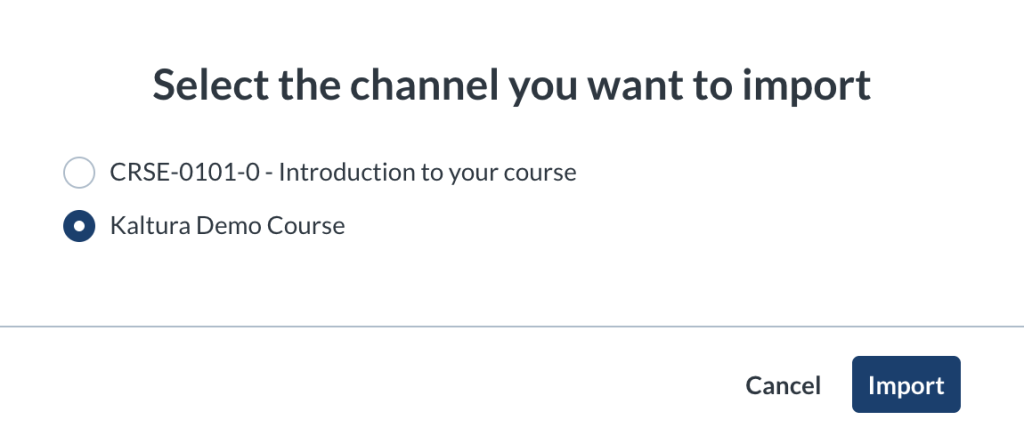
Import entries from Media Galleries in other courses you teach by selecting Import to Channel from the Actions menu.
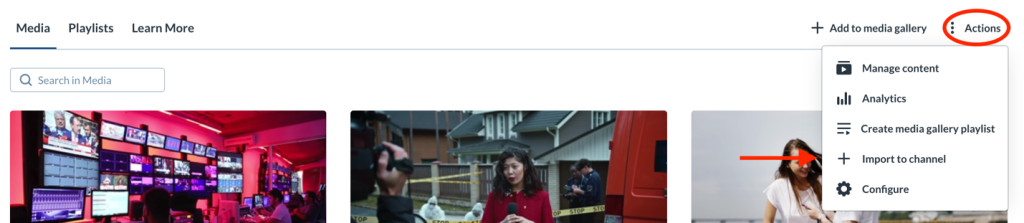
This action imports all entries and playlists from the selected gallery.
Selective Importing
Selective or partial video importing is not supported using this tool. If you only need to import specific videos, please publish them directly from My Media instead. See Kaltura – Publishing Media for details.
Configuring Media Gallery
Customize the behavior and the appearance of your Media Gallery by clicking on the Configure option.
In the configuration area, you can:
- Modify the gallery’s display title and description
- Enable or disable moderation for student‑submitted entries
- Enable or disable automatic publishing of entries added through Kaltura BSE (see Kaltura Browse and Embed)
- Create, delete, or edit playlists
- Change the gallery’s appearance
Publishing into Media Gallery
Publish your media to a course’s Media Gallery using + Add to media gallery from within My Media.
Tick the checkbox next to the entries you want to publish, then click Select to complete the action.
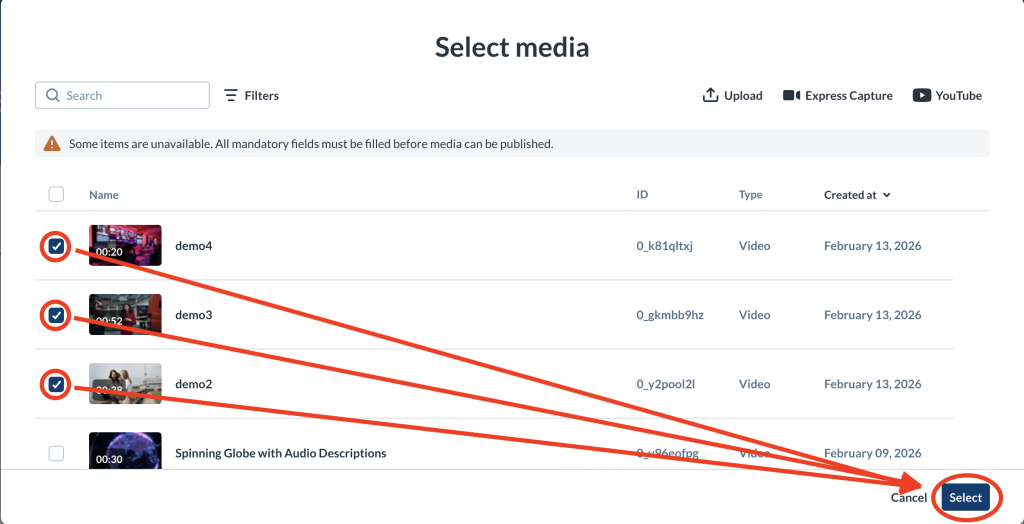
If any entries are missing required metadata, they cannot be selected. A warning message will appear at the top of the page indicating there are entries whose fields must be completed.

You can also publish entries to a Media Gallery directly from My Media. See Kaltura – Publishing Media for a detailed list on how to publish Kaltura Media into your Media Galleries.
Moderating Media Gallery
If moderation is enabled (from the Configure option under Actions), student‑submitted media must be approved before it appears in the course Media Gallery. When a submission is waiting, a notification bar appears at the top of the gallery.
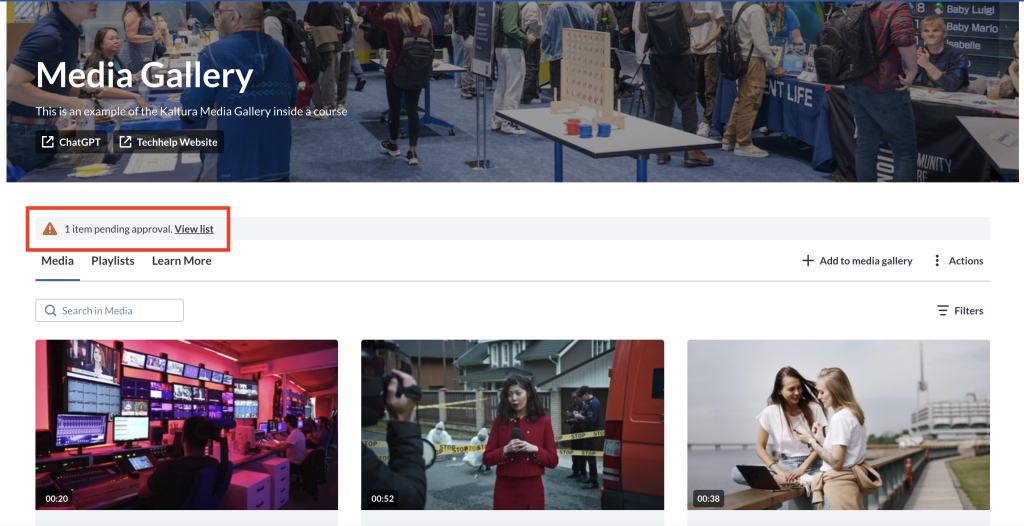
Select View list to open the moderation page. From there, review each item and choose:
- Approve — Publishes the entry to the gallery.
- Reject — Removes it from the queue.

Only approved entries become will become visible to the class. See Kaltura Media Gallery – Moderation
Job Aids Related to Media Gallery
For information about a specific topic related to Media Gallery please see below:
- Kaltura Media Gallery – Adding Media
- Kaltura Media Gallery – Analytics
- Kaltura Media Gallery – Branding
- Kaltura Media Gallery – Configuring Media Gallery
- Kaltura Media Gallery – Import
- Kaltura Media Gallery – Managing Media
- Kaltura Media Gallery – Moderation
- Kaltura Media Gallery – Playlists
- Kaltura Media Gallery – Search and Filter
- Kaltura Media Gallery – Settings and Layout
Related Posts
